Repurposing and Ranting

20191228_111108.jpg

In the days before I really thought things through, I bought some cheap synthetic pillows for the spare bed. I no longer have a spare bed, so these pillows were extra to my needs. The labels said they were machine washable, so I figured I’d give them a wash and donate them to a charity shop. Unfortunately they went horribly lumpy and were left in a state that wasn’t really decent enough to donate. I could have just done it anyway, but then couldn’t be sure they’d be welcome and not just end up in landfill. I rang animal shelters to ask if they had any use for them for bedding, but alas they did not.

Meanwhile, I had some cushion inners from my student days that were disintegrating and making a horrible mess. I dread to think what they were made of, but it wasn’t natural. I hadn’t really any choice but to responsibly dispose of them (knowing that at least they wouldn’t go to landfill because my local council incinerates rubbish – not ideal at all, but at least energy is produced from it). But now I had empty cushion covers.

I also had an annoying situation with my bed frame being slightly longer than my mattress, and finding that a gap kept appearing and swallowing my pillow in the middle of the night.

And I had a beautiful skirt that had ripped but didn’t really fit well enough to justify mending. I loved the fabric and kept it for a future project.

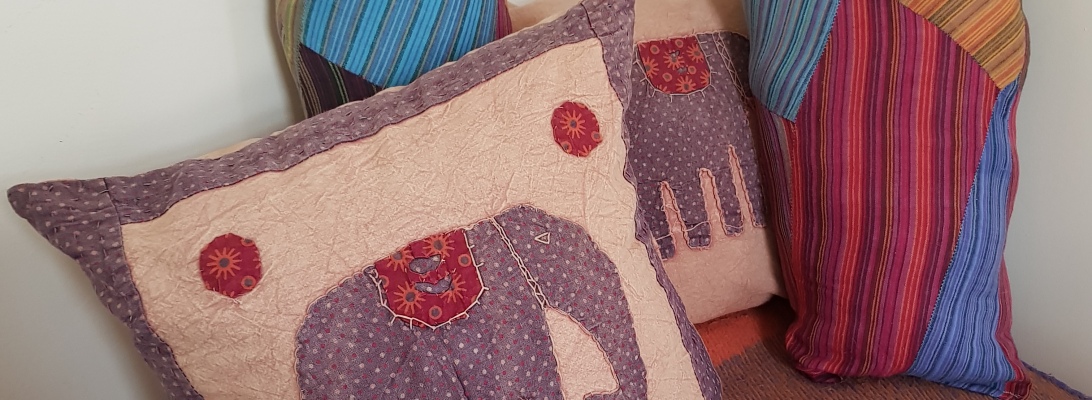
What if all of these situations could come together for one big solution? I cut down the misshapen pillows (and rearranged the stuffing in the process!) to make new cushion inners. And I used some of the skirt fabric and the left over pillow stuffing to make extra cushions to put at the bottom of my mattress to stop it from moving. The skirt was a weird shape so they were never going to be straight, but they’re not going to be seen so it doesn’t really matter.

It’s a long story and it isn’t even a mildly interesting one. But what this long-winded story does show is how our poor decisions as consumers don’t go away. I haven’t solved the problem, really. I have just delayed some synthetic materials from polluting the environment, whilst also fixing some minor comfort issues. I won’t personally ever send them to the tip, but I won’t be on this earth forever and I can’t take responsibility for them beyond my lifespan. It’s alright that we have made poor decisions out of ignorance, as long as we don’t repeat the behaviour. But is it alright that these products are still being manufactured when sustainable alternatives are available?

Attempts to Recycle Candle Wax

Over the last few years I have gradually been going zero waste/low waste. My local council has a very limited recycling programme, but through carefully planned food shopping and refusing items that aren’t essential, I have had my basic routine pretty much sorted for some time now (another blog post to come on this…eventually!). The aspect that is taking ages for me is my choice to go through all of my belongings and make sure everything is sustainable, for want of a better umbrella term. Again, the reasons behind this and the process I have been using are for another post, but my basic method has involved asking the following questions:

  1. Do I need this item?
  2. If so, can it be reused, repurposed or recycled after its life with me?
  3. If not, how can I responsibly dispose of it, should I need to?

And so, in my typically meandering way, I come to the topic of this blog post: candles. If I were buying candles today, I would be opting for environmentally friendly types, but having ignorantly bought parafin-based candles years ago in ridiculous quantities, and having received some as gifts, I unfortunately have a fair few left to use up. I spent some time pondering the dilemma of waste versus carbon footprint, but ultimately, I can’t dispose of them without sending them to ‘landfill’, which in my area means an incinerator, so they’re going to be burned anyway. I might as well use them for a bit of extra heat on a cold evening (it’s surprising what a difference they make!), instead of putting on my gas central heating, avoiding waste and saving money in the process.

It is easy to melt down the left over wax, but how do I go about finding new wicks? After a bit of research, I had decided to try wooden wicks (although I could still be going down the wrong path). I couldn’t find anywhere to buy them locally, however, and so it was going to involve buying them online, potentially adding to carbon emissions, and risking them being delivered in packaging that will ultimately end up in landfill, or worse. And then it occurred to me that in lighting candles I have created a batch of matches that are only slightly charred at one end. Would these work as wicks? (Again, I already had lots of matches before finding out they aren’t vegan and attempting to live a zero waste lifestyle, but I am researching the pros and cons of a metal refillable lighter).

Everything seemed to work! While my setup seems to be perfectly safe (using old tea light foils and jam jars as containers as well as a fireproof surface), I feel I ought to make it clear that anyone who wishes to replicate this method does so at their own risk. Next time I make some I will do another post with full instructions, however.

April Lace Pattern


This is a pattern I wrote as part of a project that was a present for some friends who had an April wedding. It’s quite straightforward, but if you aren’t sure of some of the stitches, there are loads of resources to be found with a basic internet search. I used fingering weight yarn and 6.5mm needles.

April Lace

The pattern is written in chart form and shows just the right side. All of the wrong side (even numbered) rows are done in purl stitch. The minimum number of stitches for the pattern is 13, but it will work for any number above this that is a multiple of 4 plus 1 (4n+1). For example, 17, 21, 25, 29, etc. For pieces wider than 13 stitches, repeat the section in the green box until you have your desired size. As you can see, there are repeats within the rows, too. If you wish, you could just repeat rows 1-8 to leave out the offset aspect of the design, or knit rows 1-4 and 9-12 for increased variety. One day I might write a chart for these variations!

The pattern is free of charge, but if you do share it or use it in any items for profit, I do ask and trust that you will credit me. The website that I previously used to write charts doesn’t appear to be working any longer, but this chart was created using the Knitting Chart app by Piet Hein van Cleef. This is available in the App Store. I also recently tried out the Conligata Android app, and recommend it if you do not have access to iOS devices.

Click here for a PDF of the pattern.

I’m Back!

It’s been rather a long time since I’ve posted anything. Aside from work being incredibly busy, the main reason is that I’m a idiot and forgot my usernames and passwords to this account, my craft Twitter account and the associated email account! I hadn’t used them for a while and then had to get a new mobile, so all of the information that was saved was lost. Anyway, I’ve made an effort and taken the time to solve these issues this week, and now everything is up and running again.

I’ve written some more knitting patterns over the last few years, which I hope to post in the coming months (a few are for mittens, so I hope to get them published before the winter!). I’ve also become a vegan and am attempting to have a ‘zero waste’ lifestyle, so I will be writing about these subjects, too.

Hearty Holiday Hearts

I know that’s a terrible title, but I can’t resist a bit of cheesy alliteration sometimes, and all of the words are relevant so it feels completely justified. Today was the first of nine days off work, and it’s the first time I’ve had that long off without having the stress of moving house or being ill in over a year, so it was very warmly welcomed. I thought I’d collapse in a heap and not achieve very much, but instead I’ve been a hive of activity and trying to catch up on friends’ birthday presents and unfinished craft projects. I found a packet of wooden hearts I’d picked up a couple of years ago in a small shop in Newcastle and decided to turn them into an alternative to the usual birthday card. It’s been years since I’ve done any proper painting, and this skill clearly leaves a lot to be desired, but it was fun and easy. I have a few patterns to write up and post in the next week, but for now, here are some cheerful hearts!

Blank canvas starting point.
Decorating complete
Decorating complete.

I chose to add tiny tags to each one to write a personalised message.

Finished article
Finished article.

Having completed the decoration, I strung the hearts together so they can be hung up as one item.

Finished article, hanging up
Finished article, hanging up.

Jewellery Stand and ‘Clare’s Lace’ Pattern

2015-04-03 17.51.07A few months ago, when I was moving house, a very dear friend helped me out a lot. When all of the hard work was done, we went out to a local café for a quick lunch, but predictably ended up rummaging around Razzberry Bazaar on the return journey, where my friend bought a hand-shaped sculptured jewellery stand. I happened to mention that I’d seen a great design for making a jewellery stand on Ravelry and, despite the fact that she’d just bought one, somehow ended up volunteering to make one for her. I decided to use the inspiration of the original design I’d seen (and additions of some others on the site), but adapt it by using it as an opportunity to write my first lace pattern. It’s only a simple pattern, but a good one if you’re just starting out with lace knitting or looking for something that’s easily memorised.

I haven’t specified measurements or quantities in the pattern below because they depend upon the size of the frame you use and how tightly you choose to pull the fabric or knitting over the board of the frame. I also won’t go into much detail around the assembly of the components because I am assuming it’s self-explanatory, and that anyone attempting this will be used to crafting and the methods involved. If there is any aspect of this project that you would like me to clarify, however, please get in touch and I will be happy to do so.


Essential materials:

  • Photo frame
  • Fingering weight yarn and knitting needles (I used 4mm)
  • Sewing needle and scissors for finishing off


Optional materials:

  • Fabric
  • Buttons
  • Fabric glue
  • Sewing needle and thread
  • Crochet hook


Optional Features

20150403_173915The board of the frame I was using wasn’t very attractive so I decided to cover it will some fabric from an old dress that I had in my fabric collection, which I stretched over the board and glued on the back. This did the trick nicely! I sewed a flap from the same fabric and inserted it on top of the knitted layer as a place to safely add studs.

I added some buttons to the knitted layer so that necklaces and bracelets could be hung on the stand. If you would prefer not to do this, they could easily be draped across the top.

2015-04-03 17.56.53I also crocheted a strip of wool with a loop at the end and attached this beneath one button. It can be hooked and unhooked from the button and used as a place to store rings.

Although this post is aimed at knitting, this idea would work quite nicely for anyone looking to upcycle some net curtain or other form of lacy fabric. If you aren’t wanting to do this, read on!


Clare’s Lace Pattern

2015-04-03 17.46.58

This pattern is worked in 5 stitches + multiples of 14 stitches for the repeat. This means that the basic pattern is 19 stitches across, but for each repeat you will need 14 extra stitches.

Cast on required number of stitches. I used the long-tail method, because of its elasticity, but this is not essential. If you’re unsure of how to do this, here is a good instructional video.

Purl one row. This will be the ‘wrong’ side and will not be counted in the row numbers for the chart.

Follow the chart below from right to left for the odd rows and left to right for the even rows (all of the even rows are done entirely in purl). The section between the thick lines shows the 14-stitch repeat.

Repeat rows 1-8 of the chart until your knitting is large enough for your frame. Cast off.

This knitting chart was produced using Knitting Chart Maker by Jacquie and is also available here as a pdf.

Clare's lace