Refashioned Blouse

It’s been a while since I posted anything. Although I’ve been really busy, I haven’t taken any time to show you what I’ve been working on. I found a blouse at a thrift store a few weeks ago. It’s been sitting on the anger against the door because I have to wait on the materials to complete it. This is how it looked when I bought it. 

 The shirred bottom looked dated so I took it off. I could picture black chiffon or maybe even a blue chiffon on the bottom but black was found first. Hobby Lobby had just enough in the clearance bin for me to finish the shirt. This is what I came up with. 
 As always, The picture doesn’t do the shirt any justice. One day I’m going to figure out how to take some professional looking pictures so you can really appreciated the way that I see it. Until then…

My Plot Update

I was so excited about creating my little garden that I shared it with you sometime ago.  Since then, it’s been growing very well.  I have six varieties of tomatoes, eight varieties of peppers, and many herbs. This is what the tomato plot looks like. 
My peppers are nowhere near as tall as the tomato plot but I’ve already been able to pick some peppers.  Experienced gardeners don’t laugh at my twine experiment.  I wanted to see if tying twine into a plaid(ish) interlocking system would make it easier for the peppers to lean but not fall. So far it’s a success. 


As you can see in the back of the planter, I have a bucket that is growing shallots. My herbs are placed in the little holes of the cinderblocks. 

I used the lemon balm to make lemon balm tea, which is fantastic. And I’ve been using the purple basil for different dishes. I’m really anxious to get some of my peppers grown and picked because I want to make Peppersauce. I am also really anxious to get some tomatoes. 

Recently, we had a green zebra tomato that was nice and ripe.  We cut it just to give it a taste test and it tasted like it already had salt and pepper on it. My mom said it taste like a homegrown tomato because those that you get in the store are really bland. Because of the success with the green zebra tomato, I am anxious to now try the black Krim tomato. And I really want to hold the mortgage lifter.  According to the picture, you need to hands to hold it. Will see when they finally get bigger. 

I have three fig trees that I’m nursing. One has been nursed for two years now and I’m finally getting one piece of fruit. The others were clearance buys. I’m sure it’ll take them a while. 

I’m continuing in my quest to have a self-sustaining environment right outside of my house. My next mission is to try hydroponics to see how well I do or to see if it’s a waste of time.  

Anyway… This post was just to update you on my success. 

Transformer Cake

My nephew turned The big 12 yesterday. When asked what type of cake he wanted, he said, “Ummm, Transformers.” I was excited that it was easier than my original plan, which was the XBox One. It would have been so much work. This was the result of my long day. 


It was a big hit! He loved it. It was a vanilla cake with Italian meringue buttercream. All of it was made from scratch, with the exception of the fondant. I think this will be my new buttercream because it is nowhere near as sweet as the typical buttercream. It does well with fondant and doesn’t harden. 

I’ve Graduated to a Plot

For the last few years I have been using pots to grow my herbs and veggies.  After hearing about last year’s never-before-seen neighboring garden, the jealousy started to brew.  In fact, it brewed all fall and winter.  I was determined to make my yard work for me.  This is is the result.  

 First, I raked all of the pine straw away.  It was the dumping grounds for all of the yard debris, which made more work for me.  Good thing I needed the exercise. 

 After leveling the ground as much as possible, I placed my cinder blocks into a 3×3 square pattern.  This is when I found that the ground wasn’t as level as I thought. It will have to work.  

Last, I used a mixture of 3 types of soil; 2 bags of top soil, 1 bag of potting soil, and 2 bags of garden soil.  I am not sure if this is the right ratio to use of any but I made sure to use less of the heavy stuff.  5 bags filled the space. 

 I was then ready to plant the tomato varieties.  The plants came from a plant outlet that has wonderful prices.  Each tomato plant cost either $1.00 or $1.50.  Did I mention that the plants were huge before purchasing them? 

In the picture above, I have Sweet 100’s, Mortgage Lifters, Tomatillos, Green Zebra, and Yaqui tomatoes. Again, I am not an expert on growing in raised bed planters because I have been a pot person for the past few years.  Let’s hope my spacing is correct. I can say that they have more space in the bed than they did in the pots.

The 3×3 space looked much larger when placing the cinder blocks in the pattern while in the store.  Hind sight is 20/20!  Now I have to build 2 more on the adjacent sides.  Hopefully my neighbor doesn’t mind looking at the cinder blocks.  I considered painting the sides with some sort of design.  Maybe it will make them less of an eyesore. If I do, you’ll be the first to see.

Notice the holes in the cinder blocks.  I wanted to plant my peppers in each of the spaces but I am trying to figure out if there was enough space for the roots.  Understandably, the roots would grow down in to ground so maybe my concerns are a mute point.  This way the peppers can provide security for the tomatoes since I have some interesting wildlife in my neighborhood.  It would also increase my available planting space.  I’m on my way back to the outlet to plan my next move!
 

Smoothie Bags and Cubes 

My biggest shopping day of the month just past.  The result…A Whole Lotta Fruit!  It was on sale and I can’t pass a great sale.  I planned on freezing it to be able to make smoothies.  I love smoothies but I hate removing multiple containers and bags from the freezer to make my combinations.  Therefore, I came up with a way to avoid the extra work.  I made smoothie bags. (I guess it was still a little work involved.)

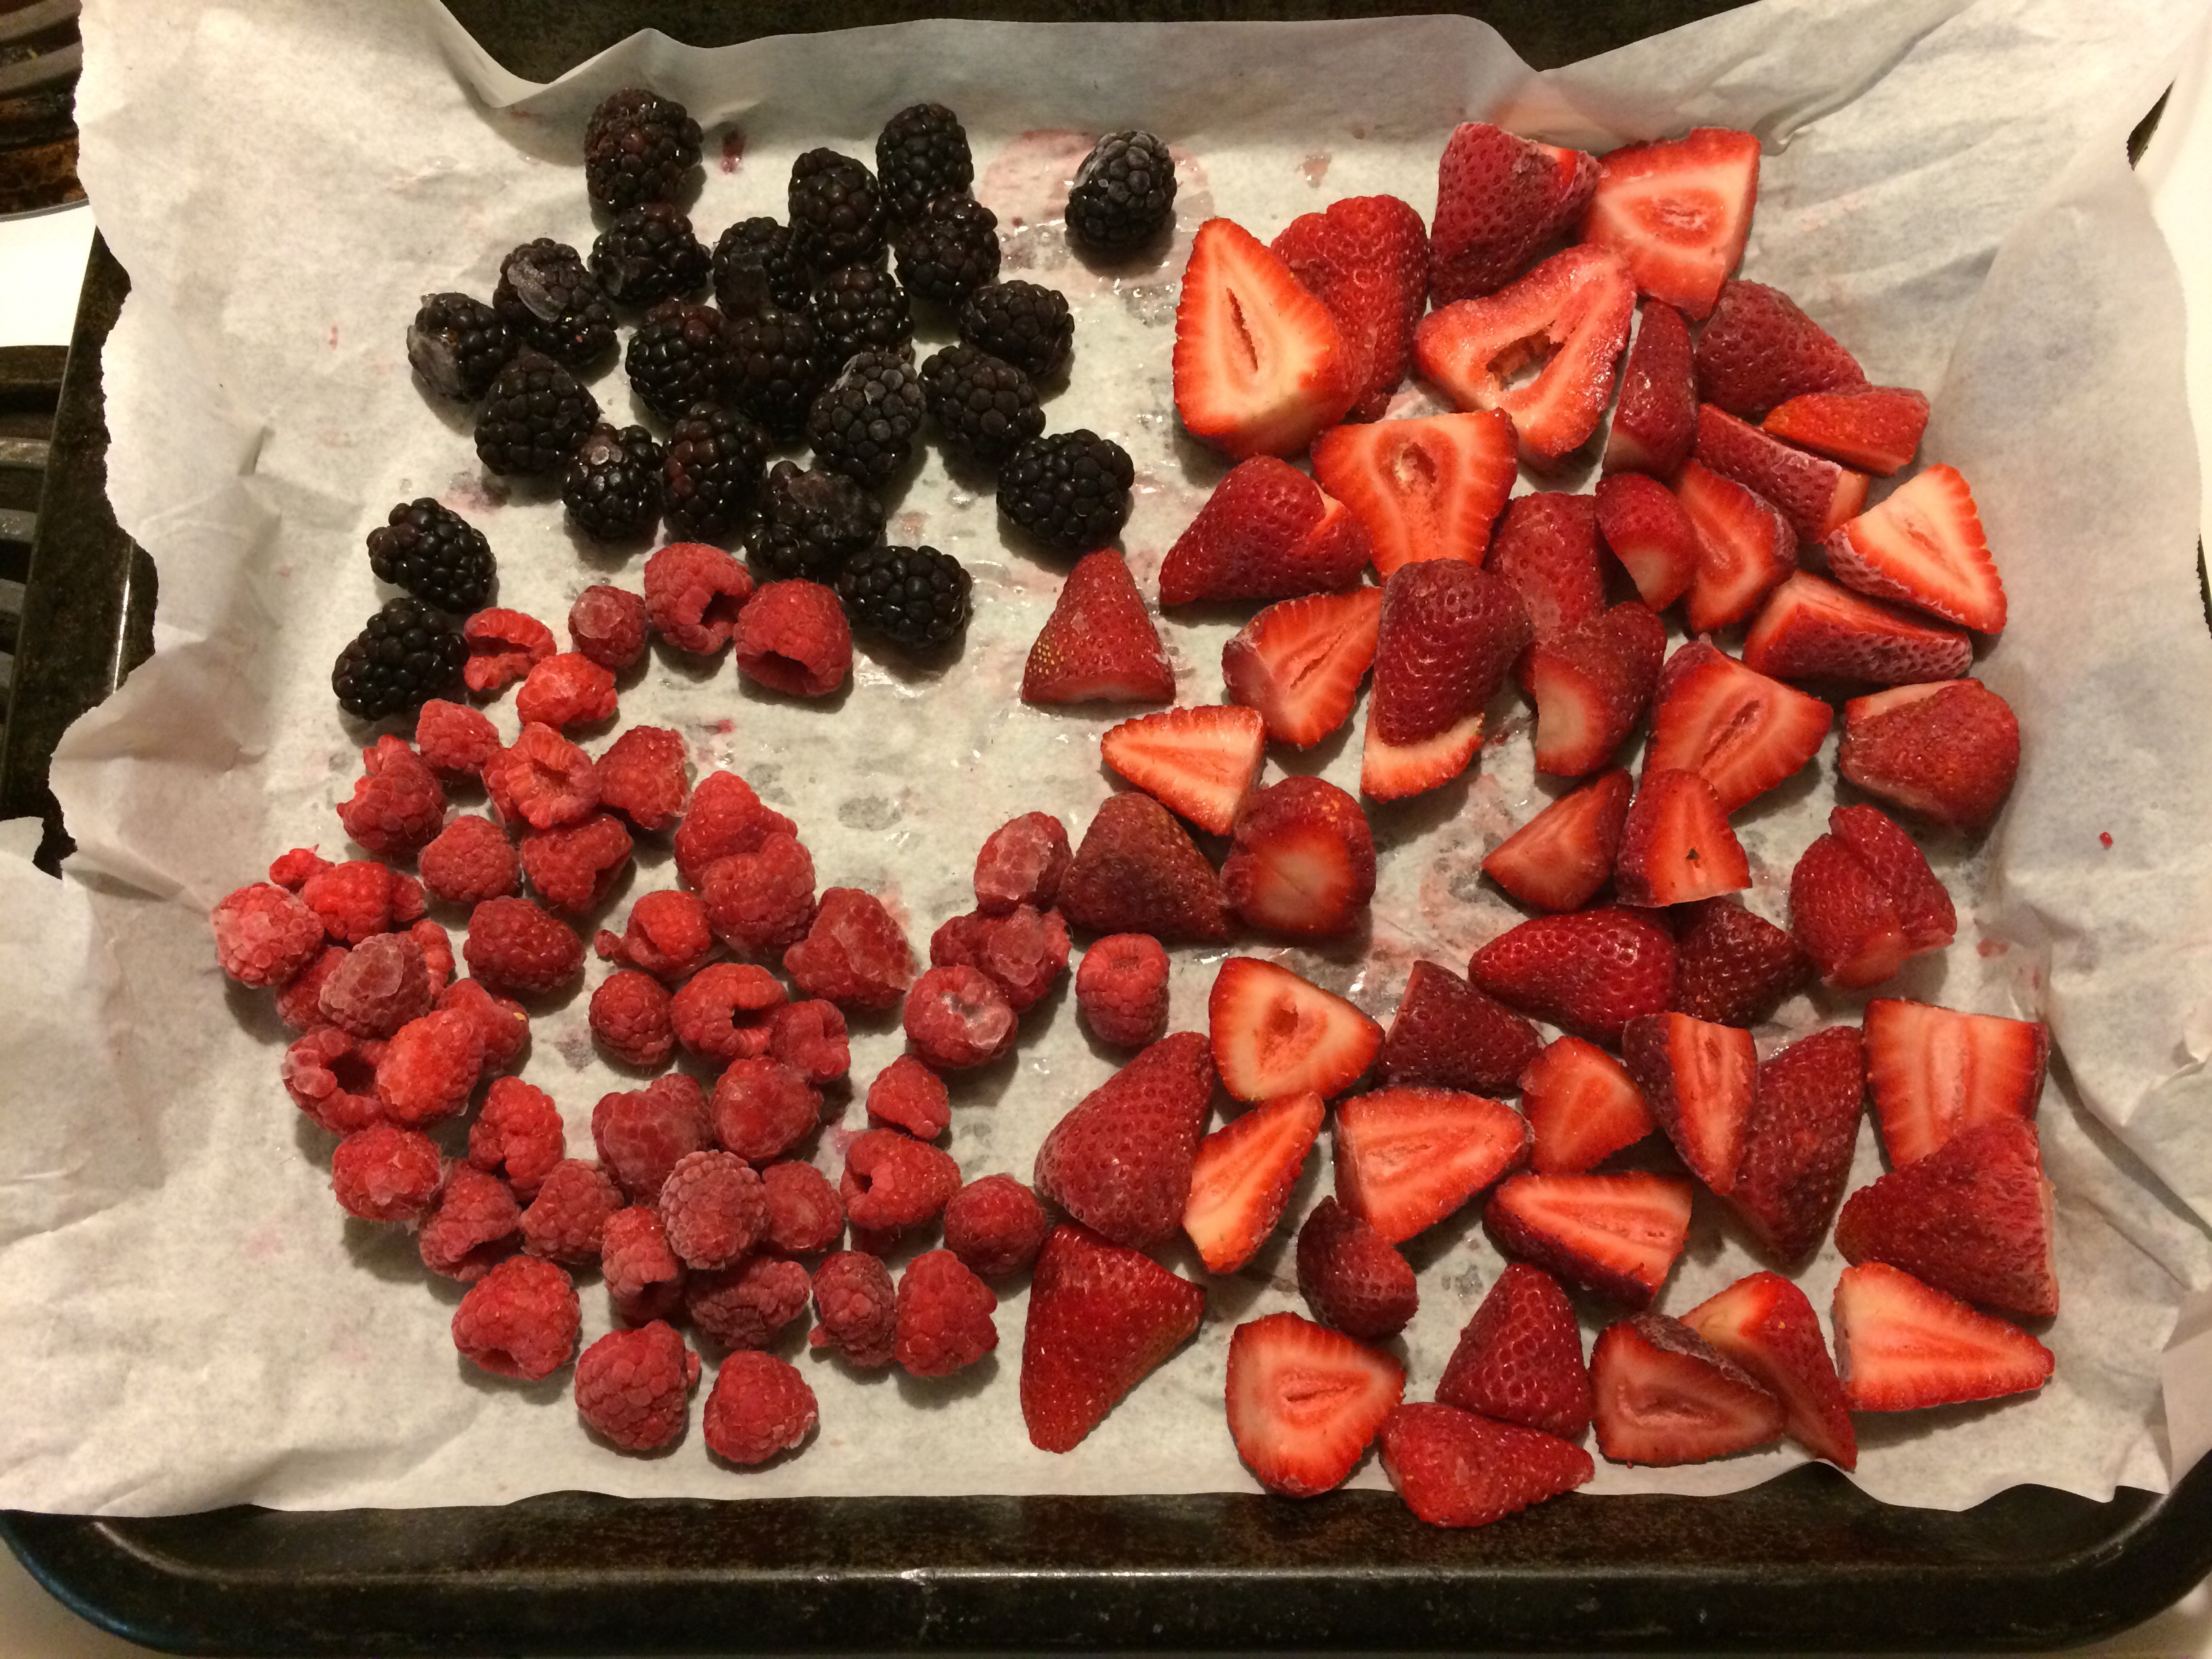
First, I  washed and cut the fruit.  It was all placed on parchment paper, which was on top of a cookie sheet. (Wax paper would probably work better.  Place the entire cookie sheet in the freezer. Mine only stayed about an hour.Try to avoid skipping this step or your fruit will be smushed and mushy. 

Cut a food storage bag (Food Saver) at the 6in. mark.  That should be the 3rd mark on the side of the bag or one line visible in the middle.  Look just above my hand an you will see what I am referring to.

Cut the bag up the middle.

Using only the “seal” option on your Food Saver or other machine, seal one side of the bag.

Turn your bag and seal another side.  You should now have a bag that is open on one side. It should be about 5.5 x 6in.

I put a handful of fruit in my bags.  Make sure you leave enough of the bag hanging off the end so the machine can suck the air out.

Voila! Smoothie bags. Need another tip for making your smoothies taste great in less time?  Keep reading.

I like to think I am the queen of discounts.  If not, don’t burst my bubble.  Please let me believe.   I always find baby food that is marked down.  I like to by it and use it when cooking.  Admitingly, I like to eat the pureed peaches.  Don’t judge.  Their great!

These jars cost $.45.  When we saw them, my mom said, “You could use these in smoothies.” Her bright light bulb made mine brighten as well.  Since smoothies need that extra thickness and extra flavor is always great, I thought, “Why not make smoothie cubes?”

I poured/spooned the jars of food into ice cube trays and froze them.  Once they are completely frozen, they will be placed in future smoothie bags as a flavor boost.

Another suggestion is to freeze yogurt cubes.  The only thing you will need for your smoothie that isn’t frozen is juice or whatever liquid you use.  I hope this helps someone else because it surely helps me.  Let me know what you think.  I am also taking suggestions.