Two At A Time Toe Up Socks

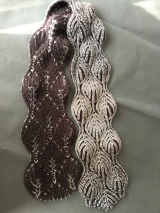
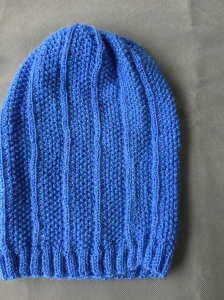
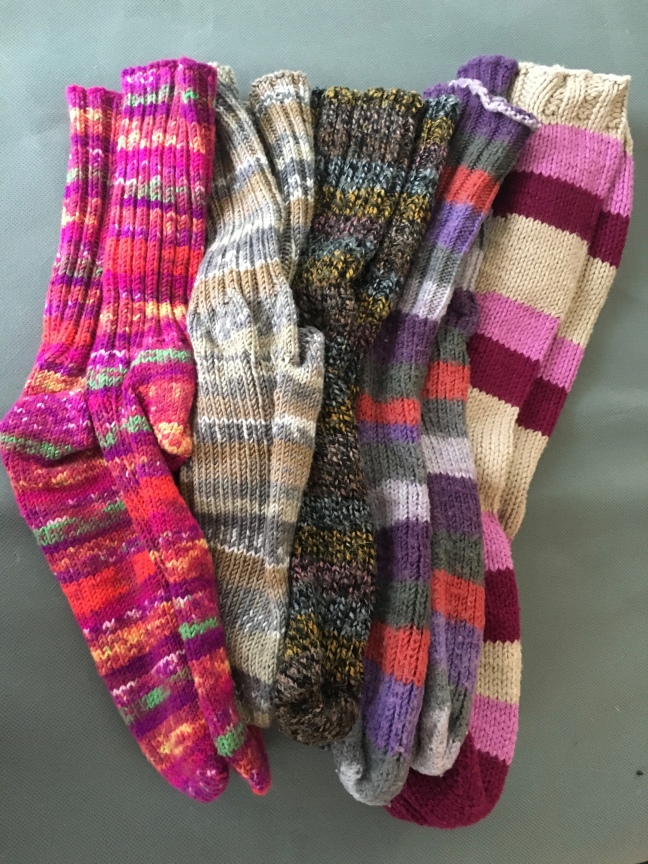
This is a “recipe” for a basic pair of socks. After a lot of trial and error I finalized this recipe for the everyday socks my family covets.

IMG_0872

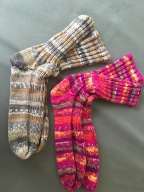
The measurements given are for a women’s average size 8 sock. Adjust to suit your sizing needs.

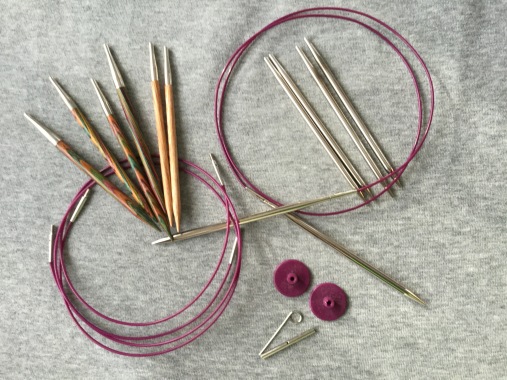
#2 circular needles. Gauge 8 sts./ inch.

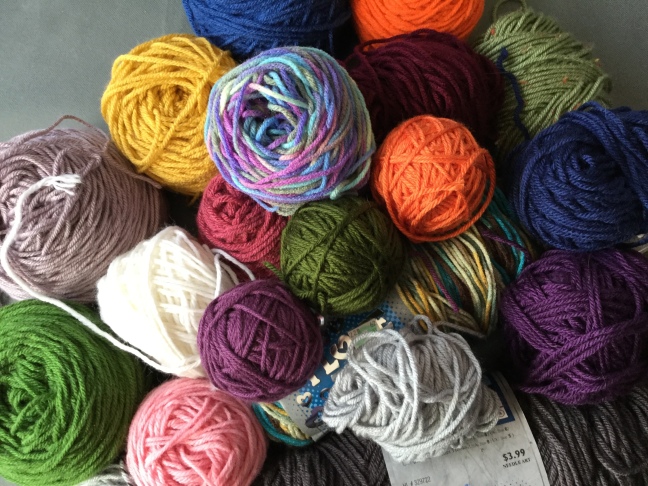
About 500 yds. Fingering/ Sock yarn of your choice divided into two balls. (This is plenty for one pair and may be stretched to one and a half pair depending on your gauge and size choices.

Cast on 28 stitches using Judy’s Magic Cast On with the first ball of yarn.

Cast on a second 28 stitches with the second ball.

Using the magic loop method:

Round 1 and every odd row until increases are complete, Knit even.

Round 2 and every even row until stitches total 52 for each sock, increase 4 st. per round. (I do my increases on the second and second to last stitch on each side of the sock.

When you reach 52 total stitches for each sock, knit even for 2-4 rows. (personal choice)

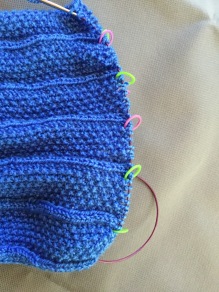
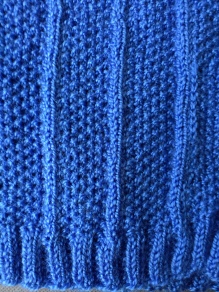
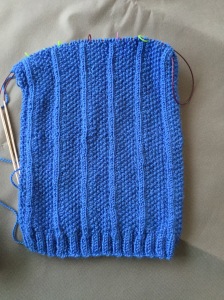
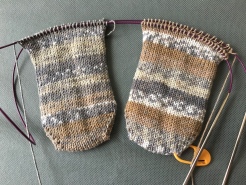
All rounds for the “body” of the sock: K1, P1  for the “top” of the sock (half the stitches for each sock).

IMG_0878

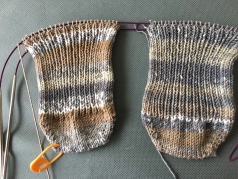
K all stitches for the “bottom” of the sock (the second half of the stitches for each sock).

IMG_0880

When socks measure 7 1/2 Inches from the toe, work the heels using whatever method you prefer. I use the Short Row Heel demonstrated here.

Knit even for 1 to 1 1/2 inches.  (To get the body of the sock up over the ankle bone)

K2, P2 Rib for 7-8 inches.

Cast off using your favorite stretchy cast off. This is my new super easy favorite, Stretchy Sewn Bind Off . I don’t usually like sewn bind offs but this one is amazing.

Weave in ends. You’re Done!

‘Static Happy Knitting!

The Fair Isle Sampler Poncho

I Finally Finished!

I loved this project. I combined a desire to practice my Fair Isle technique with a need to reduce my stash and the result is beautiful. (If I do say so myself).

The pattern is a simple rectangle 124 stitches wide (120 for the pattern + 2 on each edge) with a garter stitch border on the bottom and open side. The top was knitted together using an I-cord from the bottom edge to the neck opening. The neck opening is several rows of knitting to create a curled “collar”.

IMG_0715

The Fair Isle patterns all came from 200 Fair Isle Motifs: A Knitter’s Dictionary.

IMG_0675

I chose motifs simply by making sure the stitch count would multiply evenly to 120.

I can think of several more variations on the Basic Rectangle Poncho. A stitch sampler rather than a Fair Isle sampler. Cable practice. Lace stitch practice.

Use your imagination to create your own one of a kind poncho.

‘Static Happy Knitting!

My Very Own Yardage Counter!

I have the greatest husband in the world. He also happens to be very handy.

When I told him I really wanted a sturdy yardage counter to go with my ball winder and my yarn swift he came up with this:

IMG_0699

It clamps to the table and as you can see, has eye bolts to guide the yarn on its way.

Now I can divide those balls/hanks of yarn for my two at a time projects. Yea!

If you don’t happen to have a handy husband or if you’re not so handy yourself, you can get your very own similar counter at Knit Picks.

‘Static Happy Knitting!

Chart Keeping Tips

Keeping track of your pattern on a chart is something we all run into at some point. I’ve done this several different ways depending on the size of the chart and the projects.

I’m going to show you the “tried and true” and then something new and very handy.

First there’s the metal and magnets cross stitchers, crocheters and knitters have been using for years. Very easy to use. I’ve added the step of slipping the chart keeper and the pattern into a page protector sleeve. This protects the pattern and allows me to make notes or other marks with a dry erase marker to help me on my way.

IMG_0654IMG_0656

Next up is a keeper that works the same way but comes in a prettier package, will stand on its own, and closes to half size for convenience and also to protect the pattern.

IMG_0657IMG_0658IMG_0664

Finally there’s the method I’ve been using for my current Work In Progress. I’ve been working on a Fair Isle Sampler Poncho using patterns from a book. Rather than make copies of the patterns so I could load them onto one of the above chart keepers, I found this magical thing…. Post It’s by the roll.

IMG_0652

I found the “tape” to be a bit too wide so I simply pull out the length I want and cut it in half.

IMG_0674

Then I can put the strips directly into the book and move them as I work. No damage to the book. No hassle with making copies.

IMG_0675       IMG_0667        IMG_0666

One more note, when I first started doing this, I would only show the row I was working between the strips. Now I show the one I’m working and the one below. It helps me double check my place on the row. Buy yourself some Post It Tape and try it out!

‘Static Happy Knitting!

The Shiny New Thing

Last year I had a knee replacement.

This meant several weeks of no driving. Ah Ha! I thought. The perfect opportunity to try out a new knitting technique.

I decided that Brioche knitting looked like a lot of fun. The pictures of those beautiful curving contrasting colors making leaf and wave shapes were almost hypnotizing.

I forgot one thing.

Recovering from major surgery involves pain medication. Pain medication muddles your brain. Trying to learn something new while your brain is muddled is not the best idea.

I lost count of the number of times I frogged huge swathes of knitting. Brioche is tricky and if you don’t know what you’re doing, ripping back to fix a mistake is crazy making.

I finally threw up my hands in defeat.

I went back to the project when my brain became my own again. I finished the scarf and found out two things.

  1. Brioche isn’t so bad once you understand the basic technique.
  2. Brioche isn’t for me.

I also learned in a way I hadn’t before exactly how the WAY you work your increases and decreases affects the look of your project. This is valuable information that I might not have really “gotten” if I hadn’t embarked on this experiment.

IMG_0432IMG_0434

So follow the shiny new thing. You might learn something you didn’t expect.

‘Static Happy Knitting!

Stash Busters

At a certain point every knitter looks into a craft closet or a corner of the room and confronts bags, boxes or piles of yarn leftover from all those wonderful projects we’ve created.

Sometimes we just close our eyes and pretend it’s not that bad. Sometimes we manage to suck it up and organize the mess according to yarn weight or fiber or even both.

Yea! Now we have an organized mess of leftovers.

I challenge you to get inspired and do something with all of that lovely yarn.

Stash busters can be large blankets or small kid’s socks. Hats or scarves. Or if you’re really creative, sweaters. (I myself have not been brave enough to attempt the sweater)

IMG_0482

My daughter loves her mismatched ugly stash buster socks. (So much that I couldn’t get my hands on any of them for a photo)

I’ve done blankets and socks. My current project is a stash busting poncho that is doing double duty by giving me a chance to work on my Fair Isle technique.

IMG_0472

I have noticed one insidious evil that can creep into your best stash busting intentions…. the urge to buy more yarn to make the project bigger or maybe fill in “missing” colors. Resist! Make it a real challenge and make do with what you have.

Share your Stash Busting Ideas with the rest of us we can all use a new idea.

‘Static Happy Knitting!


3 Types of Books Every Knitter Needs

I Love Books. All types of books.

This means I have bought my fair share of Knitting books. I even have the one with patterns to knit your own dog.

But there are three specific types of knitting books that I turn to over and over to get my money’s worth out of them every time. Recipe Books, Stitch Dictionaries, and How To / Tips.

Recipe books teach you how to measure, calculate rows and stitches, and put the parts together for various garments. Like these two for creating Top Down Sweaters:

IMG_0450

Stitch Dictionaries are just what the name implies, page after page of various knitting stitches. The two below are excellent examples. The 400 stitch dictionary has everything from basic garter and stockinette stitch to very complicated cables and lace. The 200 Fair Isle Motif book contains patterns from 2 stitches to 30 stitches and an equal number of rows.

IMG_0451

How To is also self explanatory. The one below is compact and has answers to most any question that might come up.

IMG_0453

I’m sure if you look you will find a few favorites of your own. One last piece of advice, I love Ebooks but most of the time I find I like my knitting books to be of the real paper type. Of course you may feel the exact opposite.

I’d love it if you’d share some of your favorites with me!

‘Static Happy Knitting!

Lottery Fever

When the lottery went up into the stratosphere recently, I thought about what I’d do if I won. (Didn’t we all)

Yes I’d buy a new house and take a vacation or two, invest, set up trusts for the kids. Blah blah blah.

But would I still knit? Would I still get a thrill out of watching a pair of socks appear on my needles?

The answer is yes.

I’d just do it with more expensive yarn. I’d peruse the Knit Picks Catalog and order skeins and skeins of whatever struck my fancy. I’d go to Eat, Sleep, Knit and fill my basket with all the soft, hand dyed yarn that excited my fingers when I touched it.

Like the Silk blend  from Eat Sleep Knit I used on this scarf:IMG_0436

This yarn just slid onto my needles. What fun to knit with something so nice.

I’d knit without worry about hand washing because I could afford to have things professionally cleaned.

I’d knit afghans with silk, wool blends.

Cashmere sweater? Oh yeah.

Let’s face it, quality yarn can be expensive. But, I gotta say, if I’m going to put in the hours to knit a sweater, I’m not going to use cheap yarn.

So I can dream about not worrying over the price of a skein of yarn or feeling guilty if a project goes unfinished.

For now I’ll just have to pick my projects with care.

‘Static Happy Knitting!

The Travis Hat: Free Pattern

A few years ago my son found a slouch beanie online that he loved. He wasn’t happy with the price and asked me to look at it and see if I could make something similar.

I played around with the pattern and proportion and finally came up with The Travis Hat.

That first hat started something. His friends started asking where he got the hat, my daughter wanted one and then her friends and before I knew it I’d knitted probably a dozen of them. I used a soft acrylic sport weight yarn in lighter colors to highlight the pattern.

I hope you like it too. ‘Static Happy Knitting!

Super Simple Travis Hat The Pattern:

1 Skein soft sport weight yarn

Gauge: 6 St / IN with # 4 circular
Row doesn’t matter as you’ll be measuring.

This is for a man’s size (24 in around)

K = Knit. P = Purl

Cast on 140 st. (I use magic loop method)
Join in round.

K2 P2 Rib until hat measures @ 1″ (or whatever looks good to you)

Pattern Row 1: *PKKP KPKPKP Repeat from * around.
Pattern Row 2: *PKKP PKPKPK. Repeat from * around.

Repeat Rows 1 and 2 until hat measures 11-12 inches tall.

(You will notice the PKKP produces a rib and the KPKPKP / PKPKPK section is a seed stitch pattern between the ribs.

Once the hat measures 11-12 in. You will begin reducing every other row by knitting two stitches together in the seed stitch section between the ribs.
After you’ve reduced away the seed pattern, purl together the purls in the rib until you have Only PKK repeat.

Cut a long tail and thread onto a yarn needle. Slip all remaining stitches onto the needle and pull tight. Turn hat inside out, knot. Weave in ends.

Tip: I put a stitch marker at the end of each pattern repeat to make things easier until the pattern becomes obvious.

IMG_0420IMG_0430

IMG_0425IMG_0431

You’re done!
‘Static Happy Knitting!

Needles Needles

I’m not a knitting historian but somewhere back in time our knitting ancestors got by just fine with a couple of sharp sticks of about the same diameter. They figured out how big stuff would be using their particular set of needles and their particular tension and even their particular homespun yarn.

Lucky for us all that has changed and we can buy beautiful standardized needles in nearly endless varieties.

Try them. Try them and find the ones you love.

I have knitted with straight aluminum needles, circular aluminum needles, plastic varieties of both and bamboo varieties of both. I have used interchangeable circulars and single sized circulars. I can’t even remember all the brands.

I finally settled on what works for me.

And the winner is . . .

Knit Picks Circulars. (http://knitpicks.com) Single size for those too small to be interchangeable and interchangeable for all the available sizes.

This is a sampling:

IMG_0407

I knit everything with these needles. Everything.

First and maybe most important, these needles are affordable. They’re comparable in price to needles you can buy in craft stores. You don’t have to pay a premium to get these high quality needles.

Next, the cables are super flexible which is a big deal when you’re using the magic loop technique.

They have a needle type for every need. I have two complete sets. One set of nickel plated tips for speedy, smooth knitting. One set of rainbow wood tips for those times when you want your needles to “hold” the yarn a little better like cables or lace. I’ve recently picked up a few Sunstruck wood tips just because I think they’re pretty. Ditto the Caspian wood tips. (I can justify the Sunstruck because they’ll provide a little more contrast with darker yarn.)

The quality is great. I knit a lot. Socks, sweaters, scarves, blankets, hats, and on it goes. I’ve never replaced a tip. I’ve had one cable break at the joint from wear which wasn’t a big deal because the replacement cables are not expensive.

Which brings me to my next point. The cables come in any length you need and the price means having multiple options won’t break your bank.

I said I knit everything on circulars and I do. I don’t need to have straights, DPNs and circulars when I can do the job with circulars alone. Learning the Magic Loop technique changed my life. Really. Find a video on YouTube and learn it. Knit Picks Tutorial  It’ll change your life too.