About six years ago was the first time I went to the New Jersey Sheep and Wool Festival. I remember the excitement I felt in anticipation of this event. I was a novice knitter who had not yet ventured into a yarn shop. I was amazed when I went to this festival and saw the many breeds of sheep, how their fleece is sheared, the process involved from raw fleece to yarn, alpacas, and a plethora of indie dyers, sheep farmers and yarn shop owners. It was such a wonderful experience. It was there that I purchased the fingering weight sock yarn used in the Reminisce Hat pattern. I remember I stopped at this stall because the owner was spinning fiber into yarn with a spinning wheel. She encouraged me to try spinning but I was hesitant to do so. I did however purchase her hand dyed superwash merino with nylon sock yarn. Regrettably, I have since lost the label and with it the name of the yarn shop. But I do remember her friendly personality and the lovely time I had meeting other indie dyers and crafters.
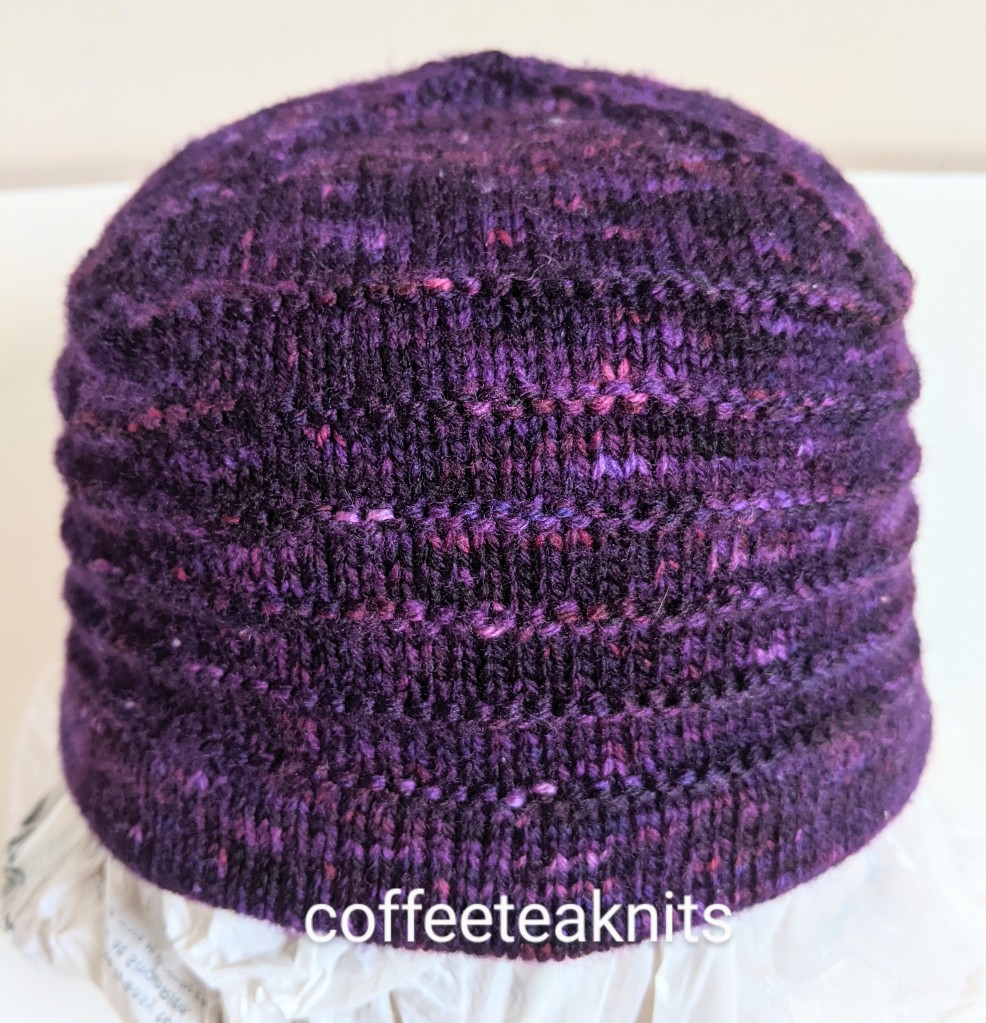
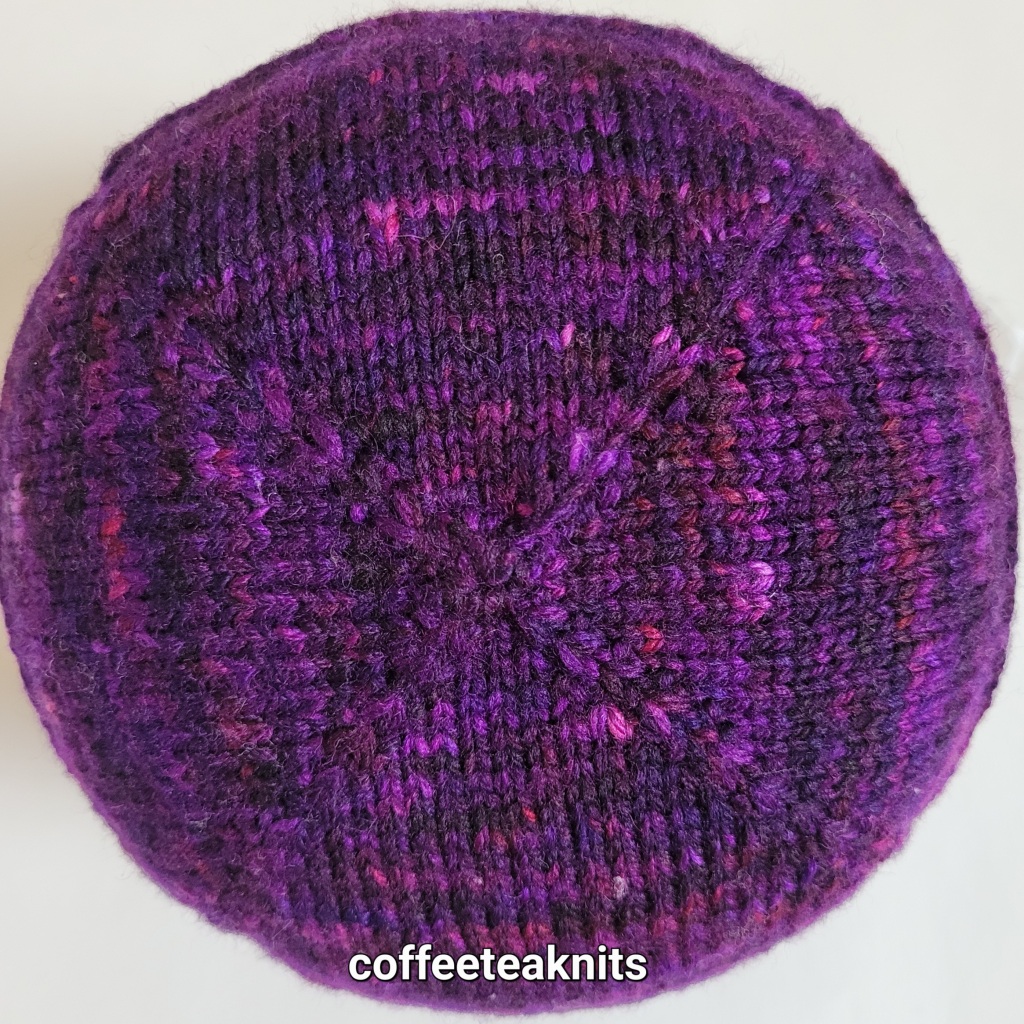
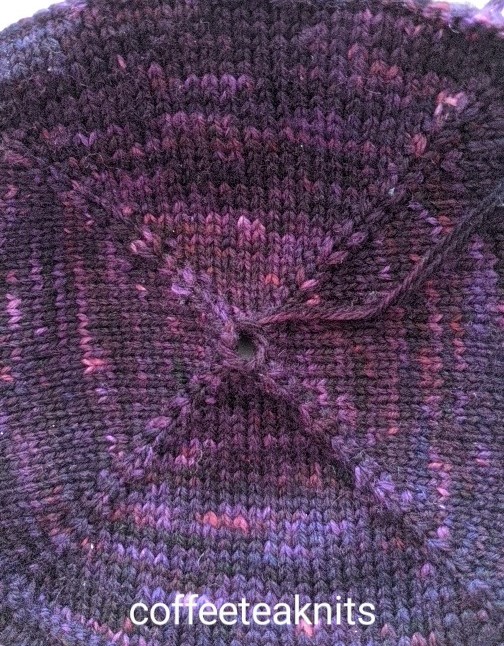
The Reminisce Hat is knit top down and in the round holding two strands of the same yarn together. Eight stitches are cast on and using the magic loop method the crown of the hat is increased to the preferred size. The body is knit in a simple stitch pattern. The hat is then completed by a double brim in stockinette stitch pattern. The first few rounds of the hat is a bit fiddly but the rest of the hat is mainly in stockinette stitch pattern with a few repeating purl stripes.
The Reminisce Hat Pattern: (text and images for personal use only)
Yarn: Fingering Weight Sock Yarn (Super wash Merino and Nylon) 100g about 400 yards
Circular Knitting Needles: US #4 (16 and 32 inches cable length)
Gauge: 5.5 stitches x 8 rows per inch
Size: Adult (23 – 24″ head circumference and about 8″ hat length)
Abbreviations:
- K: Knit
- P: Purl
- Kfb: Knit front and back (knit one stitch first in the front and then knit the same stitch in the back before slipping it off the left needle – 1 stitch increase)
- pm: place marker
- sm: slip marker
- BOR: beginning of round marker
With two strands of the same yarn held together, cast-on 8 stitches using the magic loop cast-on method (several tutorials available on Youtube). Divide the stitches equally (4 stitches) between the left and right sides of the US #4 circular needle (32 inches cable length)
Hat Crown Increases:
- Round 1: Kfb all stitches
- Round 2: Knit all stitches (16 stitches)
- Round 3: Kfb, K2, Kfb, pm, Kfb, K2, Kfb, turn to work on stitches on the next needle, Kfb, K2, Kfb, pm, Kfb, K2, Kfb, place BOR marker
- Round 4: Knit all stitches (24 stitches)
- Round 5: Kfb, knit to 1 stitch before marker, Kfb, sm, Kfb, knit to 1 stitch before last, Kfb, turn to work on stitches on the next needle, Kfb, knit to 1 stitch before marker, Kfb, sm, Kfb, knit to 1 stitch before BOR marker, Kfb, slip BOR marker
- Round 6: Knit all stitches (32 stitches)
Repeat Rounds 5 and 6 till there are 128 stitches on the knitting needle (to knit to another size just increase or decrease the number of rounds and stitches)
Change to US#4 16 inch circular knitting needles and purl one round removing all markers except the BOR marker
Hat Body:
- Knit all stitches the next 5 rounds and then purl all stitches in the sixth round.
Repeat these 6 rounds 4 more times.
Hat Brim:
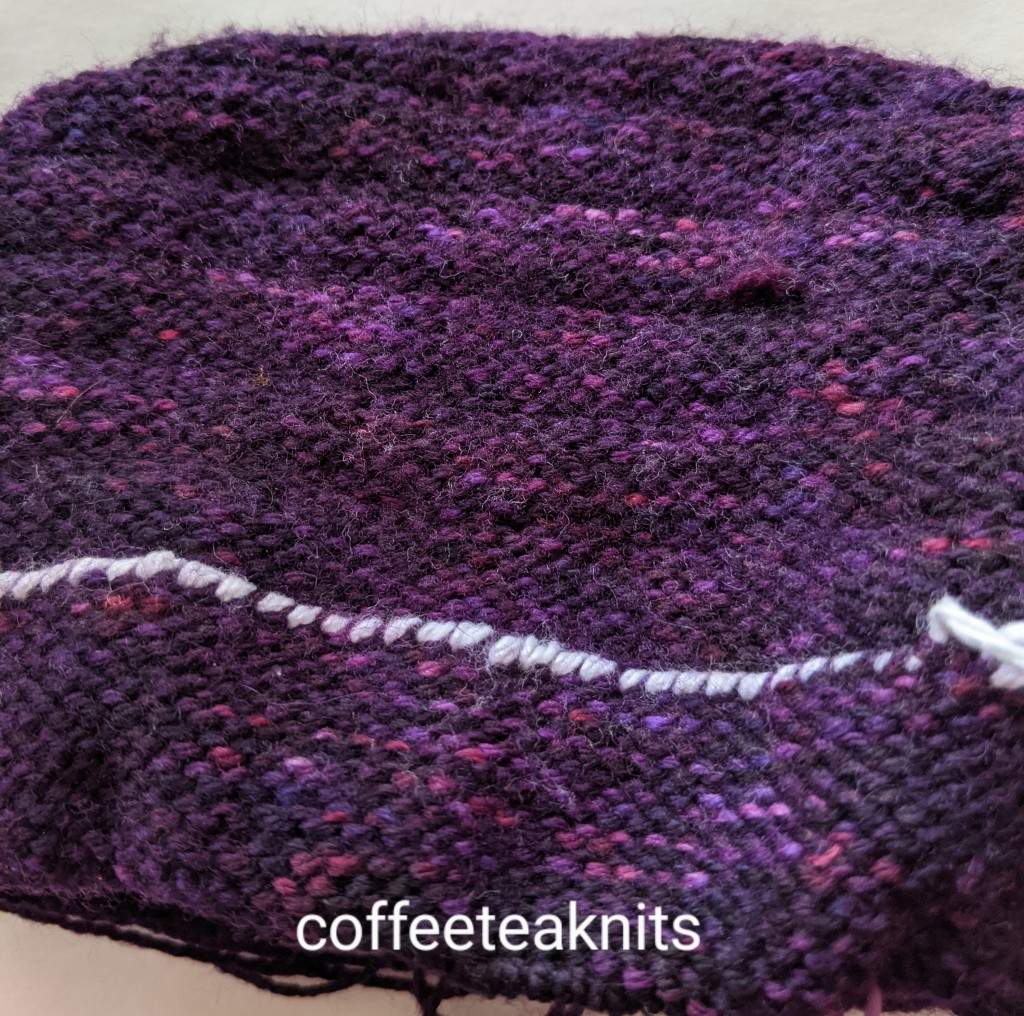
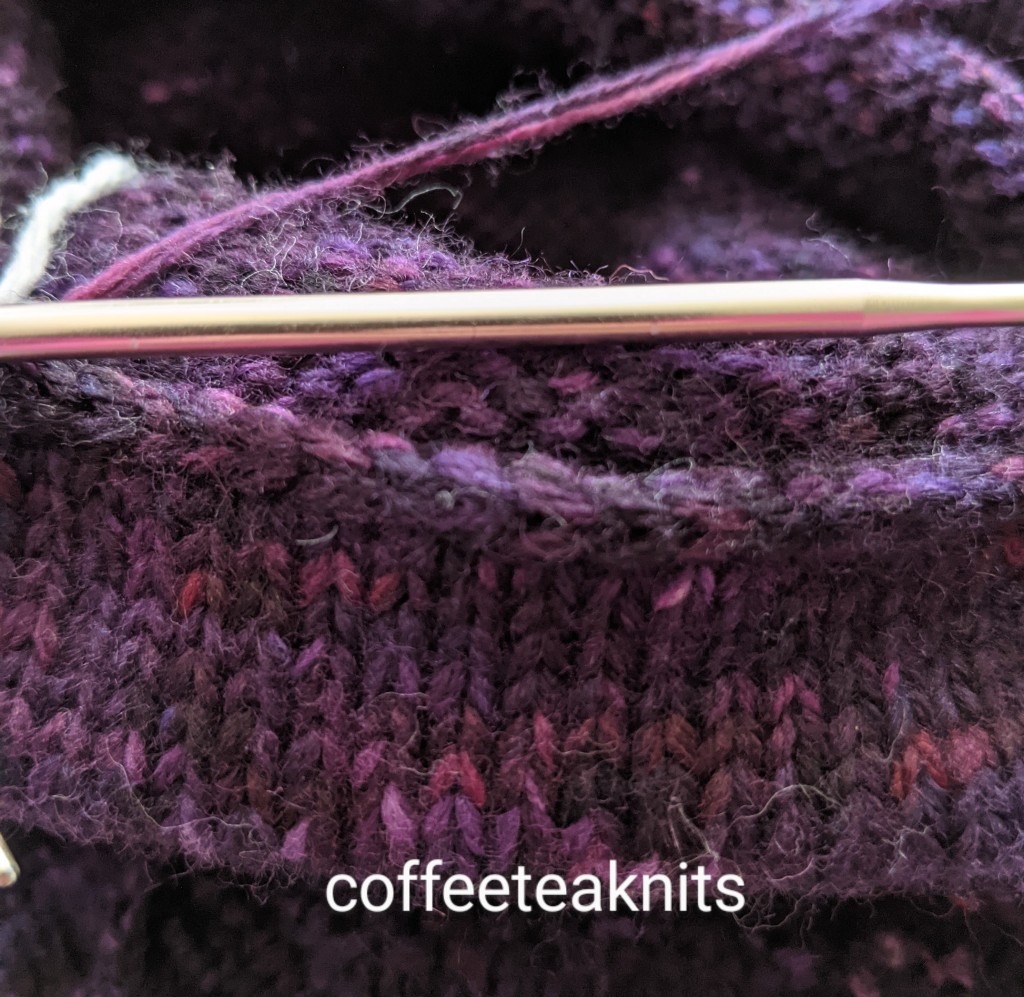
- Round 1: Knit all stitches wrapping the waste yarn around the working yarn in the wrong side of the hat before knitting the stitches with the working yarn, slip BOR marker (see image above)
- Knit all stitches for the next 20 rounds (or more if preferred).
Hat Double Brim Bind Off:
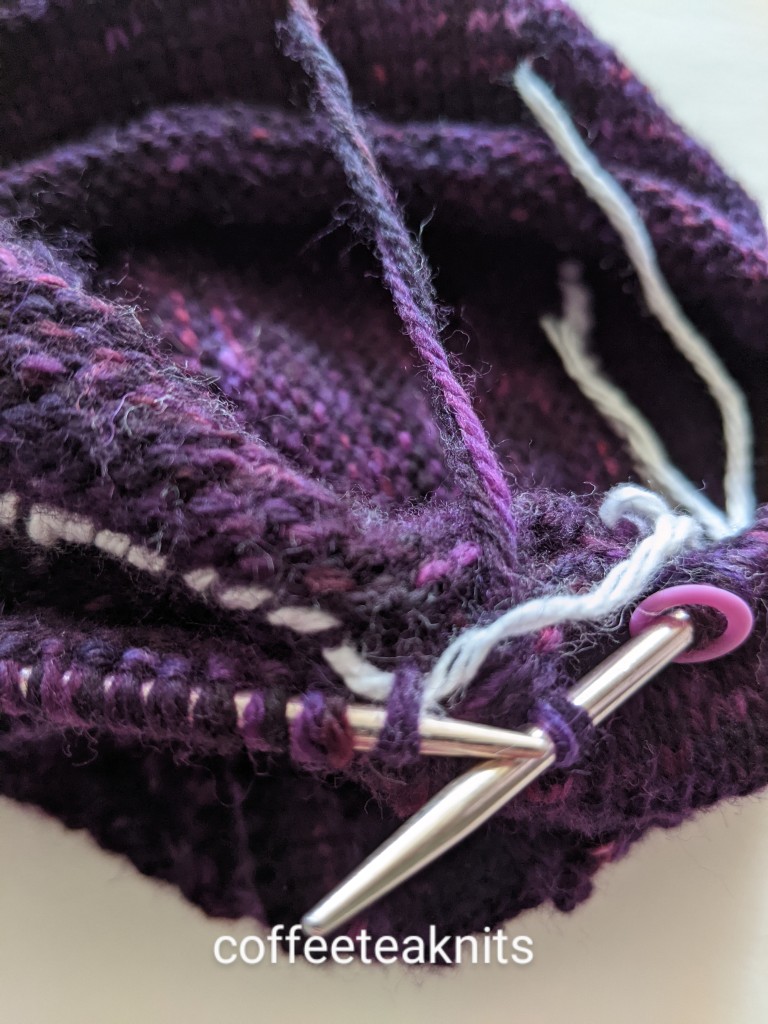
- Fold the brim inside the wrong side of the hat and pick up the back of the stitch from Round 1 with the waste yarn and place it on the left needle. Remove the waste yarn and knit this Round 1 stitch together with the first stitch on the left needle. Repeat this with the next stitch and then bind off the first stitch on the right needle.
- Repeat this till 1 stitch left on the needle. Cut the working yarn and pull through the stitch. Remove BOR marker and weave in the ends (see below)
To tighten the gap in the center, insert yarn tail with a tapestry needle through the first eight stitches and pull them tight to close the gap.
Weave in the ends, wash and block hat
Happy Knitting!
~coffeeteaknits
