


Marcy's Beret, a free knitting pattern from Knitty.com.
INTRODUCTION
Marcy's Beret
 by Kerry Bullock-Ozkan

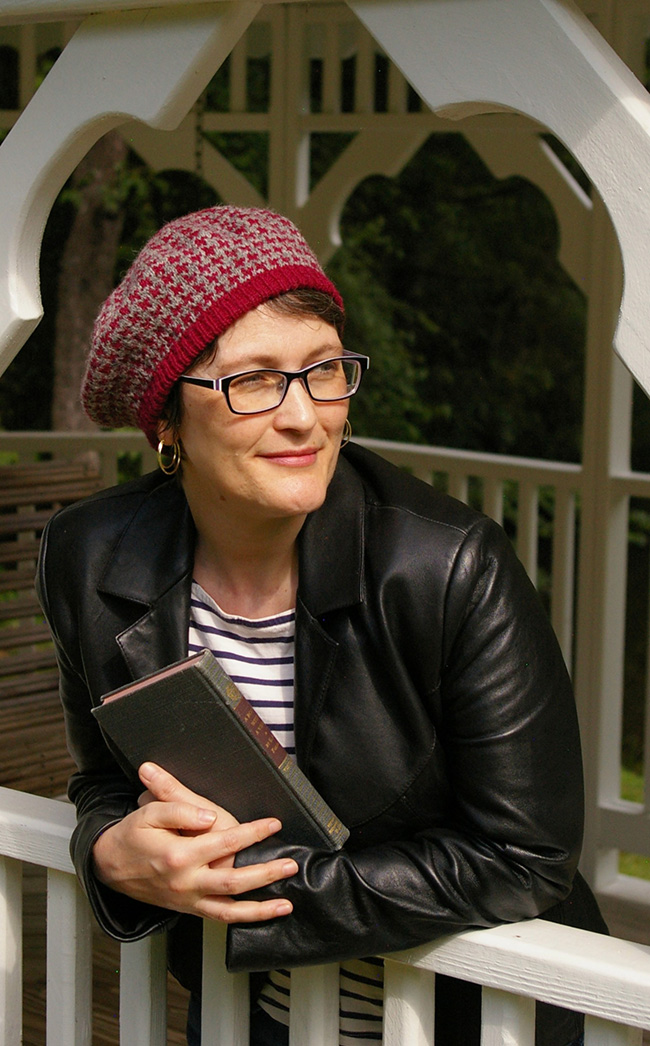
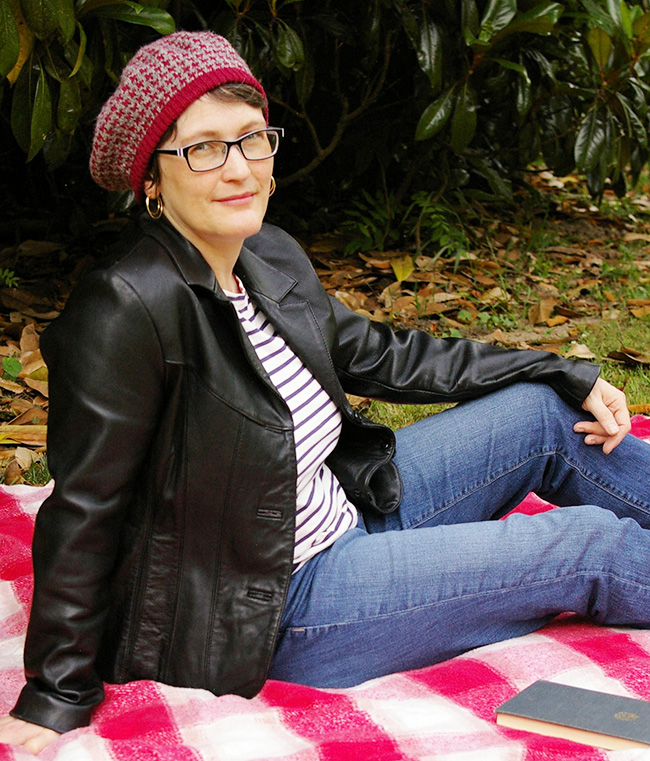
Berets are a staple wardrobe item of 1990s rom-com heroines. Black is classic, of course, but why not make it more fun with an allover houndstooth pattern? And of course I had to name it after my favorite rom-com heroine, Janeane Garofolo's Marcy Tizard from The Matchmaker. Although she didn't wear a beret in the movie, I feel sure Marcy would have owned one.
I wanted a firm but stretchy brim to give the beret structure, and since the stranded colorwork makes the body of the hat double-thickness I settled on a folded ribbing to match it and keep the wind off my ears. The ribbing is worked from a provisional cast on and joined together before increasing for the body of the beret.
 model: Kerry Bullock-Ozkan
photos: Ken Bullock


SIZE
Adult S[M, L]
Choose a size with approximately 2 inches/ 5 cm of negative ease at brim
FINISHED MEASUREMENTS
Brim Circumference: 18.75[21.25, 24.25] inches/ 47.5[54, 61.5] cm
Height: 8[8.75, 9.5] inches/ 20.5[22, 24] cm. Height can be adjusted by working more or fewer repeats of the charted pattern before the crown.
MATERIALS
Yarn
Jamieson's Shetland Spindrift [100% pure Shetland wool; 115 yd/ 105 m per 0.9 oz/25 g skein];
![]() [MC] #580 Cherry; 2[2, 2] skeins (note that size S uses less than 20 yards of the second skein)
[MC] #580 Cherry; 2[2, 2] skeins (note that size S uses less than 20 yards of the second skein)
![]() [CC] #103 Sholmit; 1[1, 2] skeins
[CC] #103 Sholmit; 1[1, 2] skeins
Yarn Characteristics
![]() The sample shown uses a woolen-spun 100% wool 2-ply yarn. A woolen- or semi-woolen-spun yarn will bloom with blocking and give a more traditional look to the colorwork, as shown in the sample. A worsted-spun yarn will give the colorwork a crisper appearance.
The sample shown uses a woolen-spun 100% wool 2-ply yarn. A woolen- or semi-woolen-spun yarn will bloom with blocking and give a more traditional look to the colorwork, as shown in the sample. A worsted-spun yarn will give the colorwork a crisper appearance.
Recommended needle size
[always use a needle size that gives you the gauge listed below - every knitter's gauge is unique]
![]() US #2/2.75 mm circular needle, 16 inch/40 cm long
US #2/2.75 mm circular needle, 16 inch/40 cm long
![]() US #2/ 2.75 needle(s) for small circumference in the round, for crown
US #2/ 2.75 needle(s) for small circumference in the round, for crown
![]() 1 US #1.5/2.5 mm circular needle, 16-inch/ 40 cm, for ribbing
1 US #1.5/2.5 mm circular needle, 16-inch/ 40 cm, for ribbing
![]() (optional) additional US #1.5/ 2.5 mm circular needle, for joining the provisional cast-on to ribbing
(optional) additional US #1.5/ 2.5 mm circular needle, for joining the provisional cast-on to ribbing
![]() crochet hook in size close to gauge needle for crochet provisional cast-on (exact size isn't critical)
crochet hook in size close to gauge needle for crochet provisional cast-on (exact size isn't critical)
Notions
![]() 1 stitch marker for start of round
1 stitch marker for start of round
![]() (optional) additional stitch markers for marking crown repeats
(optional) additional stitch markers for marking crown repeats
![]() waste yarn for provisional cast-on
waste yarn for provisional cast-on
![]() yarn needle
yarn needle
GAUGE
30 sts/32 rounds = 4 inches/10 cm in single-color stockinette stitch
34 sts/38 rounds = 4 inches/10 cm in pattern stitch
PATTERN NOTES
[Knitty's list of standard abbreviations and techniques can be found here.]
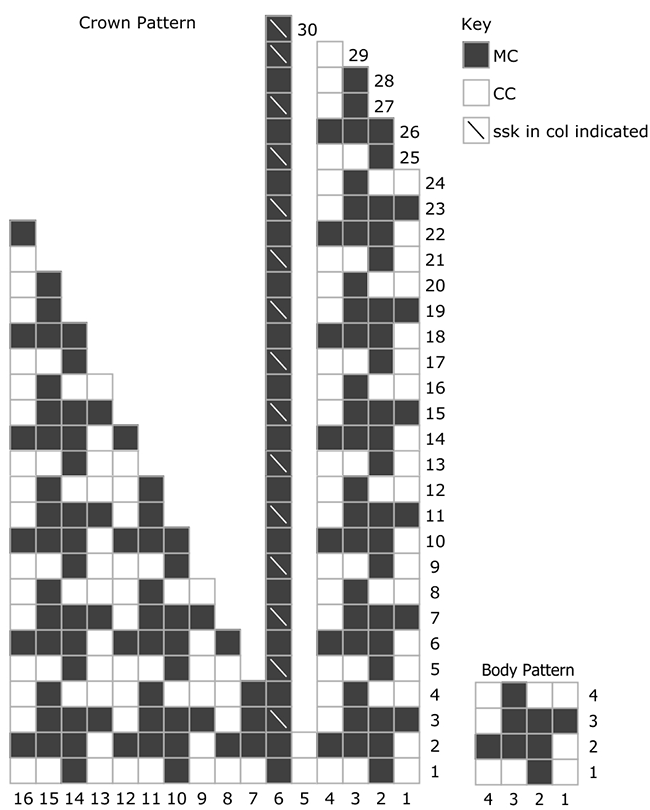
For the crown decreases, you may wish to use stitch markers to keep track of the chart repeats. You will need to slip the first stitch of the round on all odd rounds beginning on Round 29 of the chart.
When working in stranded colorwork, pay attention to color dominance. A post on color dominance can be found here.
Construction method: Hat is worked bottom-up in the round beginning with a provisional cast on. The ribbing is worked from the provisional cast on; ribbing is folded and joined before working the body of the hat. The body and crown are worked using stranded colorwork.
Crochet provisional cast-on: video tutorial or photo tutorial
CHARTS
DIRECTIONS

Ribbing
Using smaller circular needle and your preferred provisional cast on, CO 140[160, 182] sts with waste yarn. Join MC, place marker and join for working in the round.
Ribbing Round: [K1, p1] around.
Work Ribbing as set until work measures 1.5 inches/4 cm.
Remove waste yarn from provisional cast-on and place live sts on a second circular needle. Fold ribbing so that the provisional cast-on sts are behind the sts just worked.
Next round: *Knit 1 st from front needle tog with 1 st from back needle, purl 1 st from front needle tog with 1 st from back needle; rep from * to end.
Hat Body
Inc round: *K1, kfb; rep from * to last 4[0, 2] st(s), k 4[0, 2] — 208[240, 272] sts.
Change to larger needle, join CC and work Rounds 1-4 of Body Pattern Chart until work measures approximately 4.25[5, 5.75] inches / 11[12.5, 14.5] cm from folded edge, or desired length, ending with Round 4.
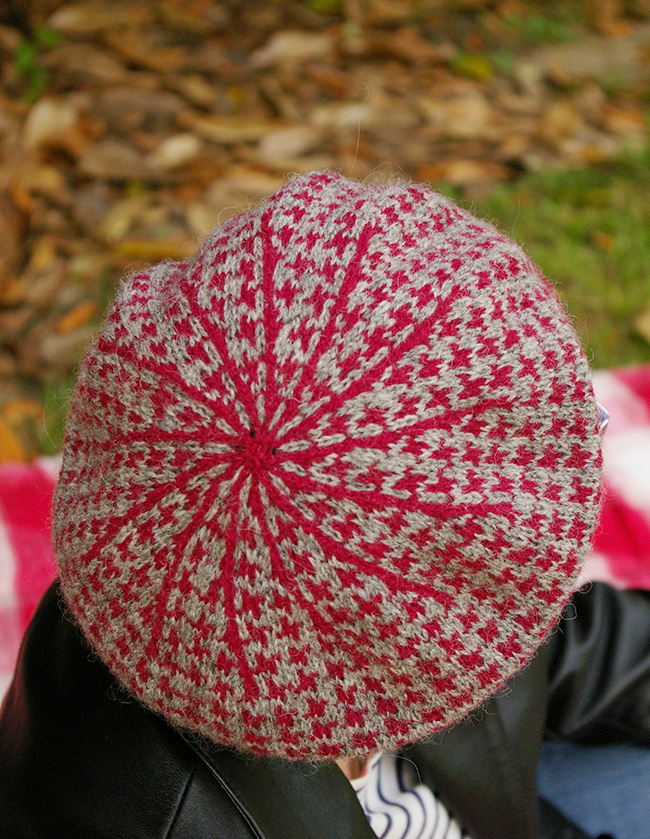
Crown
Establish chart: Work Crown Chart 13[15, 17] times around.
Work Chart as set until chart is complete, changing to needles for small circumference when stitch count gets too small for circular needle. Cut CC1 after Round 39.
Final round: K2tog to last st, k1. 7[8, 9] sts.
Cut MC, leaving an approximately 6-inch tail. Thread yarn through rem sts and pull through to WS.
FINISHING
Weave in ends. Soak hat in very warm water with a bit of wool wash for about 20 minutes, then squeeze gently to remove excess water. Stretch body of hat carefully over a 10-11 inch [25.5-28 cm] plate to dry. To prevent ribbing from stretching out, you may wish to thread a length of cotton yarn through the ribbing and fasten off. Alternative method: stretch hat over a plate to shape and apply steam with an iron or steamer to set stitches.
ABOUT THE DESIGNER
 Kerry Bullock-Ozkan is a knitwear designer and tech editor living in the Piedmont region of North Carolina. When not knitting, Kerry can be found exploring rare wool breeds and her local environment through spinning, weaving, and natural dyeing.
You can follow all her fiber adventures at bullockozkandesigns.com
Pattern & images © 2023 Kerry Bullock-Ozkan