
Little Pink Cupcakes has moved! We have a new address and a beautiful new look. To keep up with all the latest crafts, giveaways and posts come check us out at littlepinkcupcakes.com . If you are a follower of this blog you may need to subscribe again at the new site due to some technical difficulties during the switch over. Hope to see you soon!
Winner Winner Chicken Dinner!
Thanks so much to all of you for signing up on my blog and facebook page. I am totally feeling the love! I used random.org and the winner is “Flower Bubbles”. Please message me on the Little Pink Cupcakes facebook page with your address so I can get your prize on it’s way!
Thanks to everyone who entered to win. I was an exciting week for me watching all the likes add up. Stick around because there will be more giveaways coming up and lots of fun projects, recipes and crafts coming up. See you soon!
Every Princess Needs a Tower
Ok, princess I am not, but Bedraggled, sleep deprived queen of my tiny castle? You bet. If you checked out my last post, you know that we I have some serious laundry issues. I don’t know about you but I find it impossible to keep up on our laundry. There always seems to be a mountain of laundry to wash and fold on any given day. I have been off on maternity leave for a year and I am heading back to work in a few short weeks which means that our laundry situation is not going to get any better any time soon.
I spent a lot of time thinking and planning and pinteresting (is that a word?) and came up with a great solution. A tower. A beautiful laundry tower. I got the idea here. Now the original one was designed to be a dresser. I loved the idea and had my husband build me this:

Isn’t it beautiful? Well, you know, for a laundry tower. It works perfectly for our family. Mom and Dad share the top one and everyone else gets their own. I am hoping if I am a really good girl that Santa will bring me a Silhouette Cameo for Christmas so I can apply some really cute vinyl lettering, but for the time being I am going to use some patterned scrapbooking paper to add an initial to the front of each basket.

Having this lovely creation has made a huge difference in keeping our laundry area clean and tidy. It has also made it easy to implement a laundry day for my two older girls. Especially because they can just grab their basket throw it straight into the washer, the dry and then take it right into their rooms to be folded and put away (insert blissful sigh here). Every little bit helps!
Do you have a mountain of laundry? Any tips or tricks that help you keep it under control?
My Very First Giveaway!
Thanks so much for stopping by! As the title of this post state there is in fact a giveaway, which is super exciting because it’s my very first one. I love my blog, small though it may be and I am hoping that it is a place people will enjoy coming. I really like sharing the projects I am working on and hearing what my readers are doing too. So in a shameless attempt to grow my little blog I am doing a giveaway.

When I hit 25 subscribers to my blog and 50 to my facebook page I will be giving away a copy of The Money Saving Mom’s Budget: Slash Your Spending, Pay Down Your Debt, Streamline Your Debt and Save Thousands a Year. I stumbled upon this gem a few months ago and preordered it immediately. I will be purchasing the book from Amazon.ca and mailing directly to the winner. I have not been paid in anyway to do this giveaway. I love this book and I know that you will see big differences in your financial life if you try even a few of the suggestions.
Money Saving Mom has a fantastic blog. If you haven’t checked it out you really should. Mom or not she has a ton of ideas for saving money and making your home run smoothly. In her book she offers advice on a whole bunch of topics from setting financial goals to decluttering your home. I have read and reread this book and I can’t wait to give it to one of my readers.
The really good news for you is that due to the low numbers I am looking for your chances of winning are really good. If you would like to enter you need to do one of two things (although if you do both you will get 2 entries)
1. Follow my blog, there is an email subscription button at the top right hand side of my blog and leave a comment. Leave a comment by clicking the conversation bubble beside the title of my post.
2. Like Little Pink Cupcakes on Facebook (I promise I won’t junk up your facebook page with a unnecessary posts) and leave a comment.
Easy Peasy right? As soon as we hit those magic numbers I will use random.org to determine the winner and I will mail the book directly to the lucky person. It might speed things up if you pass this along to anyone you know who might be interested in reading my little blog. Thanks again for stopping by and good luck!

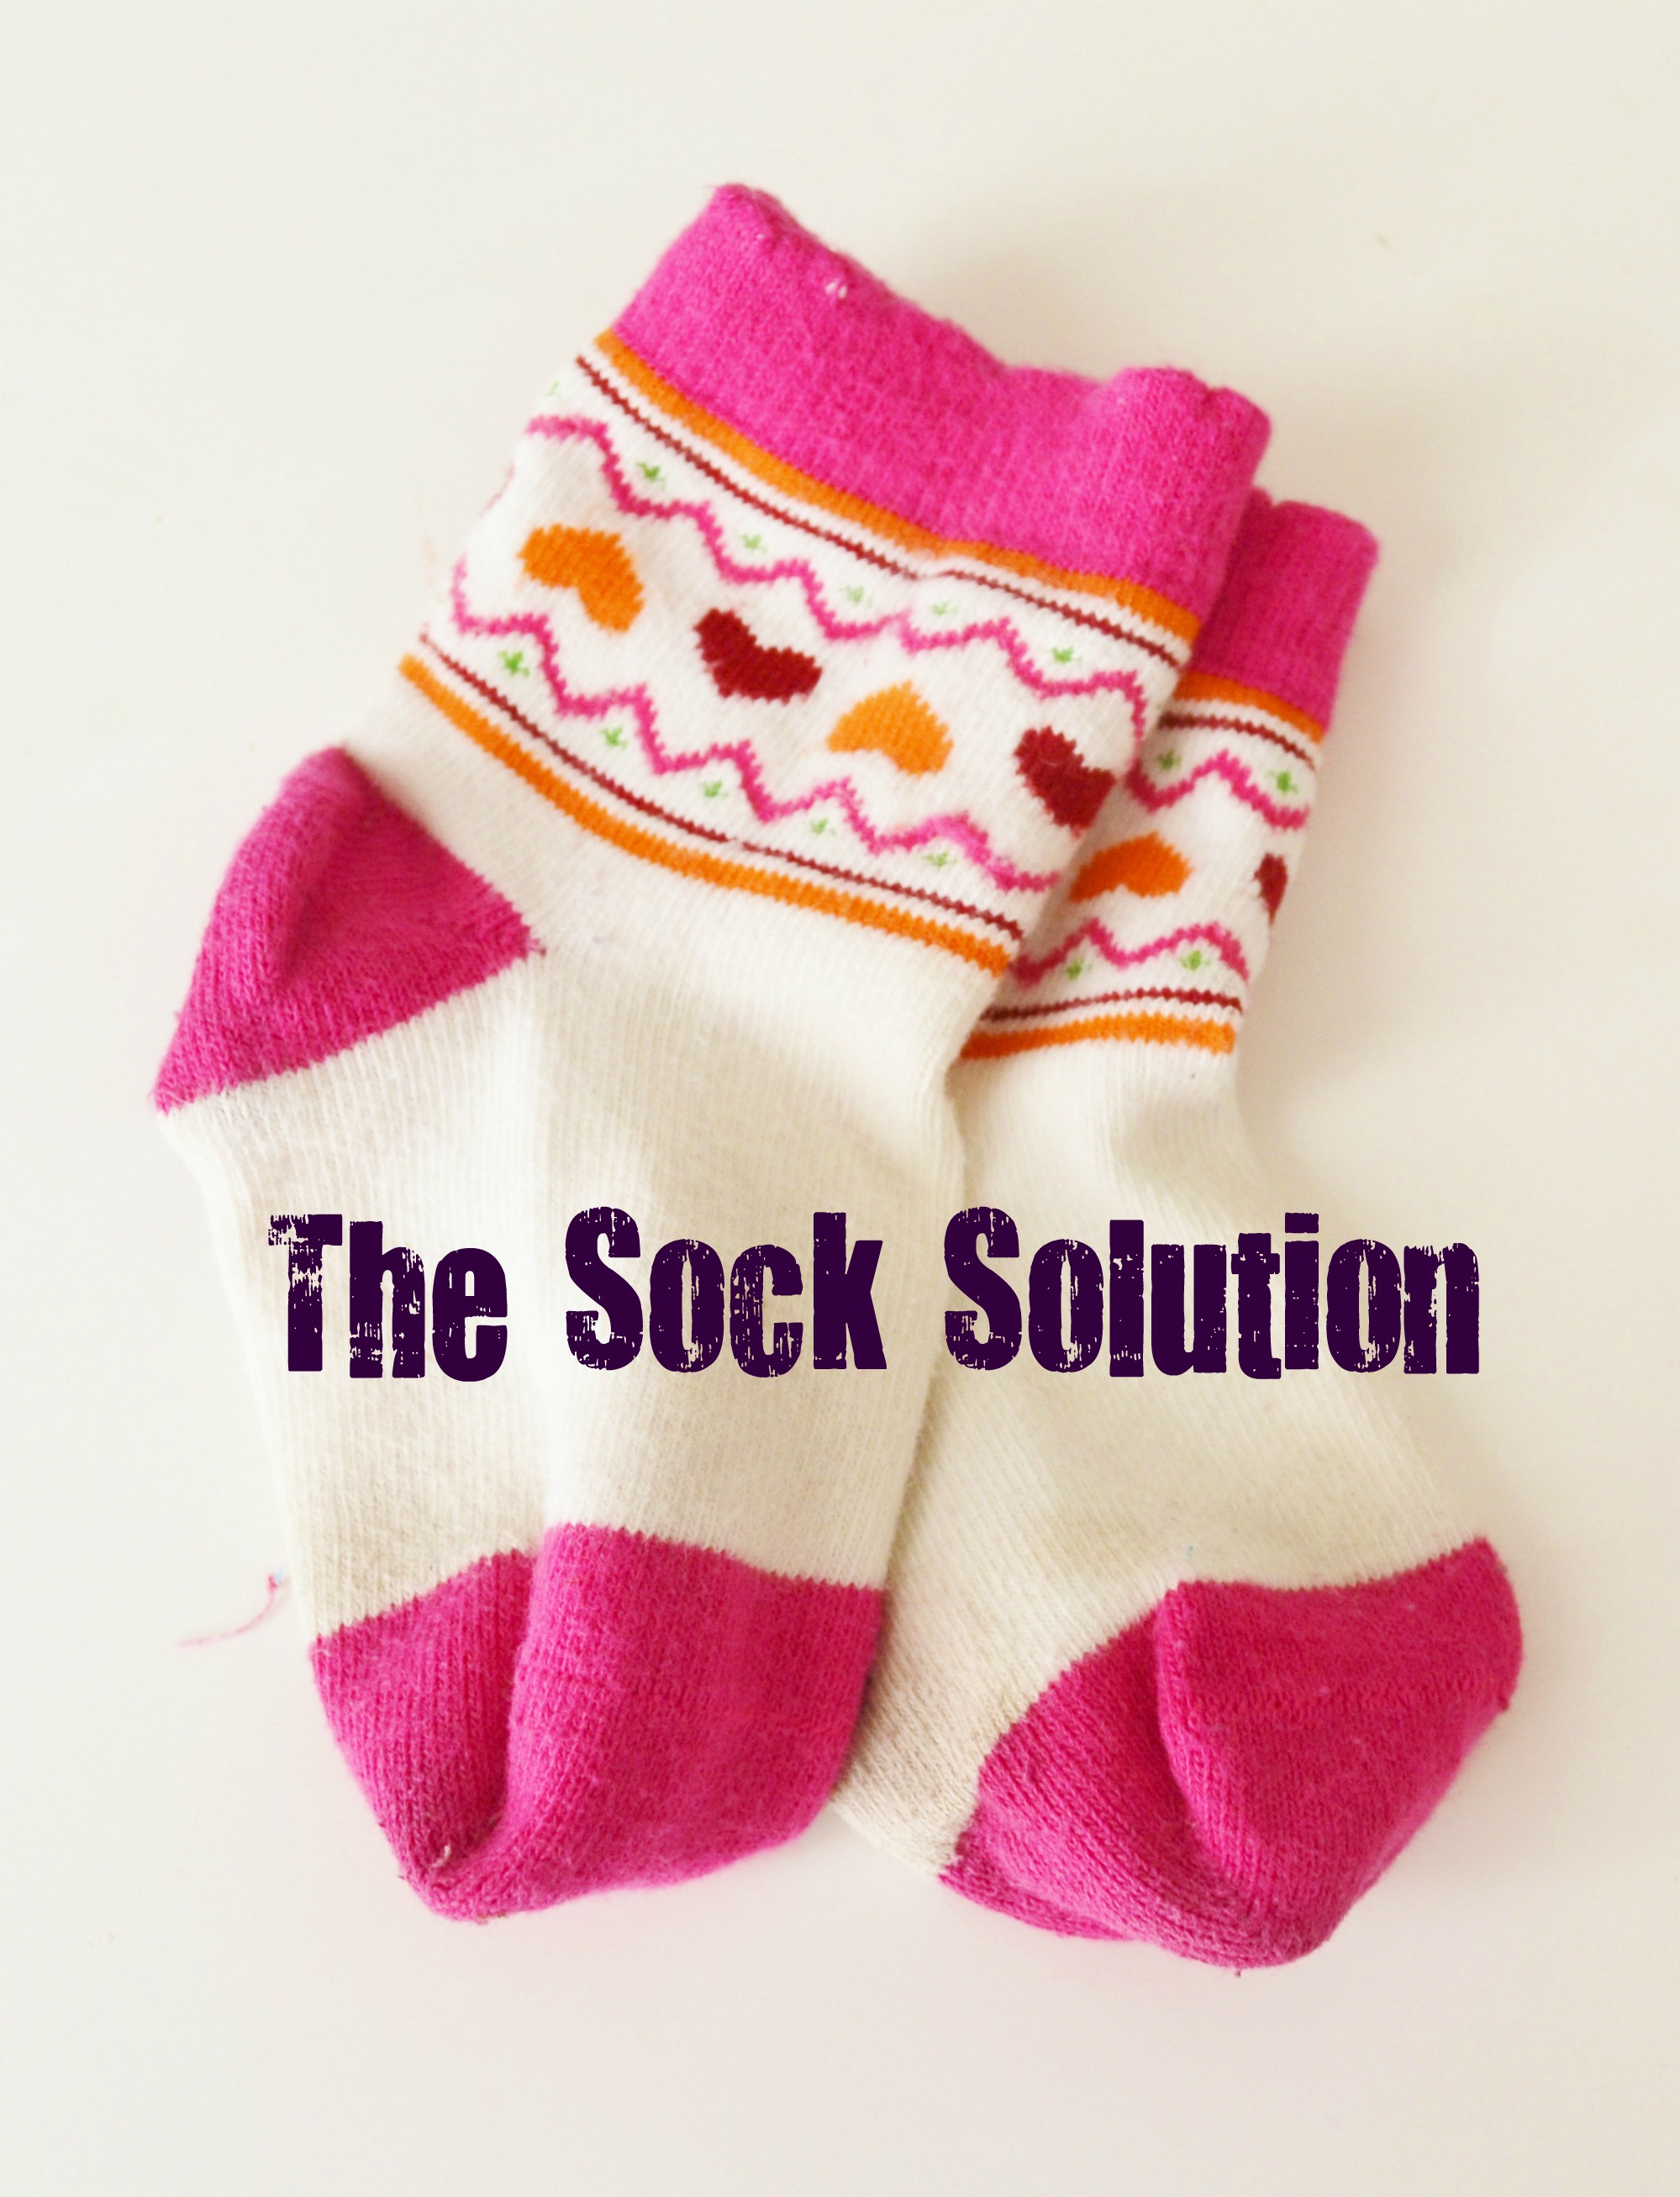
The Sock Solution!
I know you have one too. A chore that you hate to deal with. A job in your home that never quite gets done. Being a large family means that there are certain areas that desperately need to be organized so I don’t lose my mind and so that our house functions better. Usually these are the things that I never get around to but this week I tackled one of the many. Allow me to introduce you to my biggest frustration:
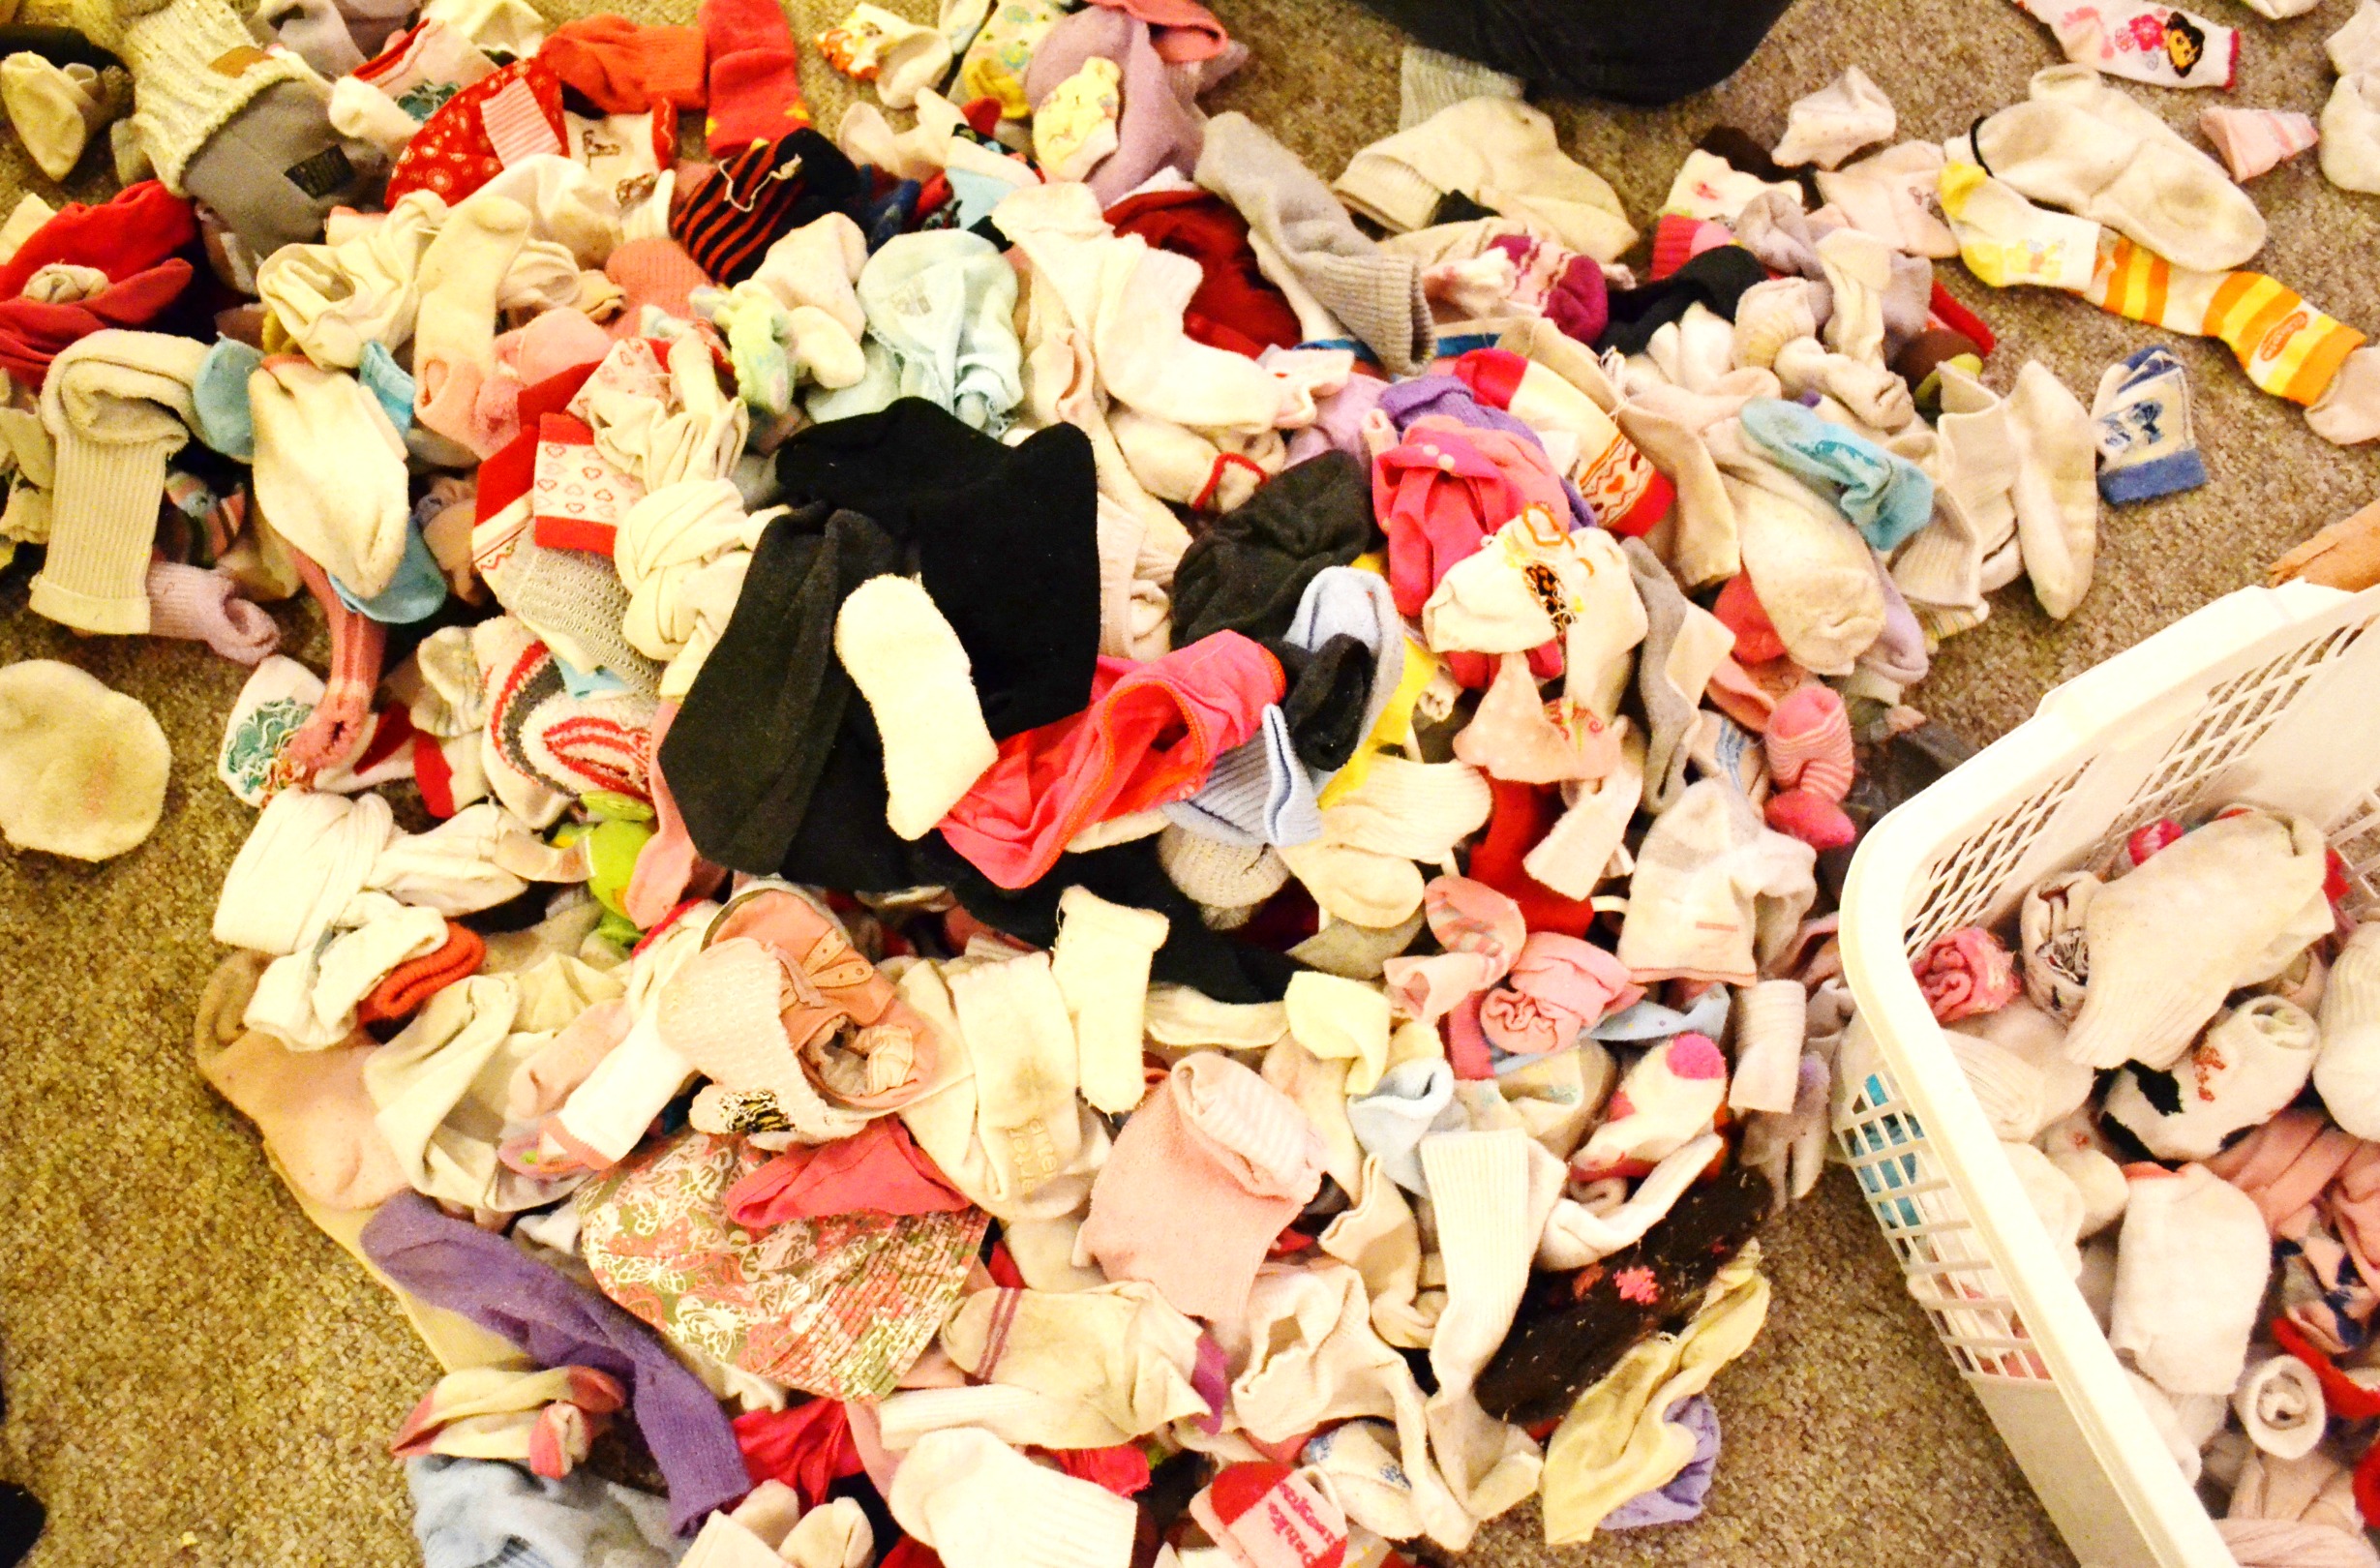
At any given time in our house we have a FULL laundry basket of socks. While it’s great for building early math concepts (sorting and matching) and for starting sock wars it is seriously annoying to deal with every laundry day. Because this has been a problem in our house for so long I decided we needed a better system for our socks and I came up with a great one. Rather than going through the hassle of pairing up socks every Sunday (the only time I seem to get around to finishing the 12 loads of laundry our family generates) when I am folding everything, I decided to implement a snap system.
I assigned each girl in our house a color (we used brown, pink, aqua and green) and attached snaps to each of their socks. The socks remain snapped together when not in use, and they get snapped back together after they are taken off and put into the laundry (hopefully!). Voila! No more sock matching. This will also help to cut down on the fighting over socks (yes, my kids fight over socks, they fight over a lot of things). Easy Peasy.
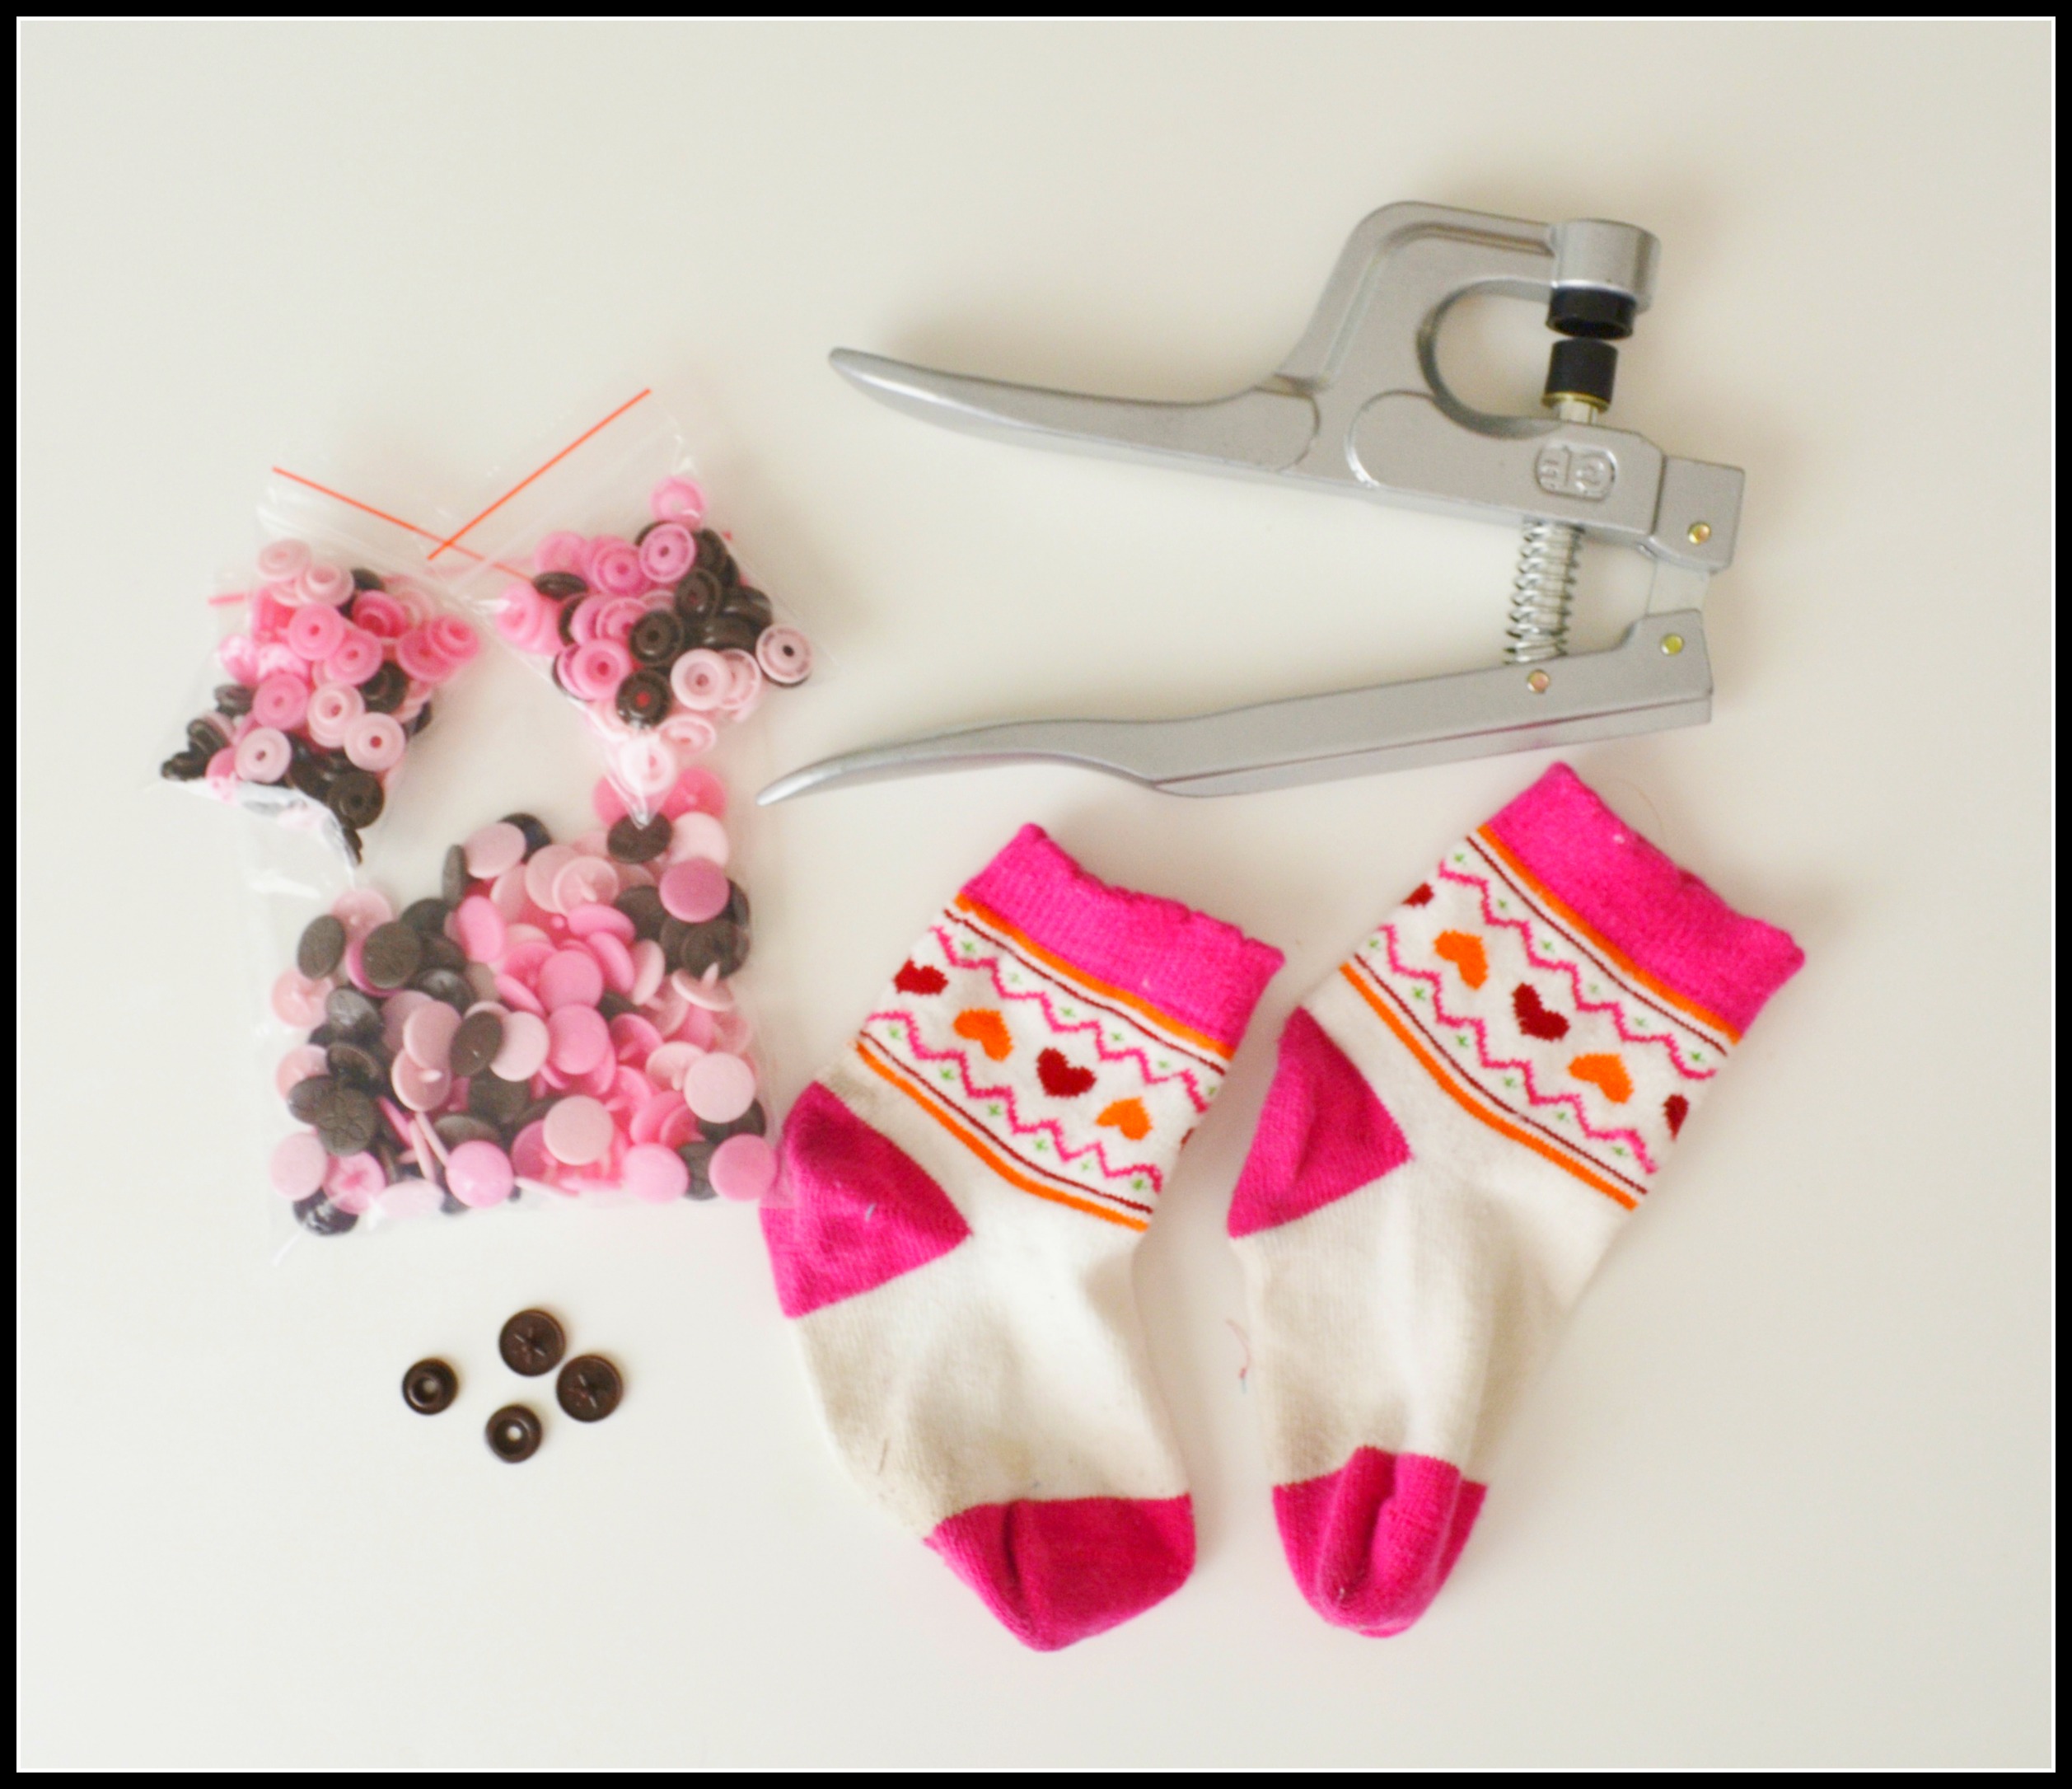
All I needed to do it were the socks we already owned, snaps, and a snap setter. As my girls get older I am going to just buy a specific sock style for each girl and continue to apply the snaps.
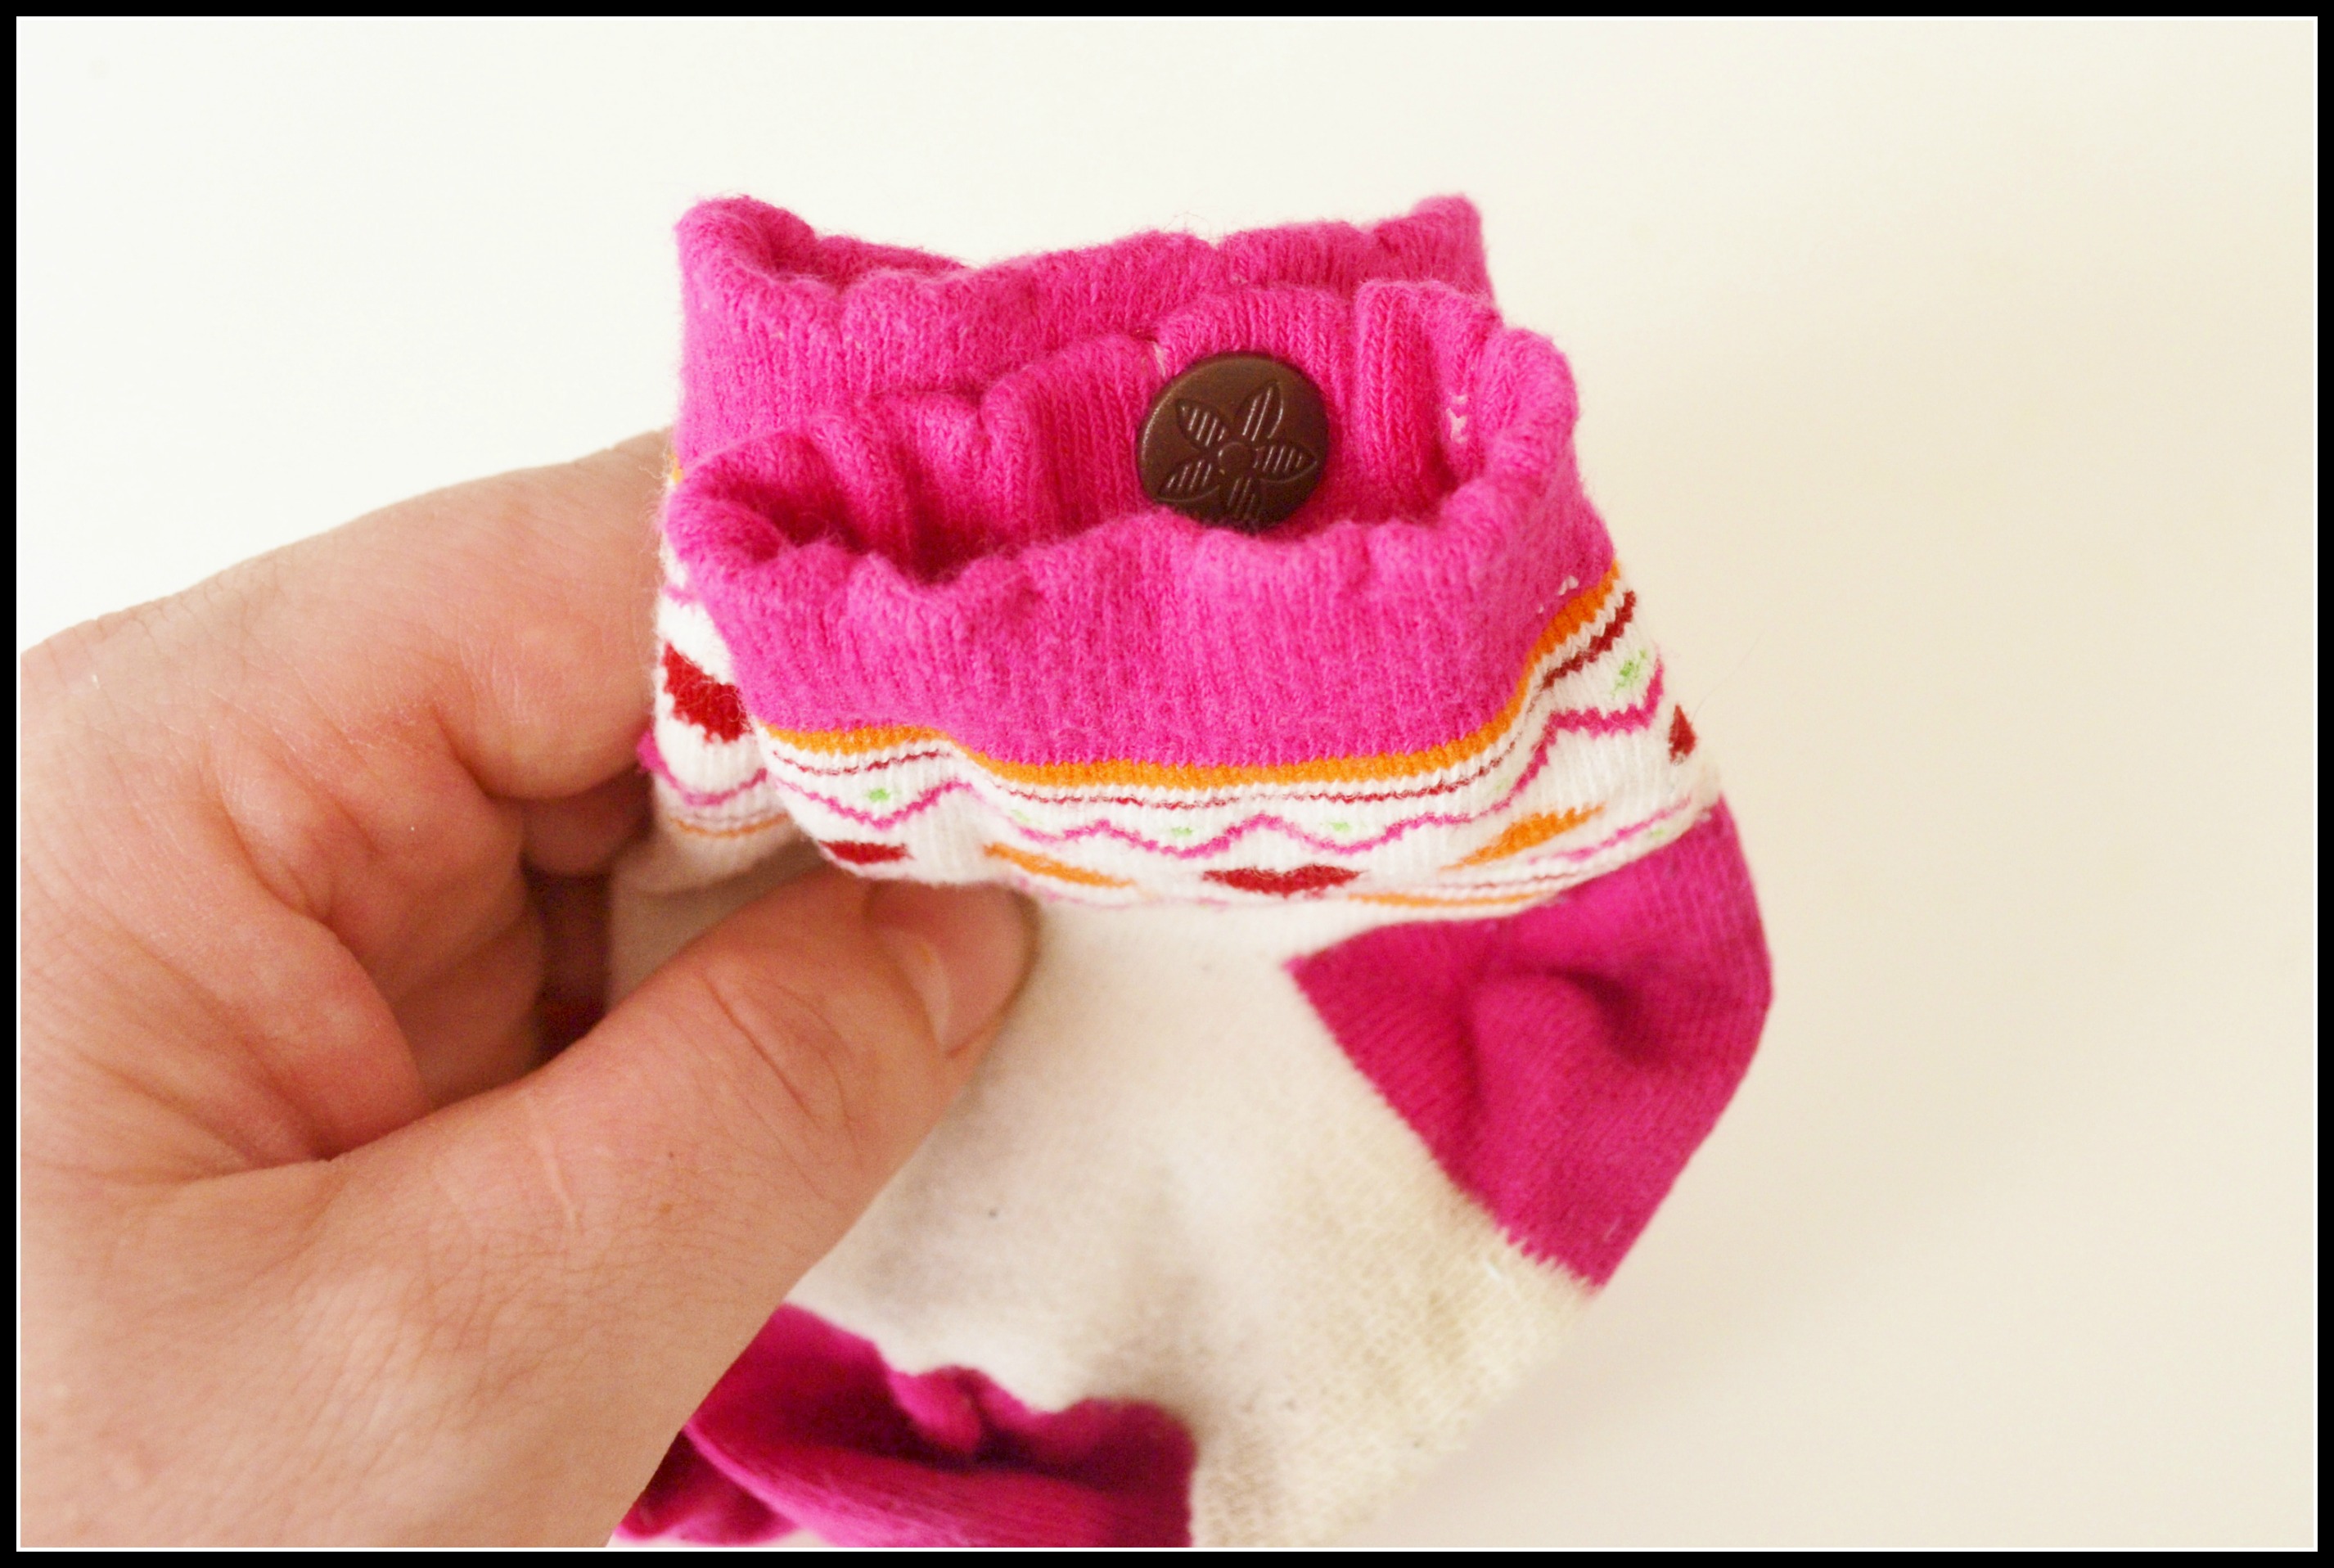
When I applied the snaps I made sure the smooth flat part of the snap was on the inside of the sock so little feet wouldn’t be irritated buy a pokey part rubbing on ankles. I also placed them on the inner ankles and not the heel, so that the heel of the shoe wouldn’t rub on the snap. Hopefully I will never see a full basket of socks again.
Do you have laundry issues? Something in your home that needs to be tackled?
Sugar free Chocolate Chip Cookies
 I would like to start by saying that I feel like I have a Dr. Jekyl/Mrs.Hyde thing going on in this blog. I post things like blueberry Cheesecake and Caramel Coconut Brownie Squares and then say that I am trying to cut the sugar out in my house. While I do enjoy cooking the super yummy sugary sweets from time to time for the most part I do try to keep the sugar to a minimum. I search for recipes and snacks that will satisfy my girls and keep me happy in the sugar department.
So when I first came across a recipe that had no sugar, no butter and no flour I was both excited and skeptical. I mean seriously, how good could they be? Well I decided to give them a try and hot diggity they were fantastic! They were sweet, light and very, very tasty. They have a slight toasted coconut flavor on the bottom too. Thebest thing of all? My kids D-E-V-O-U-R them. I have to make them 2-3 batches at a time because they vanish in this house.
They are perfect for lunches, snacks and if you want your kids to think you are the world’s best mom you can even use them as breakfast and still feel good about it. They are also safe to eat raw because they don’t have any egg in them (not that egg in cookie batter has ever stopped us from eating raw batter).
I don’t know why banana as a binder never occurred to me. It’s so smart! The cookies don’t have a banana flavor to them so if you aren’t a fan of banana then you will still enjoy these cookies.
Here’s the recipe:
3 mashed bananas
1/4 cup Coconut oil warm (not hot) so it isn’t solid
1 1/2 cups regular rolled oats
1 cup coconut flakes
1/2 teaspoon cinnamon
3/4 cup of almond meal
1 teaspoon vanilla extract
½ cup of chocolate chips
Preheat your oven to 350
In a large bowl combine your mashed banana, liquid coconut oil and vanilla, in a separate bowl mix together rolled oats, coconut flakes, cinnamon, and almond meal. Then stir your dry ingredients into the wet ingredients and combine.
If you don’t have almond meal on hand but you do have almonds just throw them in a food processor until they look like this:

Here’s where you can switch it up. If you want the good old chocolate chip experience add the chocolate chips. If you want truly sugar free cookies then you can use carob chips. If you want to skip the chocolate chips altogether you could use raisins, cranberries, dates or any dried fruit of your choosing. If you want to be sneaky you could even hide some ground flax seed in there too.
Scoop them onto a cookie sheet and bake about 12-15 minutes, until the bottoms of the cookies are browned. You should get about 30 small cookies. If you make them too big they won’t cook all the way through.
I hope you give them a try. They will be a new favorite. I promise.

Who’s up for a Quickie?

A valentines craft quickie that is! I decided to whip up one more before the big day is upon us. I saw a ton of felt and paper christmas garlands on pinterest and thought it would be really fun to adapt one for valentines day, This is another great one to get your kids involved with. Super fast and super easy.

First you cut out a whole bunch of hearts. Probably about 50-60 depending how long you would like your garland to be. This part is great for the kids to do, so you can cook dinner, fold laundry, clean the bathroom, you know, the fun stuff.
")
With what ever color thread you like, feed a needle through the center of the felt heart. Try to keep it in the middle so you can’t see the thread on either side of the heart. Repeat. Repeat. Repeat. Repeat. Well, you get the picture right?
")
You can space them with gaps between each heart.

Or no gaps. Whatever you like. If you are going to do gaps it might be a good idea to tie a knot on the string, thread your heart on and then tie a knot at the top of the heart. This will help them to remain evenly spaced.
")
See I told you it was fast. I hope you have a great Valentine’s day and spend it with people you love.
Hearts, Hearts Everywhere!
So with Valentines day quickly approaching added to the fact that I have 4 little girls in my home means that on top of the regular amount of pink in my house, we are now bombarded with hearts too. I don’t mind too much. My husband, well, he puts up with it. The craft that we worked on earlier in the week will be sticking around for a while. So I guess that means he will have to put up with it for a while.
My girls have been in a room that has desperately needed some decoration. We have done posters from time to time but they never seem to last long. I was also wanting to do something a little more permanent so this is what we came up with.

This was a really easy craft and very hands on for my older two. I actually gave them each a canvas to work on and let them do whatever they wanted to on theirs. I did this one on my own. There is a perfectionist streak in me that I am working on but I can’t quite let it go. So we did one together too.

They loved the dragonfly punch so they went crazy punching them out. We worked on the yellow one together.
If you would like to give this a try it’s super easy and, this is my favorite part, cheap! I spent twenty dollars on a 5 pack of canvas and then I used things that I already had on hand. Here’s what you will need:
Canvas
Paint and brushes
Paint Chips
Paper Punches, whatever shapes you want.
Glue or pop dots
First you paint your canvas whatever color you like and allow plenty of time to dry. About twenty-four hours. Using the paint chips (which you can get for free if you go to the paint section of your local hardware store or Wal-mart and ask very nicely) punch a big pile of hearts. When my canvas was dry I placed the paper shapes where I wanted them to go and used pop dots to stick on the hearts. The pop dots added a nice bit of dimension. It makes the picture stand out a bit. That’s it. Easy peasy lemon squeezy.

This is a great craft to do with your kids. What I loved about doing it was watching how the different personalities of my girls came through while we were crafting. My eight year old was very meticulous and took her time placing the pieces and my six year old just took piles of shapes and put them on piles of glue. I really had fun doing this craft, if you give it a try I would love to hear what you think. Do you have a favorite activity to do with your little ones?

Valentines Treats
I can’t believe it but here we are two full weeks away from valentines day and I have actually finished the valentines for my oldest two girls classes. Seriously. If you knew me you would know that I am usually finishing these things at 11:00 the night before they need to be there. But for whatever reason I actually finished them early and I love the way they turned out.

This was a super easy food craft to make and it was a lot of fun for my girls to help with. From making the bark to packaging it up they were very hands on. Which was great because they like to be hands on. Which is sometimes hard for me because I want things to look perfect but that’s a post for another day.
The process to make the bark was very easy. For 45 kids I used about 3 lbs of melting wafers. Half white chocolate and half milk chocolate, conversation hearts and colored sprinkles of your choice. Over low heat we melted the white chocolate wafers and poured them onto a large clean cookie sheet. We did the same with the milk chocolate wafers and poured them over the white chocolate before it set. Before the milk chocolate sets sprinkle the conversation hearts on and then your sprinkles.
This is what you’ll have:

A yummy chocolatey tray of Valentines treats. Now for the fun part. Break it up. Snap it into evenly sized pieces. You will want to make sure that you have a few extra pieces left for testing. Quality control is very important.

At our local dollar store we found packages of forty valentines themed cellophane bags for a dollar, the perfect price for us, and packaged them up.

I had been looking on pinterest for some valentines printables and found these and these (I don’t know if I will ever get through another post without mentioning pinterest). Printed them out and they were a perfect fit.

What are you doing for Valentines Day? Do you have anything special planned for your kids?
Apple Quinoa Muffins
I know I have been doing a lot of posts about baking lately and I will be getting back to crafting soon. I actually have a couple of really cute Valentines crafts coming up in the next couple weeks. But for now we are on a baking spree.

Each Sunday I try to get some baking done so my girls have some nutritious nibbles for their lunches. I have 2 school aged children and two little ones at home so whatever I make I have to make a lot of. It needs to be low sugar, because I am on a mission to minimize the amount of sugar my kids consume. It has to be healthy. It has to be baby friendly because I am doing baby led weaning with my 9 month old, and it has to be tasty because I have two very picky children.

Recently I have been using quinoa in a lot of my baking and cooking because it is a fantastic grain that has a ton of health benefits and is a complete protein on it’s own.
A while ago I made a pumpkin quinoa muffin that was really good. I figure since I am on an apple kick these days that I would change things up a bit and play with the recipe.
After a couple of attempts, I came up with a version that I am pretty happy with. If your kids are picky about textures you can blend the cooked quinoa with the milk in the recipe and it will produce a smoother texture in the muffin. This is what I have to do for my oldest two.

Apple Quinoa Muffins
2 cups cooked Quinoa
1/4 cup vegetable oil
2 1/2 cups all-purpose flour (you could use half whole wheat if you like)
1 Tbs cinnamon
2 medium grated apples
2 eggs
½ cup agave syrup
1 1/2 teaspoons baking powder
1 pinch of salt
1 cup milk
1 teaspoon vanilla extract
.
Preheat your oven to 350. Yeilds 12 Large muffins or 18 medium sized muffins
I use silicone muffin cups, which are fantastic, but if you don’t have those grease a muffin tin.
Combine flour, baking powder, sugar and salt in a medium bowl. In a separate bowl mix together the milk, oil, quinoa, vanilla, and egg. Stir in the grated apples. Add the dry ingredients and stir until just moistened, and portion out the batter.
Bake for about 20 minutes or until the top of the muffin springs back when you touch it.
This makes a great addition to school lunches. Because they are loaded with protein they fill up little stomachs and give a great boost of energy.
What are some of your favorite things to put in lunches?
