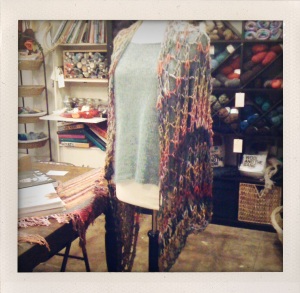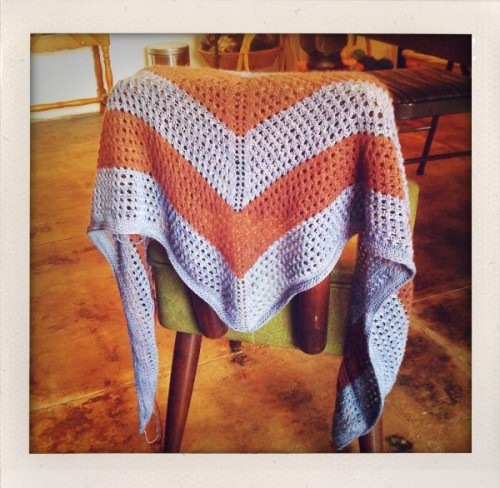
Blog has moved!

The blog has moved.  Please follow updates over here: The Little Knittery

A Cuddly Cactus

These are the cuddliest cacti around!  Pet ’em, squeeze ’em, accidentally brush against them- no pricks!

Plus, they’re even heartier than their living counterparts, so no lack of watering or sunlight will do them in!

The cactus is knit flat and then seamed and stuffed.  This pattern is very easy to alter and customize.  Try out some different stitch textures if you’re feeling adventurous, like seed stitch, or maybe even a simple old garter.

Materials Needed

– Approx 50 yds chunky or bulky weight green wool blend yarn (smaller weight yarn will make a smaller cactus, larger weight yarn will make a bigger cactus) – I used some leftover Cascade Baby Alpaca Chunky for super-extra cuddliness

– Knitting needles one or two sizes smaller than reccommended for the yarn you are using (smaller needles means tighter stitches, means no stuffing sticks out) – I used US size 8

– A plant pot

– Floral foam* that will get nicely wedged inside your pot

– Floral picks* about the height of your pot if not taller

– Stones to lay at the base of your cactus

– Polyfil

– Jumbo darning needle

You can get all of that weird floral stuff at Michael’s.  The floral foam is basically green styrofoam that will shed a bit, the floral picks are green wooden giant toothpicks, essentially.  In place of floral picks you can probably use a pencil or a knitting needle, or a part of a wire hanger.  You get the idea; something rigid and pointy.

Instructions

Cast on 19 sts.

(The cactus rib pattern is based on a multiple of 3 sts, plus 1.  So if you want to make a bigger or smaller cactus and stick to the ribbing pattern, you will cast on a multiple of 3, and then add an extra stitch.)

Repeat the following two rows for 5 inches (or more or less, depending how tall you want your Cuddly to be):

Row 1: (K1, p2) repeat until 1 stitch remains, k1.

Row 2: (P1, k2) repeat until 1 stitch remain, p1.

When you reach 5 inches, work Row 1 one more time.

Decrease Row 1: (P1, k2tog) repeat until 1 stitch remains, P1

Decrease Row 2: P2tog until 1 stitch remains, P1.

Slip all your stitches onto your free needle so that the yarn is now attached to the bottom stitch on the needle.

Cut yarn from ball, leaving a 12″ tail.  Thread tail onto jumbo darning needle and slip all of the stitches onto the tail, stretching the yarn across the back of the knit piece, lifting each stitch off of the needle and onto the tail yarn as you go.

When you have slipped the last stitch, pull the yarn tight like a drawstring and sew a seam down the side of the cactus.

Stuff with fiberfill.  Cut your pot-filler to fit tightly inside of you pot .  Use the stick to poke a prep hole in the filler.  Insert the stick into the stuffing to hold the cactus up.  Insert the stick end of the cactus into the hole.

Arrange the stones around the bottom of the cactus.  Voila!

Lavender + Chocolate

Lavender + Chocolate

Lavender + Chocolate: two of my favorite things!

This super soft and lightweight chill-blocker is worked from the top-down, using YO increases to create a triangular shape, in a basic eyelet stitch, with a few wide stripes thrown in to highlight the V-shape which results from the increases.
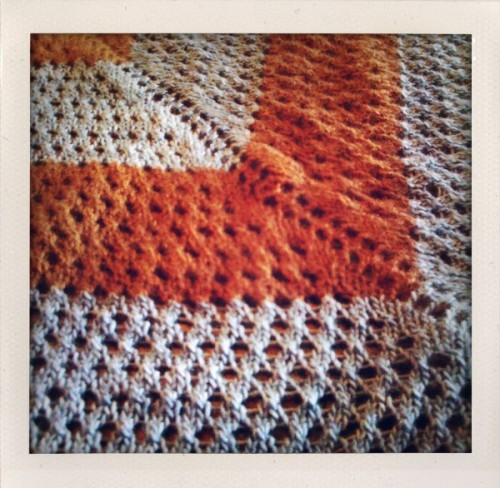
A simple eyelet.

A simple eyelet.

If you’ve been wanting to try out lace, the basic eyelet is a great place to start.  This eyelet pattern consists of four rows repeated, and only one of those rows makes the actual lace openings.  The other three rows continue the method of YO increases on a stockinette stitch background.

Lavender + Chocolate is also beautiful in a self-striping yarn or a solid color.

Lavender + Chocolate by Julie Edwards for The Little Knittery

Materials: 1 ball Schaefer Yarns Andrea (50% silk, 50% wool), 1 ball Jade Sapphire 2-ply Cashmere, or 400 yards each in two different colors (a Main Color and a Contrast Color) and/or fibers of lace, fingering, or sock yarn, US size 4 32″ circular needles, 2 markers, jumbo darning needle

Instructions:

Using MC (Main Color, in this case the purple) cast on 3 sts.  Knit 6 rows.  You will have a small rectangle.  Now, pick up and knit  6 sts from the long edge of the rectangle.  You may have to fudge this slightly to get all 6, but persevere.  You will now have sort of a weird knitted nub:

This is what it should look like after you’ve picked up and knit 6 sts along one side edge of your knitting.

You now have 9 sts on the needle.

Prep Row: K4, YO, pm, k1, pm, YO, k4.  These markers will serve to separate the very center stitch from the rest of the sts.

Row 1 (wrong side): K3, YO, purl to marker, slip marker, k1, slip marker, purl until there are 3 sts left on the needle, YO, K3.

Row 2 (right side): K3, YO, knit to marker, YO, slip marker, K1, slip marker, YO, knit until there are 3 sts left on the needle, YO, K3.

*Notice that you have a YO before 3 knit stitches on either end of the piece, but ONLY on Row 2 (the right side row) do you have YOs on either side of the center stitch.

Repeat Rows 1 and 2 6 more times.  You can continue with these two rows if you’d like to keep it simple.  The resulting shawl will be in stockinette stitch, still very beautiful, and a lot warmer!  But if you’d like a little challenge, you will now switch over to the eyelet lace pattern, which is 4 rows repeated:

Eyelet Row 1 (wrong side): K3, YO, purl to marker, slip marker, k1, slip marker, purl until there are 3 sts remain, YO, K3.

Eyelet Row 2 (lace row): K3, YO, k1, YO, *ssk, YO.  Repeat from * until 4 sts before the marker, ssk, K2, YO, slip marker, K1, slip marker, YO, K2, **K2tog, YO.  Repeat from ** until 6 sts remain , K2tog, YO, K1, YO, K3.

Eyelet Row 3: As Row 1 (but this time you will be purling the YOs as well as the knit sts.  They will feel much looser than regular stitches, but you will treat them the same.)

Eyelet Row 4: Row 2 (right side): K3, YO, knit to marker, YO, slip marker, K1, slip marker, YO, knit until there are 3 sts left on the needle, YO, K3.

Repeat Eyelet Rows 1 through 4 until you have 14 rows of eyelets at the center of the piece (you can just count the holes from up to down), having just finished Eyelet Row 3.

Switch to CC (Contrast Color, in this case the brown).  Beginning with Eyelet Row 4, work Eyelet Rows 1 through 4 until you have 12 rows of eyelets at the center of the piece (you can just count the holes from up to down), having just finished Eyelet Row 3.

Now you will switch back to MC, and work as above, switching to CC after 14 center eyelet holes, and so on until you have worked 2 more MC stripes, and 1 more CC stripe.  (That’s 3 MC stripes and 2 CC stripes total.)

Now you will work the garter stitch border:

Garter Border Row 1:  K3, YO, knit to marker, slip marker, k1, slip marker, knit until there are 3 sts left on the needle, YO, K3.

Garter Border Row 2: K3, YO, knit to marker, YO, slip marker, K1, slip marker, YO, knit until there are 3 sts left on the needle, YO, K3.

Repeat the Garter Border Rows for 6 rows total.

Bind off loosely using the US size 6 needle.

Mesh and Lace

Mesh and Lace, worn to the side

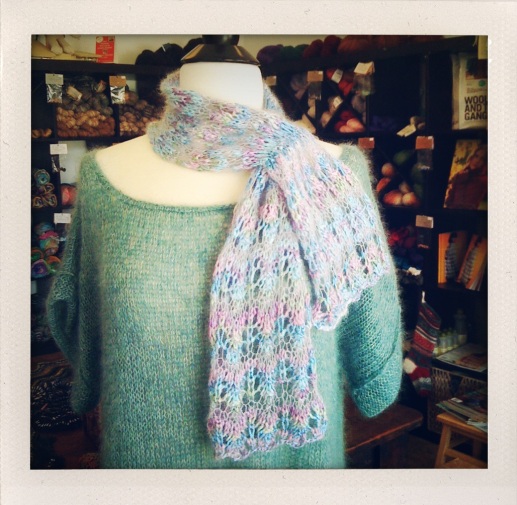
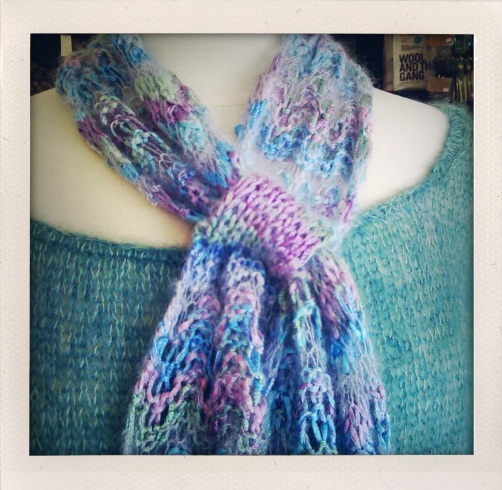
Mesh and Lace is a hidden keyhole cravat.  A 1×1 ribbed loop is knit on the backside of the piece to pull the cravat through so it will stay wrapped exactly as snug as you like.

Mesh and Lace, turned inside out

The mesh and lace texture is created by knitting a strand of a silk and baby mohair laceweight yarn together with a self-striping ribbon, and then, every few rows, the laceweight silk-mohair is knit alone.

Mesh and Lace – it scrunches in where the hidden keyhole is.

This is a good beginner-intermediate lace project.  It’s 2 rows repeated, so easy to memorize and work without having to refer to the pattern.  And then every 6 rows the laceweight mohair is worked single (with the ribbon yarn carried up the side) in a simple stockinette.

Mesh and Lace by Julie Edwards for The Little Knittery

Materials: 1 ball Cascade Kid Seta (yarn A), 1 ball Schulana Macaibo (yarn B), US size 10.5 SP knitting needles, stitch holder,  jumbo darning needle

Instructions:

Using Yarn A and Yarn B held together, cast on 31 sts.

Row 1:  Sl 1, K1, psso (pass the slipped stitches over the knit stitch on the right-hand needle, like when you cast off), *k1, (yo, k1, yo), k1, (sl 1, k2tog, psso).  Repeat from * until 4 sts remain, k1, (yo, k1, yo), sl 1, k1, psso.

Row 2: Purl every stitch.

Repeat Rows 1 and 2 two more times (6 rows total.)

Rows 7 – 8: Using only Yarn A, knit a row, then purl a row,

Repeat rows 1 through 8 for 31″. having just completed a wrong side row using Yarn A and B together.

Now you will divide the yarn up for the Hidden Keyhole at the back of the piece: Slip 1 stitch onto the stitch holder and knit the next stitch.  Repeat this until you have every other stitch on the stitch holder.

Work a k1, p1 rib using the remaining 16 stitches and holding Yarn A and B together for 2.5″.  This will form a tight little ribbed section.

Now, put all the stitches back together: knit 1 stitch from the needle and 1 stitch from the needle holder until all 32 stitches are on the knitting needles again.

Now repeat Rows 1 through 8 from above for another 8″, making sure to maintain the right side and the wrong side of the fabric!  (So, look at your work after you get your 32 stitches back on the needle, and work the row that is facing you.  If you are looking at the backside, then work the purl row, if you are looking at the front side of the lace, work a lace row.)

Bind off on a lace row, in other words, you will be working a Row 1 while binding off.

The Mesh and Lace Hidden Keyhole Cravat


Broomstick Lace Minifnity Scarf

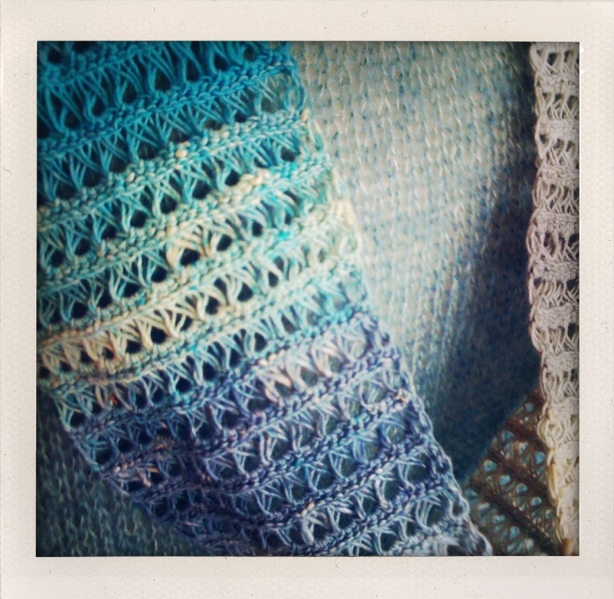
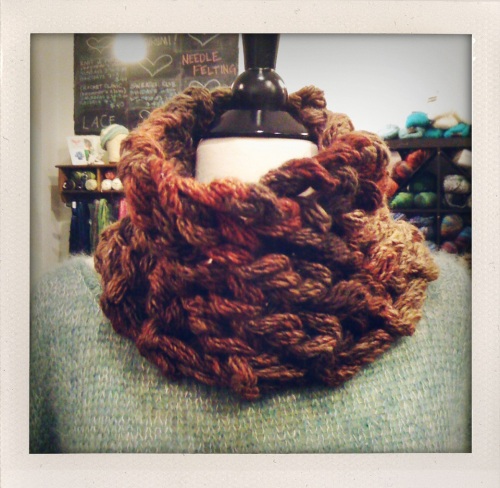
What’s that stitch?  Is it crochet?  Is it knitting?  That’s what your friends will ask as they study your minifinity scarf.

Actually, it’s broomstick lace.  I’d always wondered what broomstick lace was, and then when someone told me you made it using a large knitting needle and a small crochet hook, I became even more bewildered.  How could that possibly work?

Then a customer came into my shop and she was working on a broomstick lace top.  I watched her doing it, and it was amazing!  Broomstick lace (named for the broomstick artisans would use to make the lace before enormous knitting needles were available) is very closely related to crochet.  If you are comfortable with crochet, broomstick lace is a cinch.  However, if you have never crocheted before, I’d recommend learning crochet before jumping in to broomstick lace.

This Broomstick Lace Minifinity Scarf is a great way to explore broomstick lace.  The piece is worked flat like a small, narrow, scarf, and then the ends are sewn together.

Broomstick Lace is also called Jiffy Lace, referring to how quickly it can be made.  It’s also known as the Peacock Stitch or the Peruvian Stitch.

 Broomstick Lace Minifinity Scarf

Materials:  1 ball Noro Taiyo Sock, 1 US size 15 knitting needle (you only need the one),  size B crochet hook

Instructions:  Ch 40.  Sk 2ch, *reach into next chain, pull up a loop, and place loop on size 15 needle.  Repeat from * until the end of the starting chain.  (You will be holding the large knitting needle in your left hand and the crochet hook in your right.  This might get awkward, just bear with it and find your comfort level.)

Now you should have 39 loops on your knitting needle.

To begin: Insert crochet hook into the first 3 loops from above (as if to purl) and wrap the yarn pull up a loop, making a slip stitch.  Remove the 3 loops from the knitting needle.  Work 2 sc into those 3 loops bunched together.  *Insert crochet hook into next 3 loops, work 1 sc into those 3 loops bunched together.  Remove the 3 loops from the knitting needle.  Work 2 sc into those 3 loops bunched together.  Repeat from * to end of row of loops on needle.  You

Row 1: Place remaining active stitch on the knitting needle in your left hand.  That becomes your first loop.  Using the crochet hook and working from left to right, *reach into the back half of each stitch with the crochet hook, pull up a loop, and place that loop onto the knitting needle.  Repeat from * until you have 39 loops on your knitting needle.

Row 2: Insert crochet hook into first 3 loops from above (as if to purl) and pull up a loop, making a slip stitch.  Remove the 3 loops from the knitting needle.  Work 2 sc into those 3 loops bunched together.   *Insert crochet hook into next 3 loops, work 1 sc into the 3 loops.  Remove the 3 loops from the knitting needle.  work 3 sc into those 3 loops bunched together.  Repeat from * across all the loops on the knitting needle.

Repeat Rows 1 and 2 until piece measures 48″.  Cut yarn and pull through final loop, as you would finish any crochet piece.  Sew the two ends of the piece to each other.

For a good visual broomstick lace tutorial, check out this video on youtube http://www.youtube.com/watch?v=QzzlVMwewnY

Macrame Mason Jar Hanger

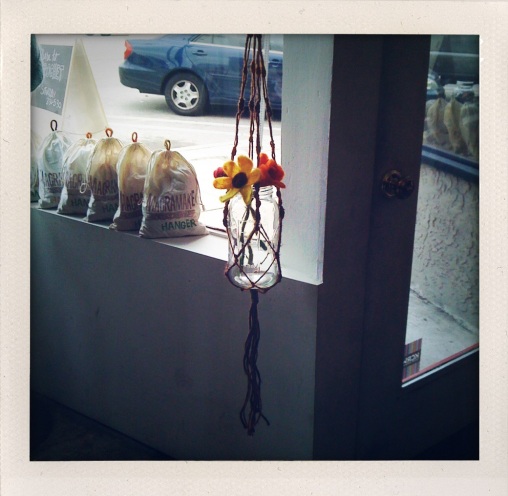
This is one of the simplest, most meditative macrame designs I could come up with.  It is made using two different colors of jute, and when it’s finished, it can hold a jar with flowers or a candle or jellybeans or anything really!

Peacock feathers?  Drumsticks?  Your crystal collection?  You could even make a bunch of them, drop in little tea lights, and hang them from the trees in your garden.

Download a free pdf on how to make your Mason Jar Hanger here.

If you have trouble downloading the pdf, email thelittleknittery-at-gmail-dot-com with subject line ‘Mason Jar Hanger’ and we’ll get you that pattern!


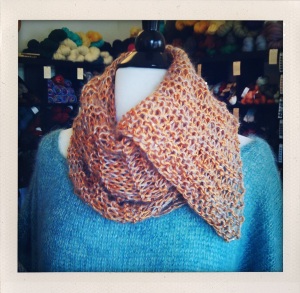
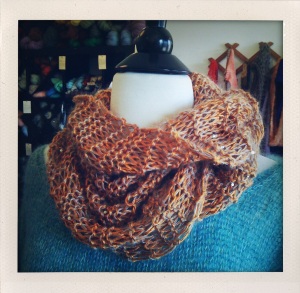
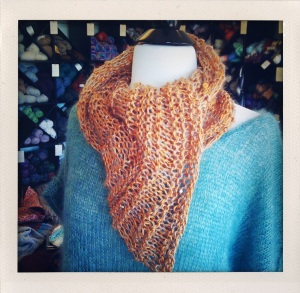
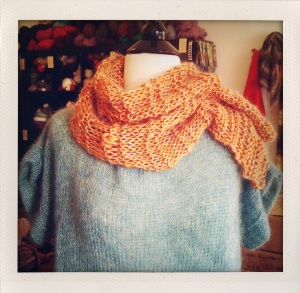
The Odori Cowl

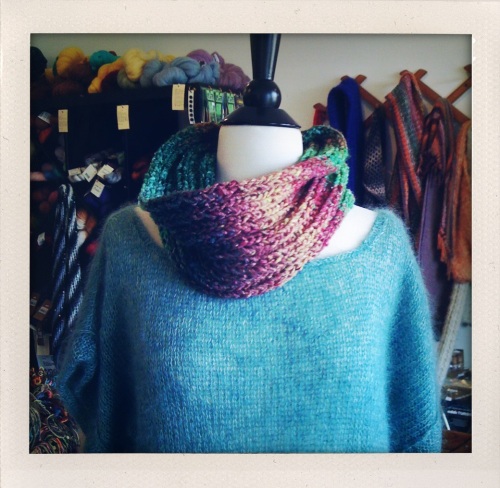
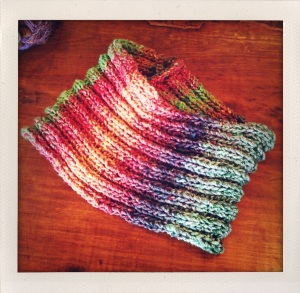
The Odori Cowl was born in one of those perfect bursts of random inspiration where out of the blue I knew exactly how many stitches to cast on, precisely what needle size for maximum drape, resulting in the complete and serendipitous usage of only 1 ball.  It was magical, one of those cherished and rare knitting moments where I actually didn’t have to frog it and start all over again.

And did I mention I’ve worn it every day since?

The Odori Cowl is knit from one skein of beautiful Noro Odori yarn, a chunky, self-striping quadruple-whammy of angora, silk, kid mohair, and wool.  So soft and supple!  You can knit one of these in only a couple hours.  Make one in every colorway!  I am…

The Odori Cowl by Julie Edwards

Materials: US size 15 needles, 1 ball Noro Odori Yarn (110 yds, 14 sts per 4″), jumbo darning needle.

Instructions:

Cast on 32 stitches loosely.  Work a K2, P2 rib until you have used up almost the entire ball (leaving enough tail for cast off and finishing).  Cast off loosely and sew the two ends together.

Image

Driftwood

photo(32)

I’ve been wracking my brain (and clacking my needles) for a simple project that only uses 1 ball of Katia Kimbo, a beautiful, but slightly pricey, woven-textured yarn.  And so I came up with Driftwood.

The stitch is a simple lattice work stitch– and a great introduction to lace.  The piece is worked flat, and then sewn closed.

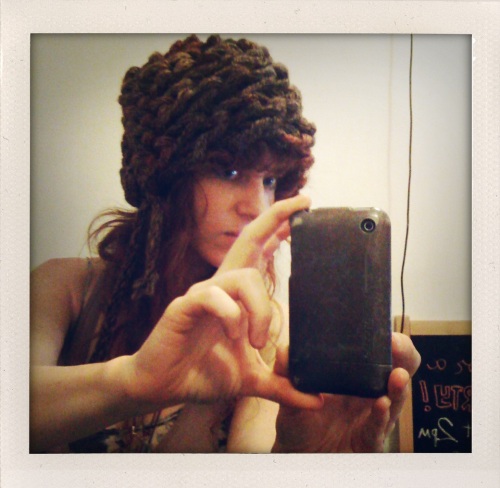
You can make Driftwood in under an hour, I promise!  (I think I made mine in about 20 minutes…)  It’s knit on the largest existing needles (US size 50) using an extra super bulky yarn which consists of several strands of soft striping single ply yarn.

It’s also a super cozy, statement-making headpiece.

And here’s the pattern:

Driftwood by Julie Edwards

Materials: 1 ball Katia Kimbo, US size 50 needles

Instructions:

Cast on 8 sts.

Row 1: Knit 1 stitch, *Yarn Over, Knit 2 together.  Repeat from * until 1 st remains, knit the last stitch.

Repeat Row 1 until you have used up almost the entire ball.  Cast off knitwise, leaving enough tail to sew the seam.

The ‘Twinkle Twinkle Little Cowl’ Cowl

Using alternating rows of knit and purl, with a 100% silk yarn and a paillette mohair held together, the Twinkle Twinkle Little Cowl cowl (say that ten times fast) can be knit in a night, and is a perfect project if you have just learned how to knit and want to polish up your purls.

The piece is knit flat, and then one end is sewn to the center of the piece, rather than the outside edge.  So what you end up having is a cowl with a big flap hanging off, which you can tuck in, turn inside-out, or just let hang down.

Twinkle Twinkle Little Cowl

Materials: US size 11 needles, 1 ball Himalaya Duke Silk Yarn, 1 ball Schulana Kid-Paillettes, jumbo darning needle

Instructions:

Cast on 38 sts loosely.

*Knit 5 rows.  Purl one row.  Repeat from * until piece measures 18 inches from cast on.

Cast off loosely, leaving a 10″ tail.

Using the darning needle, sew the cast off edge to the center of the piece, lining up the top corner with the top edge, and the bottom corner with the bottom edge.  You’ll end up with a small cowl with an extra flap hanging off of it.

You can wear the flap out, like a small scarf, tuck it in, like a cowl, or turn it inside-out with the flap folded over the edge, like a collar.

Weave in ends.

Graffiti Wrap

Knit on the very biggest needles there are and using a simple eyelet stitch, the Graffiti Wrap is a great baby-steps introduction to lace knitting.

This lace stitch really gets the most mileage out of the yarn.  Try the same pattern with smaller yarn and needles, and you will get a more delicate lace.  I love using this lace pattern in just about everything!  (See the Lace Beret and Lacy Beret: Chunky Edition)

Graffiti Wrap

Materials: US size 35 or 50 needles, 2 balls Katia Inca

Instructions:

Cast on 25 sts.

Row 1: Slip the first stitch knitwise, purl remaining stitches.

Row 2: Slip the first stitch purlwise, k1, *yo, k2tog.  Repeat from * until 1 st remains, k1.

Repeat rows 1 and 2 until desired length.  (I used about 1 and a half balls.)  Cast off loosely.  Weave in ends.