As a knitter who thinks out of the box, I get inspiration from all kinds of places. Usually the more “difficult” a shape looks, the more eager I am to try knitting it! I’m a pretty huge stickler for detail as well, and I try to make models as accurate as possible. Given that stuffed toys are safer than their metal or plastic counterparts, I try to design items that not only provide an alternative, but provide an alternative that you and your children would RATHER play with! With that in mind, the charming little details mean a lot to me.
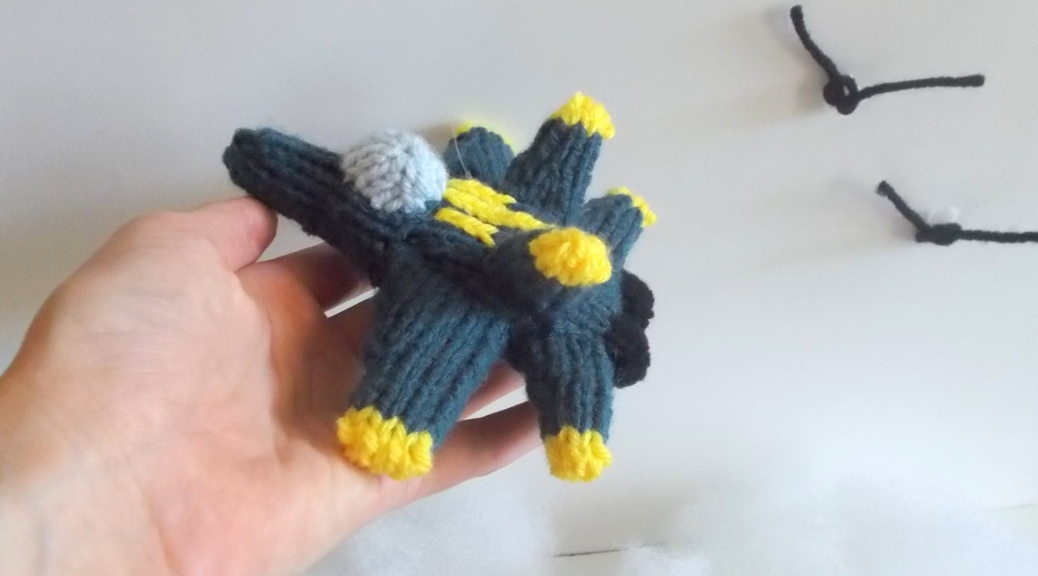
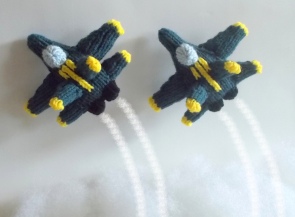
This week’s free pattern was inspired by a trip down the model vehicle aisle at the craft store. Since vehicles are a passion of mine, I love looking at those tiny models! Well, this time I came to the end of the aisle and a Snap-Tite model of a Blue Angels F-18 Hornet Fighter Jet caught my eye. I immediately whipped out my camera and snapped a few pictures! For those unfamiliar with the Blue Angels, they are the United States Navy’s flight exhibition squad. They do all kinds of fancy maneuvers, tricks and formation flying.
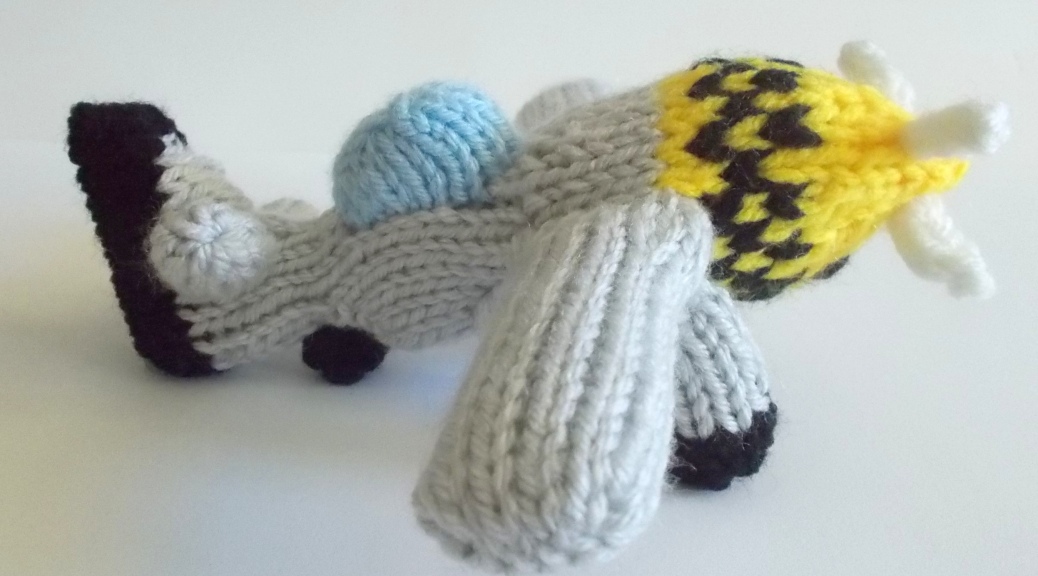
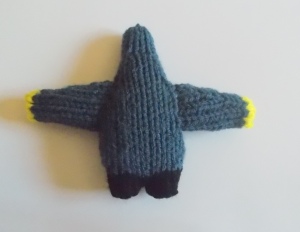
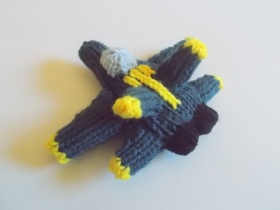
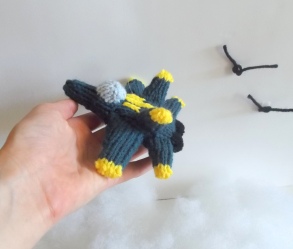
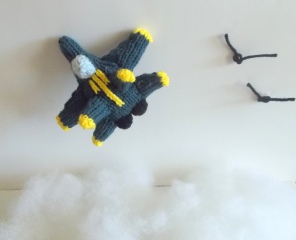
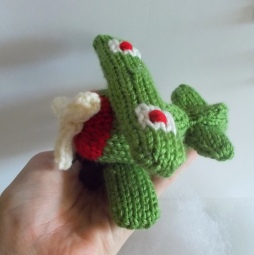
This little Fighter Jet model, at about 5 inches long and 5 ½ inches in wingspan is the perfect size for taking with you wherever you go. Also, the little ones can toss it around to make it “fly” without the worry of causing damage or injury. I bet they’d make a pretty awesome mobile or other hanging display, too. I made my models in the blue and yellow signature colors of the Blue Angels squad, but you can try knitting it in your child’s favorite colors, or forego the color changes and make it a single color. The model would also take well to additional embroidered or felt details to make it special for your family! I hope you love it as much as I do!
Small Fighter Jet Knitted Toy
by Ilana R. Marks
Materials:
-Small Amounts of Worsted Weight Black, Dark Blue, Yellow and Light Blue Yarns
-One Set US Size 6 Double Pointed Needles (dpns)
-Small amount of Polyester Fiberfill Stuffing
-Tapestry Needle
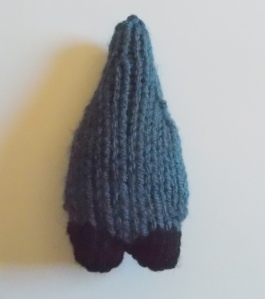
Main Fuselage
“Thrusters”
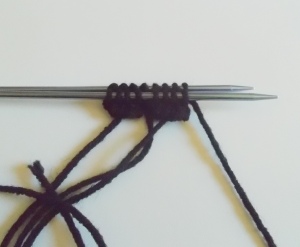
Using black yarn, cast on 8 stitches evenly onto 2 dpns and join to knit in the round.
Rnd 1-2: Knit 2 rounds.
Cut Black Yarn, leaving a short tail.
Set this thruster piece aside – you may leave it on the needles.
Onto 2 more dpns, cast on 8 stitches and join to knit in the round. Repeat Rounds 1 and 2 above to make a second thruster. Do not cut the black yarn.
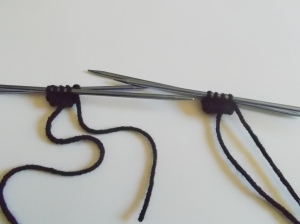
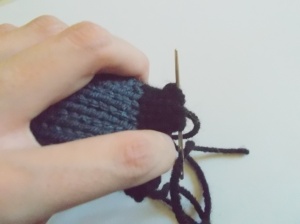
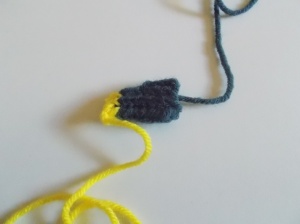
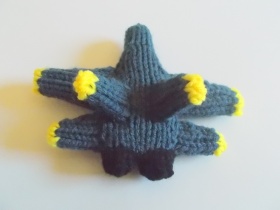
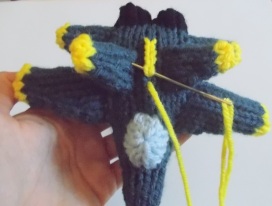
-Line up the stitches from the two thrusters as pictured. The working yarn is coming off the rightmost stitch on the back needle of the set on the right.
-Slide the front four stitches from the right set of needles onto the front needle of the left hand set.
-Slide the back four stitches from the right set of needles onto the back needle of the left hand set.
-You’ll now have two needles with 8 stitches apiece on them, with the working yarn coming off the rightmost stitch of the back needle. Now the thrusters are side-by-side waiting to be joined.
Joining
Knit the 8 stitches on the front needle, then turn and knit the 8 stitches from the back needle (16 st)
Cut the black yarn, and join the dark blue yarn. Distribute the 16 stitches onto 3 dpns (for easier working) and continue to knit in the round.
Rnd 3-4: Knit 2 rounds.
Rnd 5: kf&b, k6, (kf&b) 2 times, k6, kf&b (20 st)
Rnd 6-15: Knit 10 rounds.
Rnd 16: ssk, k6, k2tog, ssk, k6, k2tog (16 st)
Rnd 17: Knit 1 round.
Rnd 18: ssk, k4, k2tog, ssk, k4, k2tog (12 st)
Rnd 19-22: Knit 4 rounds.
Stuff the piece.
Rnd 23: (k2tog, k1) 4 times (8 st)
Rnd 24-29: Knit 6 rounds.
Add some more stuffing to the nose piece.
Rnd 30: (k2tog) 4 times (4 st)
Cut the blue yarn, thread the tail into a tapestry needle and draw through all stitches on the needles, pulling tightly to finish.
-Weave the end back down into the closed up nose and into the toy to secure.
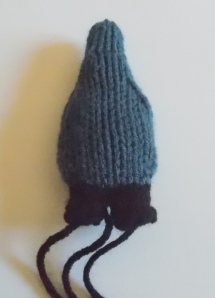
-Add a little stuffing to the thrusters through their cast-on openings. Weave the black cast on tails through the loops of the cast on edge, pulling tightly to cinch closed. Weave the ends through the closed up thrusters and into the toy to secure. You may use the tail between the two thrusters to close up any gap there – then weave in that end as well.
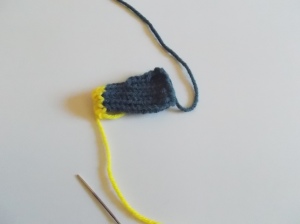
Front Wings (Make 2)
Using Dark Blue Yarn and leaving a tail for seaming, cast on 12 stitches onto 3 dpns and join to knit in the round.
Rnd 1-3: Knit 3 rounds.
Rnd 4: ssk, k8, k2tog (10 st)
Rnd 5-7: Knit 3 rounds.
Rnd 8: ssk, k6, k2tog (8 st)
Rnd 9-11: Knit 3 rounds.
-Cut the blue yarn and join the yellow yarn, continuing to knit with yellow.
Rnd 12-13: Knit 2 rounds.
-Cut the yellow yarn, leaving a short tail for seaming.
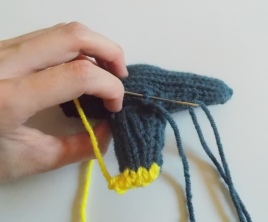
-Divide the 8 stitches evenly onto 2 dpns (4 stitches per needle), with the working yarn coming off the rightmost stitch on the back needle.
-Seam the two sets of stitches using Kitchener Stitch.
-Lightly stuff the wing, press it flat, then place it against the side of the fuselage, with the decrease seam facing the nose of the aircraft, and the front edge of the wing lining up at approximately the second decrease round on the fuselage.
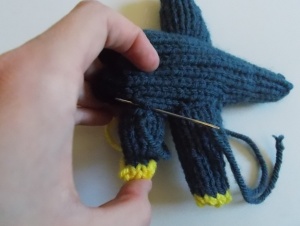
-Pin in place if you like, then seam the wing to the fuselage using the tail and mattress stitch.
-Repeat all steps to make a second wing, and attach it opposite the first wing. (At this point, your fighter jet really wants a hug 😀 )
-Weave in the ends.
Rear Wings and Fins (Make 4)
(Note: The rear wings and the upward facing fins on the top of the body are knit in the same way)
Using Dark Blue Yarn and leaving a tail for seaming, cast on 8 stitches onto 3 dpns and join to knit in the round.
Rnd 1-3: Knit 3 rounds.
Rnd 4: ssk, k4, k2tog (6 st)
Rnd 5-6: Knit 2 rounds.
-Cut the blue yarn and switch to yellow yarn. Continue knitting with yellow yarn.
Rnd 7-8: Knit 2 rounds.
-Cut the yellow yarn, leaving a short tail for seaming
-Divide the 6 stitches evenly onto 2 dpns (3 stitches per needle), with the working yarn coming off the rightmost stitch on the back needle.
-Seam the two sets of stitches together using Kitchener Stitch.
-Repeat all steps to make 4 of these pieces.
Attaching Rear Wings
-Lightly stuff a rear wing piece, press it flat and line it up along the fuselage, just behind the front wing, again with the decrease seam facing the front of the plane.
-Pin in place if desired, then seam the rear wing to the fuselage using the tail and mattress stitch.
-Repeat on the opposite side of the plane with a second rear wing piece.
-Weave in the ends.
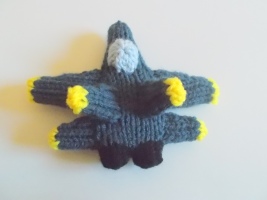
Attaching Fins
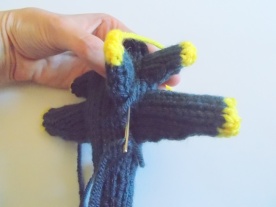
-Lightly stuff a rear wing/tail fin piece, press it flat and place it on top of the fuselage, centered between the front and rear wings, about a stitch in from where the wings were attached.
-Pin in place if desired, then seam the fin to the fuselage using the tail and mattress stitch.
-Repeat to make a second fin on the other side of the top of the fuselage.
-Weave in the ends.
Cockpit
Using Light Blue Yarn and leaving a tail for seaming, cast on 12 stitches onto 3 dpns and join to knit in the round.
Rnd 1: Knit 1 round.
Rnd 2: ssk, k2, k2tog, ssk, k2, k2tog (8 st)
Rnd 3: Knit 1 round.
-Cut the light blue yarn, thread the tail into a tapestry needle, then weave through all stitches on the needles, pulling tightly to close.
-Lightly stuff the cockpit piece, then position it on top of the fuselage, just in front of the front set of wings.
-Pin in place if desired, then seam the cockpit to the top of the fuselage using mattress stitch. Add some more stuffing if necessary before closing the seam.
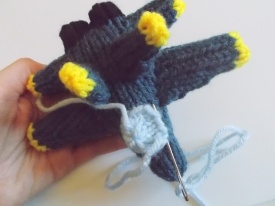
-Weave in the ends.
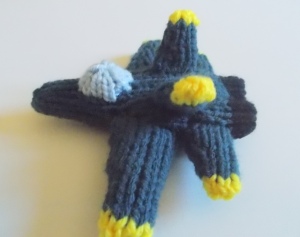
Details
-Cut a strand of yellow yarn and make a line of duplicate stitches as shown along the top of the fuselage between the fins, and stretching from the cockpit to just in front of the thrusters. Make two more lines of duplicate stitch flanking this center line, stretching from the cockpit to the front of the fins.
-Alternately, if you’re not comfortable with duplicate stitch, you may embroider several long straight stitches for the stripes … or use some felt scraps … or leave them off entirely as you like.
-Weave in any additional ends.
Enjoy your fighter jet!!
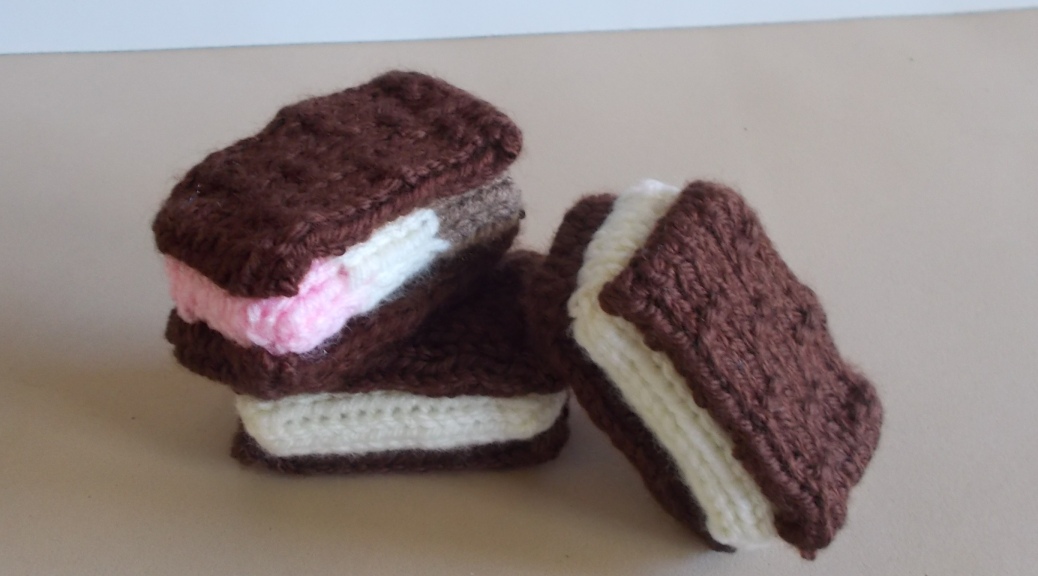
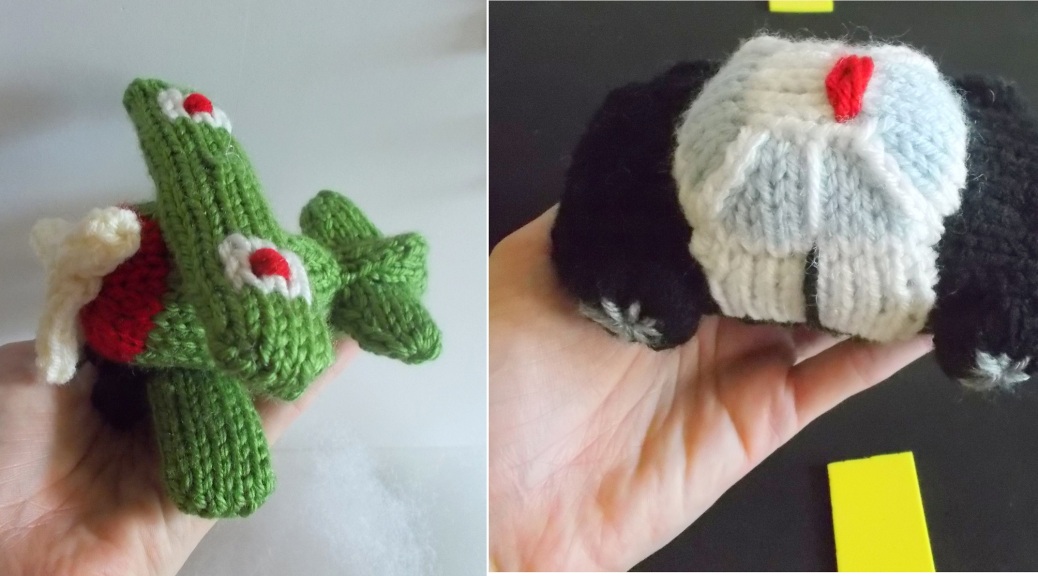
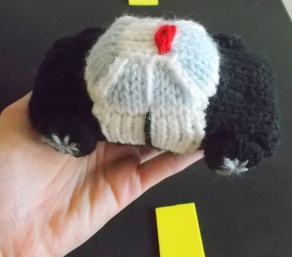
In shop news today, I have a new “Land and Air” pattern set available. I’m hoping to have a series of these types of pattern sets in the future featuring different types of vehicles. This first one includes a pattern for an adorable classic biplane and the sweetest little police car you’ve ever seen! I’d classify them as intermediate level patterns, with the police car being slightly more advanced (read: fiddly) however if you can knit this fighter jet, you should be just fine on both of them. In other news, I’ve made this set and all of my other for sale patterns available as Ravelry purchases for your convenience! Check out my designs page at http://www.ravelry.com/designers/ilana-r-marks !
Thanks so much for stopping by for this week’s Free Pattern Friday! As always, if you have any questions, suggestions, comments … or just want to chat, I’d love to hear from you! Have a wonderful weekend and I hope to see you back here next week!