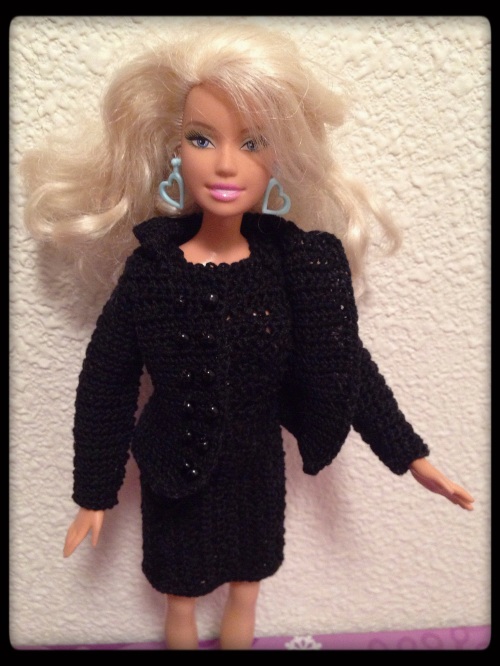
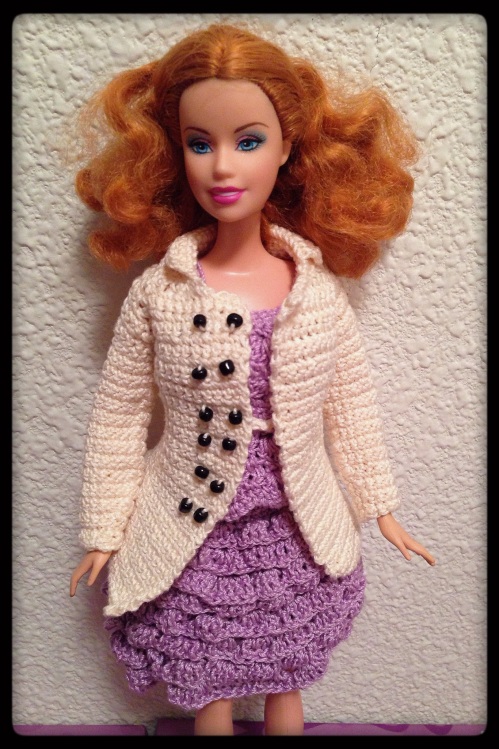
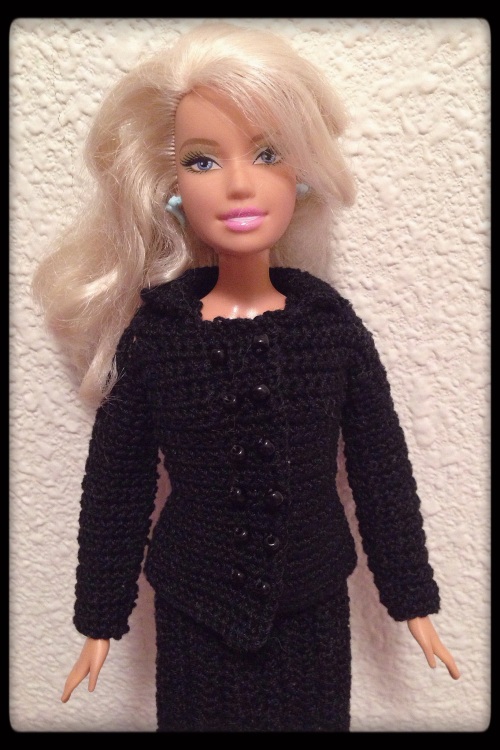
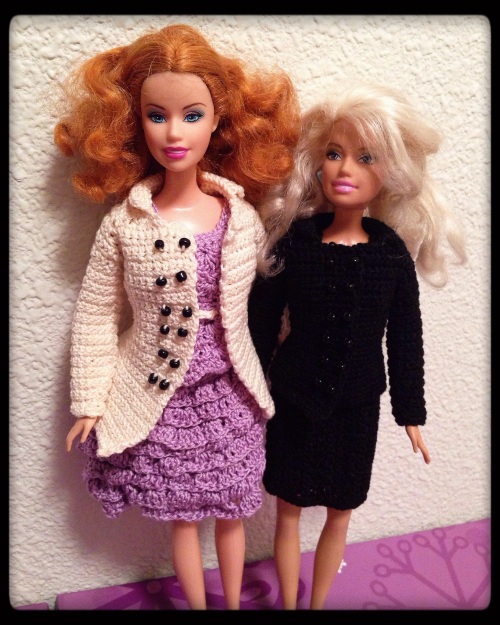
Category Archives: Patterns

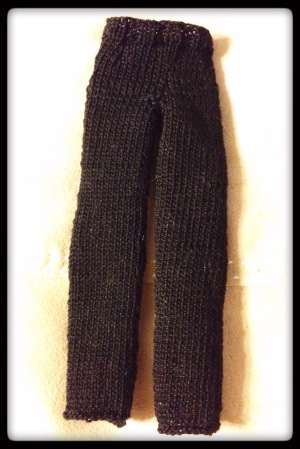
Straight-Leg Pants Pattern

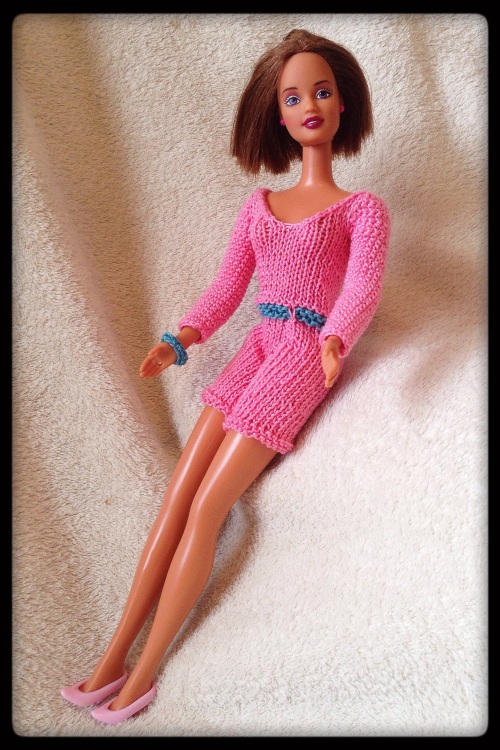
This pattern is designed for a belly-button typed 11.5″ Barbie doll, but it also fits the older narrow-hipped dolls fairly well. It should fit most of the different Barbie doll body types if you take care when knitting the top half of the pants and cast off with enough slack.

IMG_9241

Supplies:

– Size 10 Crochet Thread
– Size 0 (2.00 mm) Knitting Needles
– Size 0 (2.00 mm) Cable Holder OR an extrea Size 0 (2.00 mm) Knitting Needle

Here are a few notes before you begin:
– This pattern can be modified for length – you can easily subtract rows for a better fit for a Skipper or Disney doll.
– Slip the first stitch of every row for a nicer edge that sews together better than a rough non-slip stitched edge.
– k2p2 is optional as you cast off; I didn’t notice a big difference in the finished product between only knitting the cast off row and alternating that row between knits and purls to match the previous rows.

Abbreviations:
P – Purl Stitch
K – Knit Stitch
k2p2 – two knit stitches followed by two purl stitches; repeat this pattern through the end of the row
p2k2 – two purl stitches followed by two knit stitches; repeat this pattern through the end of the row
Stockinette Stitch – A technique where you knit one row and pearl the next row to make a smooth piece of fabric
K2tog – Knit 2 stitches together

– Leg (Make 2) –

Row 1: Cast on 28 stitches

Rows 2-71: Stockinette stitch (knit one row, purl the next) for 70 rows, beginning with a knit row (28 stitches)

Row 72: Cast off 2, knit remaining row (26 stitches)

Row 73: Cast off 2, purl remaining row (24 stitches)

Row 74: Cast off 1, knit remaining row (23 stitches)

Row 75: Cast off 1, purl remaining row (22 stitches)

DO NOT cast off – once this leg is finished, place it on a cable holder or set the needle aside while you stitch the second leg
DO cut the thread and leave a tail on the first leg so that your thread is available to work on the second leg – the second leg does not require the thread to be cut – you can move on to create the top without cutting the thread on the second leg

– Top –

Row 76: Knit 21 on the second leg, join the final stitch of the second leg with the first stitch of the first leg with a k2tog, knit 21 on the first leg (make sure that you keep the right and wrong sides of the fabric on each leg facing the same direction – the fabric created by stockinette stitch has a front and a back and it will not look right if one is backwards) (43 stitches)

Rows 77-79: stockinette stitch for 3 rows (43 stitches)

Row 80: K10, k2tog, k8, k2tog, k9, k2tog, k10 (40 stitches)

Rows 81-85: stockinette for 5 rows (40 stitches)

Row 86: K12, k2tog, k12, k2tog, k12 (38 stitches)

Rows 87-89: stockinette for 3 rows (38 stitches)

Row 90: K11, k2tog, k12, k2tog, k11 (36 stitches)

Row 91: k2p2 (36 stitches)

Row 92: p2k2 (36 stitches)

Row 93: k2p2 (36 stitches)

Row 94: p2k2 (36 stitches)

Row 95: Cast off (do this loosely so that the top has some stretch – do not repeat my mistake)

– Finishing –

Finish the pattern by sewing the seams together. I find that it is easiest to sew the back of the top from top to bottom first, and then work your way down both legs. It is easier to work from the top down because then you won’t end up with uneven ends in the crotch area. It is much easier to regulate the stretch of the fabric as you work down the legs, and you can adjust it as needed to keep it even. The hardest part things in this pattern to sew is the crotch area, so make sure to take your time so that you don’t sew the wrong edges together. Once the pants are sewn together and you have worked in any loose ends, your doll will have a sweet new pair of slacks.

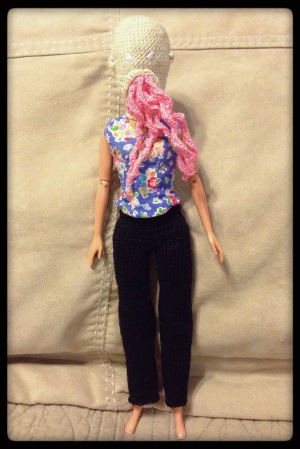
IMG_9245

That is it! Once you complete these steps, you will be in possession of a lovely pair of straight-leg Ood pants. I am happy that I was able to share this with everybody. I look forward to sharing the Ood Mask pattern with you all once it has been perfected.

This is my original pattern and protected by copyright law. These instructions may not be duplicated, distributed, or sold in any form. You are welcome to create and sell the items that you make using this pattern; I kindly ask that you link back to my blog if you do so. If you make this pattern, please let me know! I would love to see your work, and I will update the pattern as needed with the feedback given.

5 Comments

Filed under Barbie Who?, Patterns

Peri’s Plants

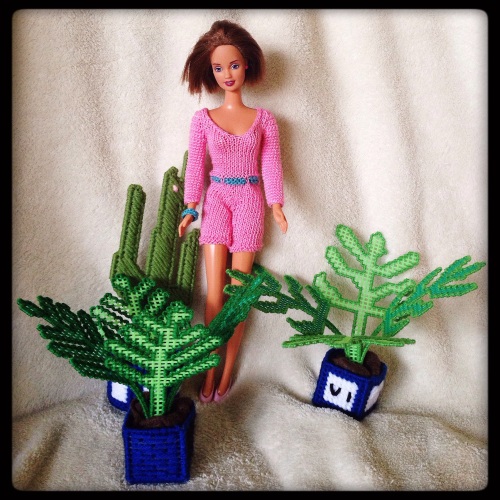
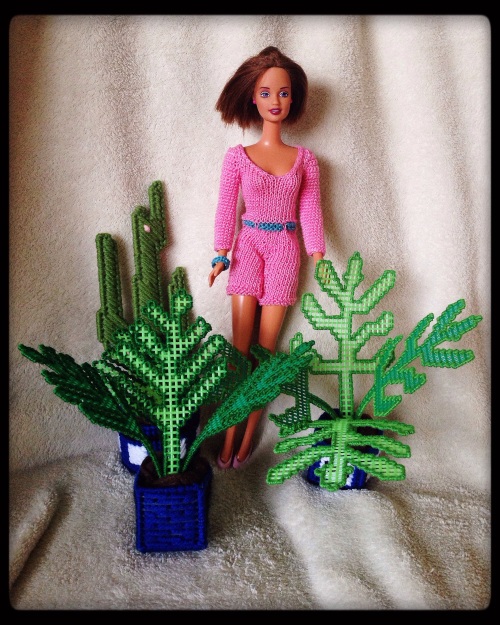
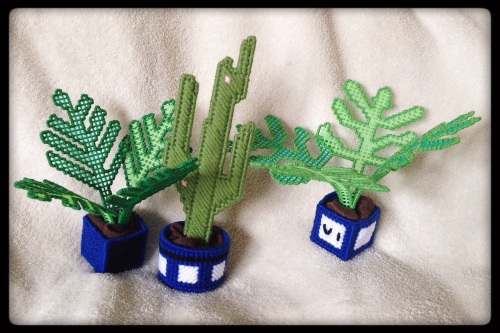
Ever since deciding to do a Peri doll, I was hard pressed to find a fun accessory to go with her. Cofelia has her Adipose, so I had to find something similarly iconic for Peri. My biggest problem was finding something that is not a piece of clothing. Nothing really stood out, even after watching a few episodes, so I decided to look at her entry on the Doctor Who Wiki to see if that would spark anything. Thankfully it did! I read that she was an American botany student. Botany is all about the study of plants, so I decided to make a few plants to go along with the Peri doll.

2015/01/img_7536.jpg

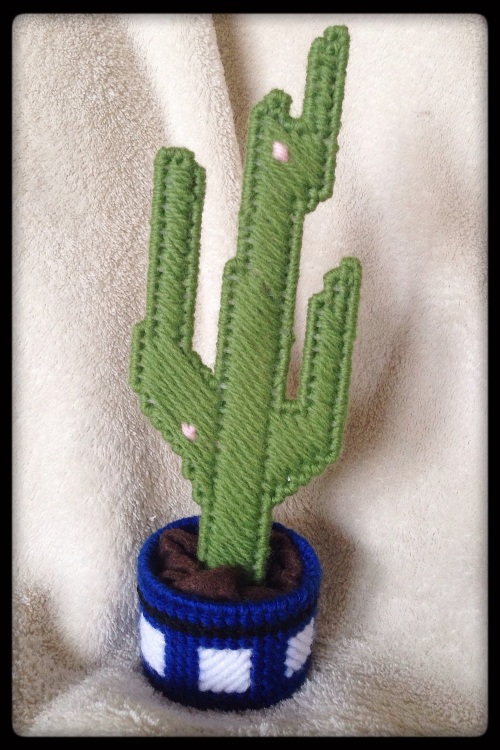
To create the plants, I searched Pinterest for plastic canvas plant patterns. I am not keen on buying fake plastic plants from craft stores because I am going for a different aesthetic. I like to think of fake plants as being in the uncanny valley of plants – they look kinda real but not quite, so it makes me uneasy. I briefly considered using something dried, but it would be much too fragile for a child to play with. A big part of Barbie Who? is to create something that my daughter can play with, and I do my best to keep that goal present when creating items. Another aspect I considered when looking for plant options was how I wanted to make something myself. After searching Pinterest for inspiration, I was lucky enough to find some plant patterns in plastic canvas. It took several hours of searching to find the free patterns I used to create these plants. The website that hosts the scanned pages is not in English (Spanish or Portuguese, maybe?), and that made it a challenge to search through their blog posts. Luckily, the scanned pages are in English, so I was able to make them with little trouble. The first pattern I created is a cactus in a round planter.

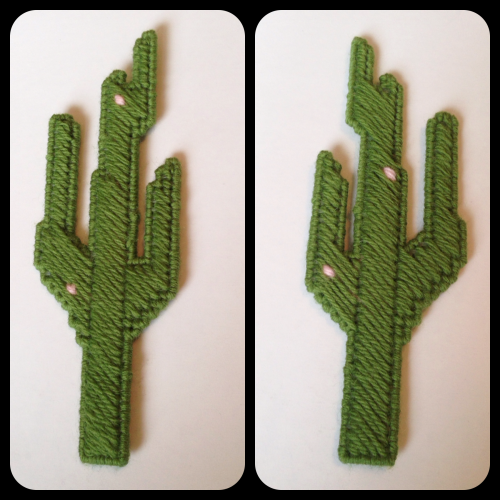
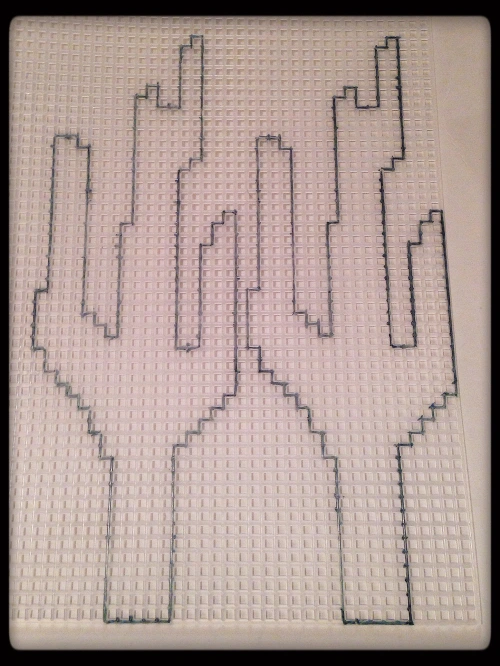
This pattern comes from the Labores de Esther todo para Barbie blog. This blogger has posted many awesome vintage patterns, including this one for a condo and snowmobile set you can create in 7 count plastic canvas. One part of this set is a plastic canvas cactus. I used the pictures template to create my cactus, but I ad-libbed the flowers. When drawing the outline of the cactus on the plastic canvas, I tried a new tip that I read about on Pinterest. I used a dry erase marker to trace the outline on the plastic before I did any actual cutting. It worked great! I didn’t make any cutting mistakes for either side of the cactus. I remember making mistakes when I was cutting things out of plastic canvas as a child, and I wish I had known this trick back then. I did have to run the canvas under running water to get all of the marker off afterwards (a wet cloth didn’t get the bits in the holes), but it was a small price to pay for the perfect cut. Little things like this are why I love Pinterest.

2015/01/img_7426-0.jpg

Once they were cut out, I used some leftover worsted weight yarn to fill it in. The green yarn was some wool that I purchased at a thrift store. I used about half of what I had bought on a baby hat, and the rest was in my remnant yarn bag. I felt a bit weird using wool for a plastic canvas project, but the only other shade of green I had available was a bright, neon color that would look rather unnatural for a cactus. They’re desert plants, and in my mind they are a darker shade of green. In the end, using the green wool worked out very well on all counts. I added a few pink flowers at the end before whip stitching the two sides together. When I finished, I asked my husband how it looked. He just looked at me like I was crazy and said it looked okay for a weird cactus thing. It was recognizable, so I took that as a win and started on its planter.

2015/01/img_7427.png

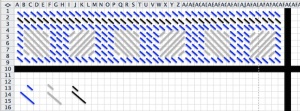
I created my own design for the planter. I used the same dimensions as the one pictured on the original pattern, but I created my own pattern for the outside of it using Microsoft Excel. I just used simple shapes to create stitches of different lengths, and I played around with it until I found something I liked. I decided that using the colors of the TARDIS would be the most appropriate thing for this planter, and I tried to make a pattern vaguely reminiscent of a police box. This is what my finished pattern looked like in Excel.

Circular Planter

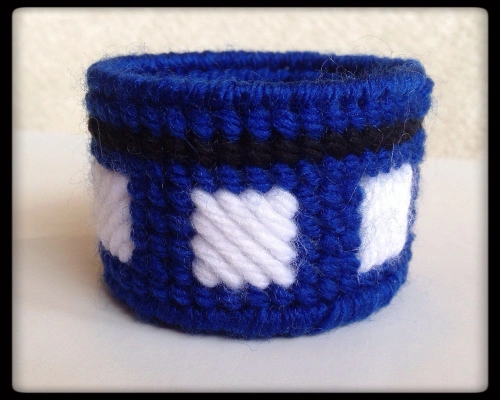
From there, I just stitched it onto the plastic canvas. It stitched very quickly; the planter only took a few hours to finish. After finishing the design, I whip stitched the sides together to create the round shape. For the bottom, I used a piece of circular plastic canvas I bought at the hobby shop. I cut it down to the proper length, put a few dummy stitches around the edge to keep it evenly spaced, and stitched everything together. It is a bit hard to see the black stripe in the finished planter, but I don’t mind that too much. It is the price you pay when you work with rich colors. Overall, I am very happy with how the design turned out! It fits the cactus very well.

2015/01/img_7430.jpg

2015/01/img_7534.jpg

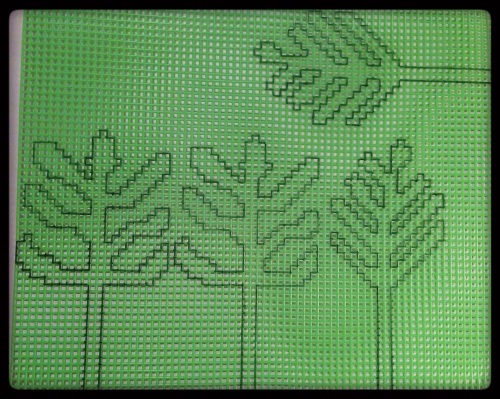
The second and third plants come from the same blog: Labores de Esther todo para Barbie. On this post, she has scans from a patio set that includes two leafy plants. I really fell in love with this pattern, but it did pose more problems than the first. The pattern called for green 10 count plastic canvas. Finding 10 count canvas isn’t hard, but finding 10 count in a green color is nearly impossible. I couldn’t even find the stuff online! It was so, so frustrating. I had two options: I can either use a Sharpie to color some clear plastic canvas the color I need or buy 7 count plastic canvas and call it a giant species. I went with the latter. It looked to be within the proper scale after outlining the patterns, so I roll on with making these giant plants.

2015/01/img_7482.jpg

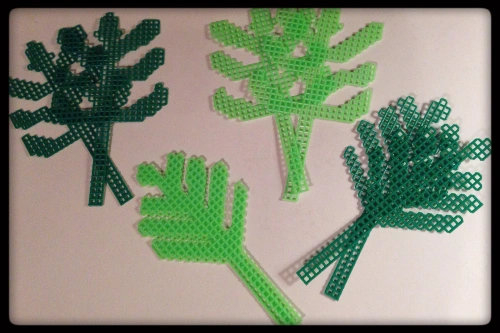
2015/01/img_7483.jpgCutting these plants out was harder than the cactus. Both were much more intricate, and it had multiple thin areas between the leaves. Luckily, plastic canvas is fairly durable and I was able to get through it without cutting myself or ruining the piece. I also chose to deviate from the pattern by sewing the edges with green crochet thread. I used the deep, emerald green thread I bought at a thrift store a few weeks ago for one plant and a lighter green that I purchased from a thrift store ages ago for the second. I like how the thread edging softens up the edges, but it took about an hour to sew around each leaf. I really prefer the more polished look, so it was worth the extra effort. The crochet thread I used looks like size 10, and it took three to seven stitches in each square of plastic canvas to get good coverage around the edges.

2015/01/img_7535.jpg

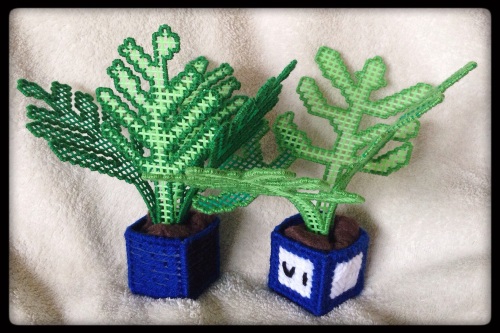
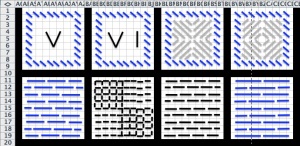
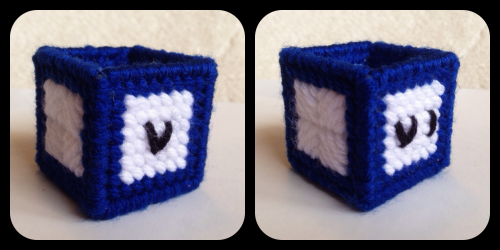
For their planters, I decided that I wanted to do something different. The pattern on the website called for another circular planter, but for visual appeal I decided to create my a square planter of my own design. I went with TARDIS colors once again, and these are the patterns I created in Excel for them. In addition to these four sides, I cut out a fifth side for the bottom that I filled in with simple diagonal stitches. I whip stitched the edges together, and added the plants.

PlanterPattern2

I know that you can design patterns for plastic canvas in paper or with other software, but I find that this helps me visually see how to stitch the plastic canvas. I am very visual when I am doing these patterns, and sometimes the square-based patterns are hard for me to work with. Each design took about an hour for me to create. Much of that time was researching different stitches and textures; each side of the second square planter has a different texture. The first one also has a small tribute to the two doctors who had Peri as a companion with by using roman numerals. I thought it would be a fun touch to an otherwise simple design.

2015/01/img_7431.png

The planters took two to three hours to stitch and assemble. I used worsted weight yarn leftover from a Doctor Who themed commissioned hat I made last year. The worsted weight yarn was much easier to work with than the size 10 crochet thread. It tangled much less than the thread, and it was easier to work in the ends once I had finished using a piece of it. Still, it was interesting to work with different yarns while making these. I now have a better grasp of the limitations different yarns have when I work with plastic canvas in the future.

With all three plants, I anchored them in their planters with a square of brown felt. I had originally planned on using rice or a small rock to anchor the plants into the planters, but the felt was able to keep the plants in place without needing the extra weight. I took a standard sheet of felt and quartered it. I put one quarter into each planter, then folded the extra bits in on itself. This left the perfect spot in the middle to place the plants. It was an easy way to simulate dirt without making a giant mess. Win-Win!

2015/01/img_7537.jpg

Overall, this was a fun way for me to work with plastic canvas. It is an interesting medium to work with, and I hope to use more of it as I continue crafting for the blog. The hardest part of using plastic canvas was finding the perfect length of yarn/thread to use when stitching. I found 18″ was a good length for worsted weight yarn. Any longer and the yarn would unwind and be more frayed towards the end, and anything shorter wouldn’t last very long (it is frustrating when you feel like you’re changing yarn every three minutes). The thread was a but hardier; it tended to be hardier than the yarn, but it would tangle more if it was too long. I used 24″ lengths without running into big problems, and I had to change string about four times for each leaf.

2015/01/img_7538.jpg

With these plants, Peri is complete! I will do a quick write-up for her and then choose a new subject over the next few entries. This should be an eventful week! I hope this little project was worth the wait, and I will see you all shortly.

3 Comments

Filed under Barbie Who?, Patterns

Peri’s Accessories

For today’s post, I am going to focus on several finishing touches to Peri’s overall look. This includes picking out a pair of shoes, making a bracelet, and doing her hair. These little details are what make the biggest difference when recreating a character. I am sorry this post took so long to publish, but we came down with a virus and the entire family was miserable for the better part of this week. This severely reduced the amount of time I had to work on crafting and the blog, and I apologize for the delay.

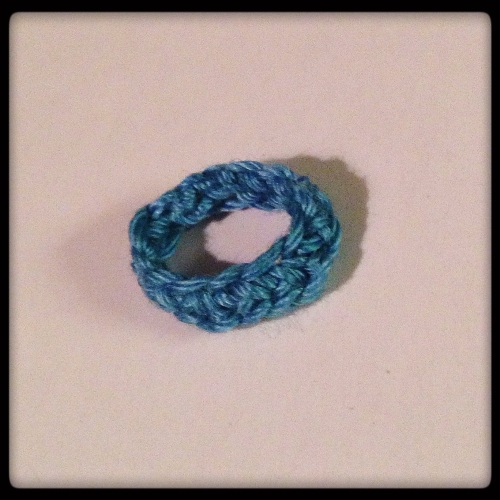
Anyways, back to the accessories! Peri always had a bracelet on that matched her belt. I wanted to create a similar bracelet, while keeping it simple. I could have gone a few different directions with it. I briefly considered braiding the bracelet so it would be very thin and dainty, but I soon realized that I am terrible at braiding evenly with crochet thread. I considered knitting it, but the sizing would have been too tricky and I believed it would wind up too bulky. To get a good balance of size and quality, I went with crochet. I decided to create it using the foundation single crochet stitch. I chose the foundation stitch because, for me, it comes out more even than chaining and then doing a row of single crochets.

2015/01/img_7370.jpg

Bracelet Pattern

Supplies:

– Size 6 (1.80 mm) crochet hook

– Size 10 crochet thread

– Embroidery needle

Pattern:

Foundation chain 12 stitches

Cast off, leaving a 7″ tail

Sew the two ends together using the embroidery needle and tail

I made the bracelet big enough that it could slip on and off of her wrist; I wanted to be able to remove it if needed. I could have made it smaller and sewed it onto the wrist, but I chose the removable route in case it gets dirty and needs to be cleaned. This size is large enough that I can remove it but small enough that it won’t fall off on its own.

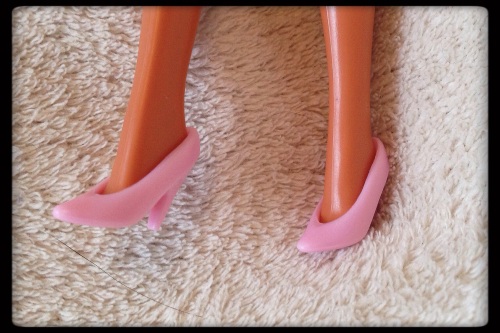
For Peri’s shoes, I first looked at the bag of shoes I bought from China last year. There were many pink pairs of shoes, but most of them were open toed and the wrong shade of pink – Peri sports a pastel pink pair of shoes for most episodes and most of the shoes in my cache were hot pink. I was looking for more of a closed toed high heel to go with her outfit. Frustrated, I rummaged through the bag of naked dolls in the toy area to see if any of them had pink shoes. Luck smiled upon me and I found a pair that is exactly what I had in mind. I was ecstatic that they fit! No giant-foot problems with this doll.

2015/01/img_7437.jpg

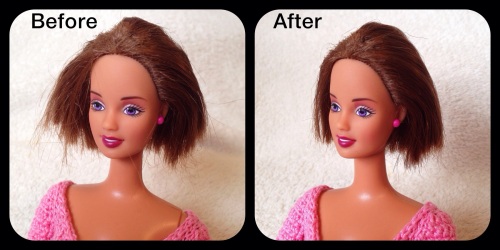
Lastly, I had to touch up Peri’s hair. A few weeks ago, I cleaned Peri. I rinsed and brushed her hair, and this brought out a few strays. I simply trimmed the uneven hairs and used a bit of heat to smooth everything out. Using a blowdryer on low setting, I just put her head under it for 20 second bursts and then moved the hair to where I wanted it. After doing this three or four times, I was able to get her hair to cooperate and sit the way I wanted. I brushed it one last time and it looks fairly better. I did before and after pictures, but the stray hairs didn’t photograph very well. Still, you can see some improvement.

2015/01/img_7438.jpg

That is it! These are the last few touches for Peri’s outfit. I just need to create some plants as accessories for her and her entry on the blog will be complete. I hope to have everything wrapped up shortly. Again, I apologize for this post taking so long to publish. One silver lining about the delay and being sick is that it gave me some time to scout patterns and possibilities for the next doll I will be doing for Barbie Who? I haven’t made a definitive decision about what I will do just yet, so stay tuned!

2015/01/img_7439.jpg

11 Comments

Filed under Barbie Who?, Patterns

Toddler Dress Pattern

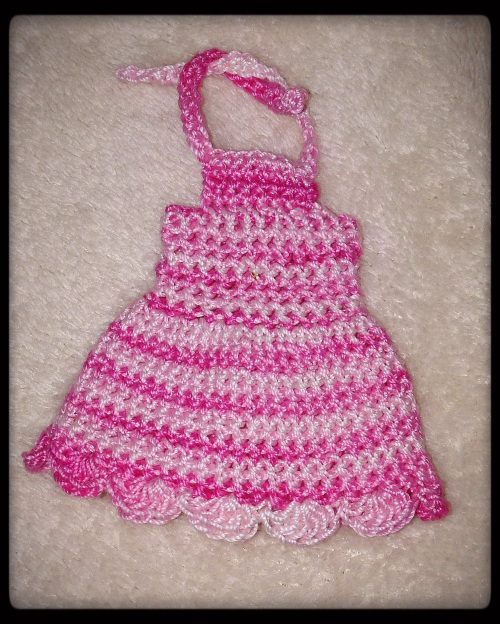
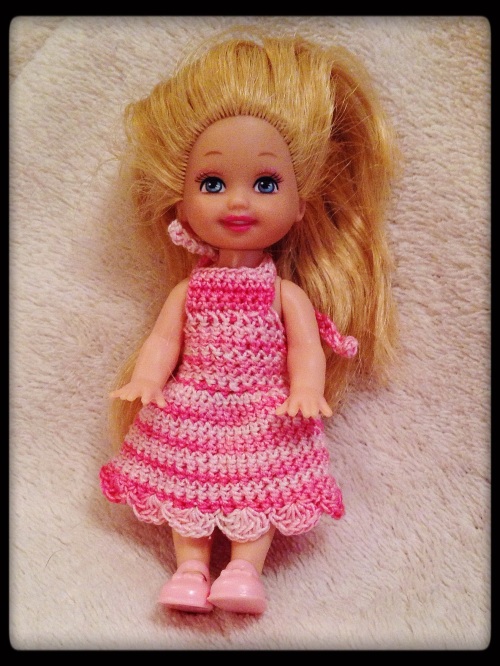
This is a simple toddler dress pattern for the little Shelly/Kelly sized doll. It should fit most 3-1/2″ to 4″ dolls, and it is very easy to add length if needed.

/home/wpcom/public_html/wp-content/blogs.dir/06a/16074280/files/2014/12/img_6559.jpg

Supplies:

– Size 10 Crochet Thread (I used unmarked thrift store yarn for this, but I am moderately sure it is size 10)
– Size 6 (1.80 mm) Crochet Hook
– Finishing Needle

Here are a few notes before you begin:
– I did this in the round, but you can join at the end of each row if you choose. I found that doing it in the round creates a smoother finish.
– This pattern can be modified for length – you can easily add rows or subtract them as you see fit.

Abbreviations:
Ch – Chain
Sc – Single Crochet
Slip – Slip Stitch
Increase – Multiple stitches into a single stitch of the previous row
Foundation Single Crochet – a technique where you create a chain and a single crochet in one pass; here is a link to a great video tutorial by Crochet Ever After on how to do it.

– Dress –

Row 1: Ch 25, join with first stitch, ch 1, sc 25 (25 stitches)

Rows 2-8: sc 25 (25 stitches)

Row 9: 2 sc into each stitch (50 stitches)

Rows 10-20: sc 50 (50 stitches)

Row 21: Skip one stitch, DC 6 times into one stitch, Skip one stitch, slip into the next stitch.
Repeat this pattern for a total of 12 scallops on the bottom edge of the dress. Cast off.
**DO NOT chain two before doing the double crochets**

– Top –
Row 1: Join back into the top of the dress 8 stitches away from the back seam (where you cast off the dress), ch 1, sc 8 across, turn (8 stitches)

Row 2-3: ch 1, sc 8, turn (8 stitches)

Row 4: ch 1, sc 8, ch 21

Row 5: Turn, sc into the second chain from hook , sc 27 (19 into the chains, 8 into the top), slip stitch into the bottom of the row, foundation chain 20, cast off

– Finishing –
Finish by taking your finishing needle and working in the ends of the yarn.

/home/wpcom/public_html/wp-content/blogs.dir/06a/16074280/files/2014/12/img_6560.jpg

This is my original pattern and protected by copyright law. These instructions may not be duplicated, distributed, or sold in any form. You are welcome to create and sell the items that you make using this pattern; I kindly ask that you link back to my blog if you choose to do so. If you make this pattern, please let me know! I would love to see your work, and I will update the pattern as needed with the feedback given.
1 Comment

Filed under Barbie Who?, Patterns

Cofelia’s Sensible Shoes

These shoes have been a gigantic headache for me. As I’ve said in previous posts, I bought a bunch of shoes off of eBay to use for this project, but I didn’t realize that my Beach Glam Barbie had big, flat feet that were never meant to wear shoes. I had several options to resolve the shoe problem:

1. Choose a different doll
2. Buy custom shoes
3. Barbie head transplant
4. Ken shoes
5. Make custom shoes

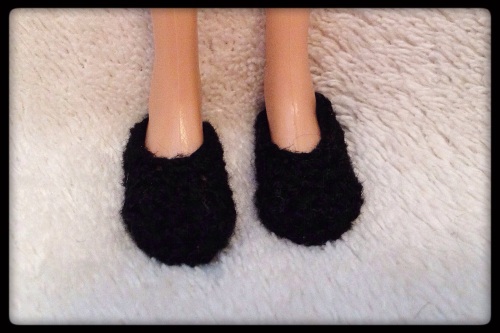
I wound up choosing the fifth option and created a pair of ballet flats for Cofelia to wear. They had their challenges, but they look fantastic!

IMG_6716.JPG

I found this awesome free pattern by dezalyx on Pinterest. The pattern is simple, but the small size does pose a challenge. It hurt my eyes and wrists to make them with black yarn, so I only made one per night. I made one pair exactly like the pattern states, but it was too small for Cofelia’s feet. I lengthened the pattern a bit, but it was still too narrow. I made it a final time with a few extra half-double crochets and double crochet stitches in the foot of the shoe, and it worked! I finally have a pair of shoes that fit Cofelia! It felt great to finally solve the problem.

To lengthen and widen the shoes, I had to mod the first foundation row the most. Here is a rundown of what I did; I made several changes and it would be confusing to present it any other way.

Round 1: ch 9
2 sc in 2nd ch from hook (this is the heel)
1 sc in next 2 chains
hdc in next 3 chains
DC in next chain
for toe end, 7 dc in last chain on this side, working your way to the back side of the chains
on opposite side of the chain, DC in next chain
hdc in next 3 chains
sc in next 2 chains
2 sc in last chain on this end
join with sl st in first sc, turn (23 sts)

For row two, I did sc all the way around as the pattern states, except mine totaled 23 stitches. I then added two single crochets to each side of the pattern (sc 7 instead of sc 5 on each side of the shoe for rows 3-5). At any given point, my modification has four more stitches than the original pattern. This makes more sense when you are crocheting the shoe, but feel free to comment if what I’m saying sounds like crazy talk. One warning I will give is that this pattern was very hard on my wrists. The small size is mainly to blame for this. I could only make a single shoe at any one sitting. They only took five minutes to crochet, plus a few more to work in the ends. Overall, it is a great pattern.

That’s how I did it! I am very happy with the shoes I created. They may not be true to the Cofelia that appeared on Doctor Who, I am willing to make that concession. She had black shoes that fit her feet, and that is more important than making a precise replica of the heels she wore on TV. Besides, flats are much more sensible for a cosmic nanny.

IMG_6715.JPG

I am still going strong on the stockings! I hope to have them finished soon. I am still stitching them, but I am nearing the point where I rip off the stabilizer and put them on the doll. Exciting stuff!

6 Comments

Filed under Barbie Who?, Patterns

Peacoat Pattern

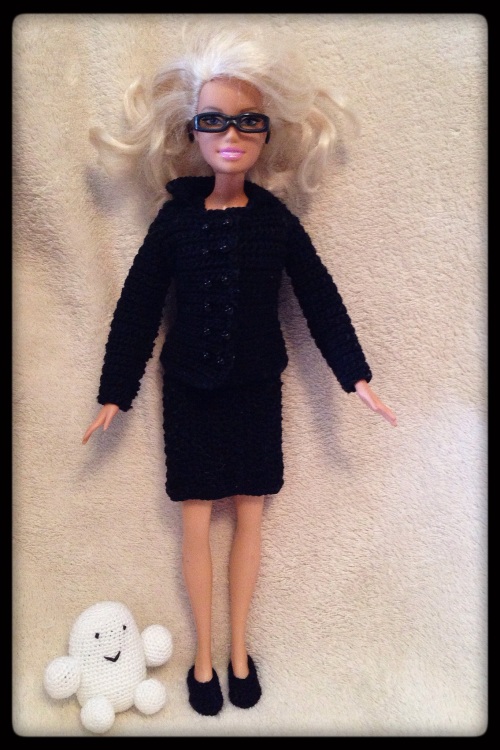
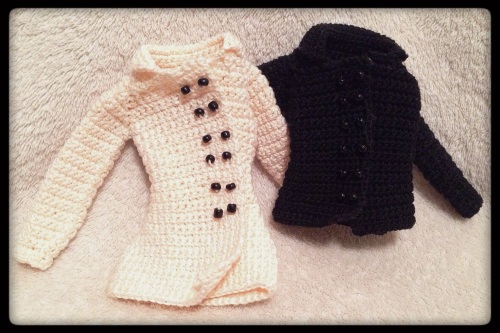
I created this pattern for a Barbie doll, and it will fit most 11.5″ fashion dolls. You can adjust the length of the jacket for your needs; the off-white coat is a mid-length style and the black coat is a jacket/blazer length.

IMG_6514.JPG

Supplies:

– Size 10 Crochet Thread
– Size 6 (1.80 mm) Crochet Hook
– Several Size 1 Snaps
– Size E Beads

Here are a few notes before you begin:
– I suggest that you leave extra-long tails on the yarn when making this so that you can use the tails to sew snaps and beads at the end. This isn’t required, but I find it easier to do it that way than to join in a new piece of yarn just for the snaps.
– This pattern can be modified for length. I have a note in the pattern that explains the two lengths pictured above.

Abbreviations:
Ch – Chain
Sc – Single Crochet
Sk – Skip
Slip – Slip Stitch
Increase – Two Stitches in the Same Hole

Pattern:

– Body –

Row 1
Chain 43
Sc into second chain from hook,
sc 10, ch 2,
sc 6, ch2,
sc 8, ch 2,
sc 6, ch 2,
sc 11, turn
(50 stitches)

Row 2
Ch 1,
sc 12, ch 2,
sc 8, ch 2,
sc 10, ch 2,
sc 8, ch 2,
sc 12, turn
(58 stitches)

Row 3
Ch 1,
sc 13, ch 2,
sc 10, ch 2,
sc 12, ch 2,
sc 10, ch 2,
sc 13, turn
(66 stitches)

Row 4
Ch 1,
sc 14, ch 2,
sc 12, ch 2,
sc 14, ch 2,
sc 12, ch 2,
sc 14, turn
(74 stitches)

Row 5
Ch 1,
sc 15, ch 2,
sc 14, ch 2,
sc 16, ch 2,
sc 14, ch 2,
sc 15, turn
(82 stitches)

Row 6
Ch 1,
sc 15, ch 2, Skip 2 (over ch 2 of last row),
sc 14, ch 2, Skip 2,
sc 16, ch 2, Skip 2,
sc 14, ch 2, Skip 2,
sc 15, turn
(82 stitches)

Row 7
Ch 1,
Sc 15
Join the next two ch2 loops together with a sc (skipping 16 sc – you’re joining the last two loops made by the ch2)
Sc16
Join the next two ch2 loops together with a sc (skipping 16 sc)
Sc 15, turn
(48 stitches)

Rows 8 – 10
Ch 1,
Sc 48, Turn
(48 stitches)

Row 11
Ch 1,
Sc 18, Skip 1,
Sc 10, Skip 1,
Sc18, turn
(46 stitches)

Row 12
Ch 1, sc 46, turn
(46 stitches)

Row 13
Ch 1,
Sc 18, Skip 1,
Sc 8, Skip 1,
Sc 18, turn
(44 stitches)

Row 14
Ch 1, sc 44, turn
(44 stitches)

Row 15
Ch 1,
Sc 18, Skip 1,
Sc 6, Skip 1,
Sc 18, turn
(42 stitches)

Rows 16 – 18
Ch 1, sc 42, turn
(42 stitches)

Row 19
Ch 1,
Sc 18, increase,
Sc 4, increase,
Sc 18, turn
(44 stitches)

Row 20
Ch 1, sc 44, turn
(44 stitches)

Row 21
Ch 1,
Sc 18, increase,
Sc 6, increase,
Sc 18, turn
(46 stitches)

Row 22
Ch 1, sc 46, turn
(46 stitches)

Row 23
Ch 1,
Sc 18, increase,
Sc 8, increase,
Sc 18, turn
(48 stitches)

Row 24
Ch 1,
Sc 18, increase,
Sc 10, increase,
Sc 18, turn
(50 stitches)

Row 25
Ch 1,
Sc 18, increase,
Sc 12, increase,
Sc 18, turn
(52 stitches)

Row 26
Ch 1,
Sc 18, increase,
Sc 14, increase,
Sc 18, turn
(54 stitches)

Row 27
Ch 1,
Sc 18, increase,
Sc 16, increase,
Sc 18, turn
(56 stitches)

Row 28
Ch 1,
Sc 18, increase,
Sc 18, increase,
Sc 18, turn
(58 stitches)

Row 29
Ch 1,
Sc 18, increase,
Sc 20, increase,
Sc 18, turn
(60 stitches)

Row 30
Ch 1,
Sc 18, increase,
Sc 22, increase,
Sc 18, turn
(62 stitches)

End the pattern here for a short length peacoat (like the one I used for Cofelia’s jacket). Continue for a longer coat (like the off-white one pictured above).

Rows 31 – 38
Ch 1, sc 62, turn
(62 stitches)

Cast Off

IMG_6517.JPG

– Sleeves –

This blends in best when you join in the thread going in the same direction as the stitches in the sleeve. When decreasing, you can stagger the decreases if you’d like, but I found it worked just as well to always eliminate the last stitch in the row. I staggered them in the off- white jacket and did it at the end of all rows for the black jacket. Both sleeves look the same on the doll.

Row 1
Join into the bottom of the sleeve
16 sc, join together in first sc, turn
(16 stitches)

Rows 2-18
Ch 1, 16 sc, join , turn
(16 stitches)

Row 19
Ch 1, sc 15, Skip 1 and join
(15 stitches)

Rows 20-21
Ch 1, sc 15, join, turn
(15 stitches)

Row 22
Ch 1, sc 14, Skip 1 and join, turn
(14 stitches)

Row 23
Ch 1, sc 14, join, turn
(14 stitches)

Row 24
Ch 1, sc 13, Skip 1 and join, turn
(13 stitches)

Row 25
Ch 1, sc 13, join, turn
(13 stitches)

Row 26
Ch 1, sc 12, Skip 1 and join, turn
(12 stitches)

Rows 27-28
Ch 1, sc 12, join, turn
(12 stitches)

Cast Off

Repeat on the other side for the other sleeve

IMG_6519.JPG

– Collar –

If you have a hard time seeing where each stitch is, it will help for you to do a foundation row of slip stitches along the top of the jacket. This row should consist of 42 stitches.

Row 1
From the right (doll’s right) top of the jacket, Skip 10 stitches and join into collar. Sc 22 across the collar. Slip stitch next stitch. Turn.
(23 stitches)

Row 2
Skip first stitch, sc 22, sc 1 into the loop you joined in with. Slip next stitch in the collar. Turn
(24 stitches)

Row 3
Skip first 2 stitches, sc 22, sc into collar. Slip next stitch in collar. Turn.
(24 stitches)

Row 4
Skip first 2 stitches, sc 22, sc into next stitch on collar. Slip next stitch. Turn
(24 stitches)

Row 5
Skip 2 stitches, sc 22, sc into collar, slip next in collar , turn
(24 stitches)

Row 6
Skip 2 stitches, sc 22, sc into collar, slip next into collar, turn
(24 stitches)

Row 7
Ch 1, Skip first 2 stitches, sc 22, turn
(22 stitches)

Row 8
Ch 1, sc 22, turn
(22 stitches)

Row 9
Ch 1, increase, sc 20, increase, turn
(24 stitches)

Row 10
Ch 1, increase, sc 22, increase, turn
(26 stitches)

Row 11
Ch 1, sc 26
(26 stitches)

Finish crocheting by slip stitching down the collar and doing a row of single crochets down the edges of the coat. Stop at the top of the collar on the opposite side before casting off. You don’t need to do this step, but it makes for a more finished look – the black jacket includes this finishing row while the off-white jacket does not have this finishing row.

IMG_6516.JPG

– Finishing –
Finish the jacket by sewing beads as decorative buttons on the right flap of the jacket (outer side – doll’s right). You should do 5 or 6 rows consisting of 2 black beads each. Add snaps as closures to the inner flaps of the jacket – I used 4 but you could get away with two or three if you want a less fitted look. For an open look, you can leave odd the snaps all together.

IMG_6518.JPG

This is my original pattern and protected by copyright law. These instructions may not be duplicated, distributed, or sold in any form. You are welcome to create and sell the items that you make using this pattern; I kindly ask that you link back to my blog if you choose to do so. If you make this pattern, please let me know! I would love to see your work, and I will update the pattern as needed with the feedback given.
6 Comments

Filed under Barbie Who?, Patterns, Shopping

Short-Sleeved Peasant Blouse Pattern

I created this pattern for a Barbie doll, and it will fit most 11.5″ fashion dolls. It is a quick pattern and can be easily modified if needed. For example, the placement of the snaps at the end can be adjusted as needed to make the shirt have a more tailored look. You can also add a row or two at the end to add length if needed.

IMG_6224.JPG

Supplies:
– Size 10 Crochet Thread
– Size 6 (1.80 mm) Crochet Hook
– Size 4 Snaps

Here are a few notes before you begin:
– I suggest that you leave extra-long tails on the yarn when making this so that you can use the tails to sew snaps at the end. This isn’t required, but I find it easier to do it that way than to join in a new piece of yarn just for the snaps.
– This pattern isn’t the most solid, so I suggest only using it for under-shirts. If you want to make a more solid shirt, you would want to do a pattern with single crochets instead of double crochets. When I have some free time, I will make a pattern for it.

Abbreviations:
Ch – Chain
DC – Double Crochet
Sk – Skip

Pattern:

Chain 37

Row 1
DC into third chain from hook,
DC 6, ch 2,
DC 6, ch2,
DC 8, ch 2,
DC 6, ch 2,
DC 8, turn
(43 stitches)
(DO NOT skip stitches in the base chain after you chain two in the pattern – you will be making holes to work in during subsistent rows – if you need to skip stitches it will say so in the pattern)

Row 2
Ch 2, Skip first stitch,
DC 8, ch 2,
DC 8, ch 2,
DC 10, ch 2,
DC 8, ch 2,
DC 9, turn
(51 stitches)
(Work the increases directly into the ch 2 holes made in the precious row)

Row 3
Ch 2, Skip first stitch,
DC 9, ch 2,
DC 10, ch 2,
DC 12, ch 2,
DC 10, ch 2,
DC 10, turn
(59 stitches)

Row 4
Ch 2, Skip first stitch,
Dc 9,
Join the next two ch2 loops together with a DC (skipping 16 DC – you’re joining two loops made by the ch2 in the precious row)
Dc 12,
Join the next two ch2 loops together with a DC (skipping 16 DC between them)
Dc 10, turn
(33 stitches)
(This may be confusing, but you are making the arm loops – I will post a picture of this the next time I make a shirt with this pattern to help make it clearer)

Rows 5 – 6
Ch 2, Skip first stitch,
Dc 33, Turn
(33 stitches)

Row 7
Ch 2, Skip first stitch,
Dc 11, sk 1,
2 DC, sk 1
Dc 2, sk 1,
Dc12, turn
(30 stitches)

Row 8
Ch 2, Skip first stitch,
Dc 11, sk 1,
Dc 3, sk 1,
Dc 12, turn
(28 stitches)

Row 9
Ch 2, Skip first stitch,
Dc 11, sk 1,
Dc 1, sk 1,
Dc 12, turn
(26 stitches)

Rows 10 – 11
Ch 2, Skip first stitch, DC 26, turn
(26 stitches)

Row 12
Ch2, Skip first stitch, DC 11, increase, DC, increase, DC 12, turn
(28 stitches)

Row 13
Ch 2, Skip first stitch, DC 28, cast off

Finish by sewing in snaps and working in the loose ends.

I finished this top with two snaps because I only had two snaps available to use. Three snaps is what I recommend using when finishing this shirt.

IMG_6223.JPG

This is my original pattern and protected by copyright law. These instructions may not be duplicated, distributed, or sold in any form. You are welcome to create and sell the items that you make using this pattern; I kindly ask that you link back to my blog if you choose to do so. If you make this pattern, please let me know! I would love to see your work, and I will update the pattern as needed with the feedback given.
5 Comments

Filed under Patterns