Monday, July 22, 2019

Toddler Jacket

Materials Required:

Size 3 knitting needles
Cable needle
Small crochet hook
Stitch markers
Yarn – finger weight yarn, 1,770 yards if self-striping (the sweater pictured used Mandala Wood Nymph self-striping yarn, 3 skeins)

Fabric for lining – 1 yard
Thread
Zipper – 24” All purpose

Download and print the following files:

Knitting Pattern & Lining Tutorial
Row Counter & Pattern Chart


Thursday, December 14, 2017

Celtic Cable Fingerless Gloves


Supplies
Circular needles or DPNs, size 4
Worsted weight yarn, any color or brand
2 stitch markers
Cable needle

Abbreviations
CB4 (cable 4 back) place 2 stitches on cable needle, hold in back, knit 2, knit the two from the needle.
CF4 (cable 4 forward) place 2 stitches on cable needle, hold in front, knit 2, knit the two from the needle.
CR3R (Cable 3 Right) place one stitch on cable needle, hold to the back, knit two, purl the stitch from the needle.
CR3L (Cable 3 Left) place 2 stitches on cable needle, hold to the front, purl 1, knit the 2 from the needle.
CR4R (Cable 4 Right) place 2 stitches on cable needle, hold to the back, knit two, purl 2 from the needle.
CR4L (Cable 4 Left) place 2 stitches on cable needle, hold to the front, purl 2, knit 2 from needle.
K1M1 (knit one, make one) knit one stitch and before slipping it off the left needle, insert the right needle into the back of the stitch to draw through second loop.

Cast On 48 stitches on circular needles.
Rib stitch x2 for six rows.
Begin cable pattern; repeat the following panel twice per row:

Celtic Cable Panel

R1
R2

R3
R4

R5
R6

R7
R8

R9
R10

R11
R12

R13
R14

R15
R16

 (P2, C4B, P2) x3
P
P
K
K
K
K
P
P
P
P
K
K
K
K
P
P
P
P
K
K
K
K
P
P

P1, CR3R, (CR4L, CR4R) x2, CR3L, P1
P
K
K
P
P
P
K
K
K
K
P
P
P
P
K
K
K
K
P
P
P
K
K
P

CR3R, P1 (P2, C4F, P2) x2, P1, CR3L
K
K
P
P
P
P
K
K
K
K
P
P
P
P
K
K
K
K
P
P
P
P
K
K

 K2, P2, (CR4R, CR4L) x2, P2, K2
K
K
P
P
K
K
P
P
P
P
K
K
K
K
P
P
P
P
K
K
P
P
K
K

(K2, P2) x2, P2, C4B, P2, (P2, K2) x2
K
K
P
P
K
K
P
P
P
P
K
K
K
K
P
P
P
P
K
K
P
P
K
K

K2, P2, (CR4L, CR4R) x2, P2, K2
K
K
P
P
P
P
K
K
K
K
P
P
P
P
K
K
K
K
P
P
P
P
K
K

CR3L, P1 (P2, C4F, P2) x2, P1, CR3R
P
K
K
P
P
P
K
K
K
K
P
P
P
P
K
K
K
K
P
P
P
K
K
P

P1, CR3L, (CR4R, CR4L) x2, CR3R, P1
P
P
K
K
K
K
P
P
P
P
K
K
K
K
P
P
P
P
K
K
K
K
P
P


Complete the panel once, then repeat rows 1 through 10.
On row 11, K1M1 x2 after the first 24 stitches to begin thumb gusset for the left glove. For the right glove, insert gusset increases after the 48th stitch. Place stitch markers here so you know where they are.
From this point, only do the panel pattern on the back half of the glove, with a standard knit stitch for the palm.

Continue the panel as before up to row 16, increasing at gusset by K1M1 x 2 every 4th row until you complete the panel for the second time. Repeat rows 1 through 8 again, increasing your gusset each 4th row.
Gusset increases will occur on rows 11, 15, 3, and 7. There will be 12 gusset stitches total.
Place the gusset stitches on reserve yarn.

Finish the panel pattern from rows 9 through 16, with the standard knit on the palm and cable pattern on the back. You will have completed the cable pattern three full times.
Rib x 2 six more rows and bind off.
Place gusset stitches back on the needles and pick up four more from the index finger side.
Rib x 2 for six rows and bind off.

Weave in ends.

Wednesday, August 23, 2017

Baby Trapper Hat


This hat was designed to go with these knitted, fur lined baby boots.

Materials:

Worsted weight yarn - I used Simply Soft acrylic yarn by Caron
Size 5 knitting needles 

Large eye blunt needle, for sewing with yarn
Sewing needle
All purpose sewing thread in yarn color
4" faux fur fabric (off the bolt)
12" super soft fleece (off the bolt)

This pattern is knitted flat and sewing together with yarn and needle. Machine sewing is used for the lining.

Knitting Pattern

Top dome (Make 2)
CO 15
R1 - k all the way across
R2 - sl1, k2, p to the third last stitch, k3
R3 - sl1, k1m1, k to the second last stitch, k1m1, k
Repeat rows 2 & 3 for 25 more rows, or until work measures about 8 inches at the bottom. Garter stitch for three more rows.

Top Center
CO 15
R1 - k all the way across
R2 - sl1, k2, p to the third last stitch, k3
R3 - sl1, k all the way across
Repeat rows 2 & 3 until work measures about 10 inches long. Garter stitch the last three rows. Match up the knots on the side of the strip and the dome pieces and knit to length.

Sew the dome pieces to the center strip, one on each side, with right sides facing one another. The side which has the garter stitch in the center strip is the back of the dome.

Bottom flap
On the front of the brim of the hat, count 13 stitches from the center strip on both sides. Pick up stitches along the brim, and around the back between these two points. Here, you will begin knitting your flap.
 Knit back and forth on both sides for 3 rows, creating a garter stitch.
For 15 rows, knit on the outside and purl on the inside, with a garter stitch edging on the last three stitches. 
On row 16, place a stitch marker after the 18th stitch and before the 18th from the last stitch. 
On row 17, knit the first three stitches, purl the next 15, knit across to the stitch marker, k3, purl to the last three stitches, knit the final three.
On row 18, knit all the way across.
On row 19, repeat as you did on row 17.
On row 20, knit to the stitch marker. Just past the stitch marker, begin binding off up to the second marker, knit across. 

Ear flaps
You should have two sections of knitting on your needle for your ear flaps. Work one at a time, knitting on one side and purling on the other for three rows, then begin decreasing every row by knitting the second and third, and the second to last and third to last stitches together. Once you have gotten your ear flap down to two stitches, knit them in the round for ten rows to get a small rope. When you bind them off, leave a four inch tail to tie on the tassel.

Lining

Once you have completed the knitting portion of the project, weave in the loose ends and begin making your pattern for the lining.

Lay your hat out on a sheet of paper and trace along the seams. Add a half an inch for stretch and another quarter of an inch for seam allowance. Also, and this is important, have your inner lining pattern come down an inch and a half further in the front than the knitted hat. Refer the the photo on the right.

You will only cut two pieces for your pattern. The dome, and the center strip. 

Once cut, sew them together with right side facing, noting which end is the front and which is the back. 

You will need to also cut a strip of fleece and a strip of fur that is about 12 inches wide and four inches tall for the front bill of the hat. The last piece you will need is the fur for the back flap. Only cut this approximately, leaving plenty of excess. You are going to cut it and sew it to fit during the assembly.

Assembly

Machine stitch the 12" x 4" strip of fleece and fur fabric together on three sides with a 1/4 inch seam, leaving the bottom open. 
As you do this, keep a 1/4 inch of extra fleece lining at the bottom. This allows for even fabric after turning.
Trim the corners and turn right side out.


Pin the strip of fur for the back flap to the lining of the hat with right sides together. Use the knitted hat as a guide for where the flap piece should go - however, leave a good inch or more of fur fabric excess on both sides of the hat. 

Machine stitch this in place.


Sew the front flap to the lining with the fur side of the flap facing the right side of the fleece lining. 
The photos on the right show the lining assembly both right side out and inside out.


Place the lining over a rounded surface (I used my knee) and fit the knitted hat over it snuggly. Make sure there is an inch of lining protruding below the brim of the front of the hat, and that the back fur flap extends past the knitted hat.
Using a standard needle and matching thread, stitch the knitted hat to the lining as shown in the picture. Hide the stitches in the weave of the knitting. The stitches will be concealed within the pile of the lining.

Cut the back flap fur piece so that it can be tucked up and pinned in place. Trim, if needed (see photo on left).

Continue tucking and pinning from sides and around the back, up to the front of the hat.
Stitch the raw edges of the front flap to the front of the knitting, then fold it up.

Hand stitch the flap in place, about an inch from the bottom, and hand stitch the fur fabric to the knitted fabric as shown in the photo on the right.


 To make the tassels, wind some yard around your palm twenty times.
Use the 4 inch length of yarn at the end of each rope to tie the bundles of yarn to the rope at the knot.

Secure by sewing repeated stitches with a needle and thread, and leave the thread attached to sew on the fur cuffs.

Cut 2 strips of fur fabric, about 4 inches by one inch. Roll this over lengthwise, and sew one end to the tassel using the thread that is still attached. Wrap the other side around, tuck the end under, and sew in place. Knot the thread inside the fur cuff.


Monday, August 21, 2017

Knitted Boots for Baby


Materials:

Worsted weight yarn in 2 colors - I used Simply Soft acrylic yarn by Caron
Size 3 circular needles (or dpn)
Size 1 circular needles (or dpn)
1 cable needle (or dpn)
3.5 mm crochet hook
Stitch markers (at least 4)
Sewing needle
Upholstery thread (color of sole)
All purpose sewing thread in both yarn colors
3" faux fur fabric (off the bolt)
12" super soft fleece (off the bolt)
8" x 8" leather
8" Craft Felt, color of upper boot
Hammer & Nail
Spray Adhesive
Flat sorbent pad (or similar material)
Absorbent shammy (or similar material)

Notes: Knit the shells at least one size bigger than you think you want. Once you get the lining and the felt inside, Baby's foot will have much less room. These boots are made to fit a size 3 1/2 infant foot. To knit the boots smaller or larger, begin by adjusting the size of the knitted sole, and then adjust the remainder of the pattern accordingly. 


Knitted Body


Sole
In the color you chose for the bottom of the boot, using a size 3 needle set, knit a sole using seed stitch that is 15 stitches wide at it's widest and 7 stitches wide at the narrowest, as follows:

CO 7
R1: sl1, 
* K1, p1; rep from * to end of row. 
R2: sl1, K1m1, * p1; rep from * to last stitch, p1m1.
R3: sl1, * P1, k1; rep from * to end of row.
R4: sl1, K1m1,*k1, p1; rep from * to last stitch, k1m1.
R5: sl1, * K1, p1; rep from * to end of row.
R6: sl1, K1m1, * p1, k1; rep from * to last stitch, p1m1.
R7: sl1, * P1, k1; rep from * to end of row.
R8: sl1, K1m1, * k1, p1; rep from * to last stitch, k1m1.
R9: sl1, * K1, p1; rep from * to end of row.

You should now have 15 stitches on your needle. Continue knitting back and forth in seed stitch, slipping the first stitch of every row, until you have 28 rows. You will then decrease on row 29, by knitting the second and third, and the second to last and last stitches together. You will have 11 stitches.
Continue knitting the heel of the foot until you get to row 60. Decrease  on row 61 to 9 stitches, and on row 63 to 7 stitches. Bind off so that you have 63 rows.

Lower
Using a crochet hook, pull the yarn through the edges of the sole, and put them on the size 3 circular needles, picking up a total of 64 stitches. Seed stitch in the round for four rows.


On row five, you will switch to your second yarn color, and as you knit, place stitch markers after stitches 16, 24, 40, and 48. You are going to decrease every row starting on row six, by knitting 2 together - just AFTER the first two markers, and just BEFORE the third and fourth. So that you will decrease 16 total stitches on four rows (6, 7, 8 & 9). You will have 48 stitches total.

Top & Tongue
Place the first 12 stitches on reserve on one piece of yarn or stitch holder. Place the next 8 on a second reserve. Leave 8 stitches on the needle, and place another 8 on reserve. Place the last 12 stitches on reserve, following the diagram below.


Pick up your yarn and knit across the 8 stitches at the very top of the boot. Turn, and purl across the eight, and pick up another stitch from one on reserve from the left side. Turn and knit across, pick up a stitch from one on reserve from the right side. You should now have 10 on your working needle and 7 on each of the top reserves.
Turn, purl across the row, pick up a stitch from reserve. Turn the work again and knit the first two stitches together. Knit across, pick up a stitch from reserve, turn. Purl 2 together.
Continue knitting and purling the stitches, picking up one from reserve as you come to it, and then knitting or purling it into the work so that you keep 10 stitches working. 

Once all of the stitches have been used on the first sets of reserves, work back and forth as follows:
k10, turn
k2, p6, k2, turn.
Make 25 rows past the reserve stitches. On row 26, knit on both sides to create the garter stitch, for 3 more rows. Bind off on row 30.

Upper Boot

Pick up all 24 of the remaining reserve stitches. Slip the knitting needles beneath 8 of the tongue stitches (4 on each side) and pick up new ones, for a total of 32 stitches.
R1- K5, p3, k4, p2, k4, p2, k4, p3, k5
R2- K3, p2, k3, p4, k8, p4, k3, p2, k3
R3- K5, p3, Sl 2 sts to cn, hold in front, k2, k2 from cn, p2, k4, p2, k4, p3, k5
R4- K3, p2, k3, p4, k8, p4, k3, p2, k3
R5- K3, p2, k3, p4, k8, p4, k3, p2, k3
R6- K3, p2, k3, p4, k8, p4, k3, p2, k3
R7- K3, p2, k3, p4, k8, p4, k3, p2, k3
R8- K3, p2, k3, p4, k8, p4, k3, p2, k3
R9- K5, p3, Sl 2 sts to cn, hold in front, k2, k2 from cn, p2, k4, p2, k4, p3, k5
R10- K3, p2, k3, p4, k8, p4, k3, p2, k3
Repeat rows 1 through 10 five more times, or until the boot is as tall as you want. Knit back and front of fabric for three more rows, bind off the on the fourth.

Once the boots are knitted, weave in all of the loose ends.

Inner Shoe

 Cut the following pieces from crafting felt:
Tongue: 4.5 x 1.25 inches (2)
Heal: arc 5.5 x 2 inches (2)
Toe: 8 x 1.25 inches (2)
Top: arc 2 x 3 inches (2)
Back: square 7 x 6 inches (2)

Turn boots inside out. Use spray adhesive to first glue the tongue felt piece to the inside of the tongue. Take care to stretch the knitted fabric to the proper width, leaving a small edge.
 Again, use the spray adhesive to glue the heel pieces to the back of the boots, then glue the large back square. The knitted fabric will need to be worked and stretched as the adhesive dries.

Glue the toe strip in place, the snip vertically twice at the toe to fold down the fabric for a rounded toe piece (refer to photo on the right). Glue the top arc on top of this with more spray adhesive.

Once the felt pieces are glued in place, allow the shoes to dry overnight.


Leather outer Soles

Make a pattern for your leather sole by following the dimensions of the original knitted sole you made. Cut the leather using sturdy scissors, then take a nail and hammer to punch holes around the edges for stitches. You want the holes to be 1/8 of an inch apart.

Glue the soles to the bottom of the shoes with spray adhesive, then stitch in place with upholstery thread.

Trim and Lining

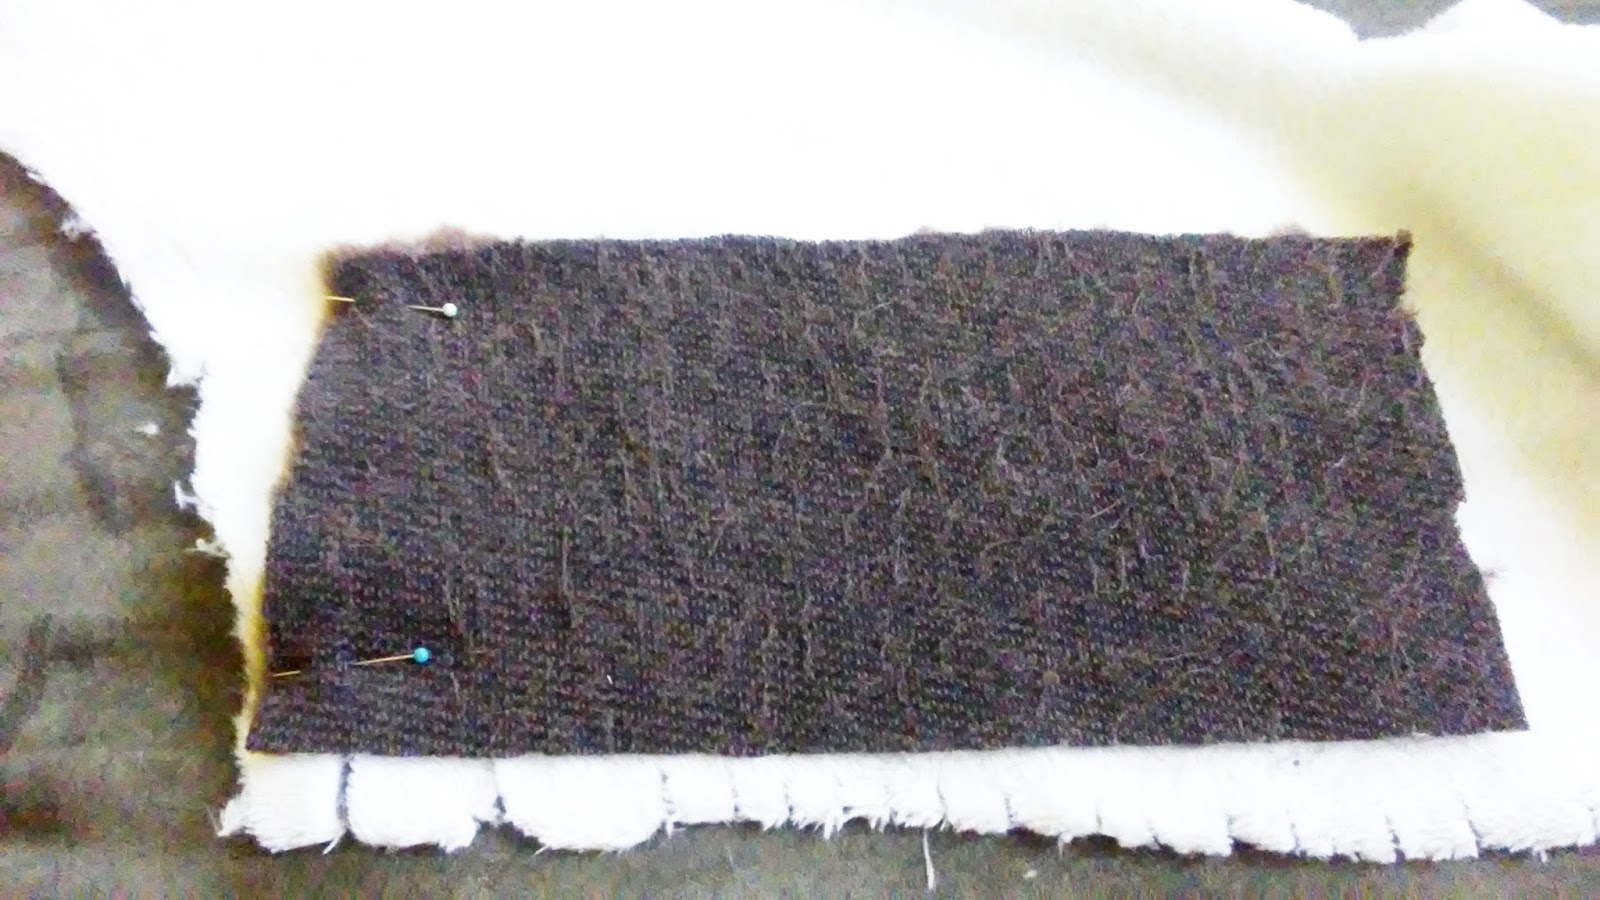
Cut two pieces of fur to make
trim; 16 inches by 2 inches. Fold this long piece over, width-wise, and pin into place around the edges of the upper boot.
Hand stitch the fir trim in place, taking care to keep the stitches on the insides of the knitted fabric bars so the thread will not be noticeable.

Cut one wide piece for the tongue, roughly six inches by six inches. Pin in place and sew to the knit fabric just as you did the trim.

Knit a rope using the yarn you used to knit the soles.
CO 2 stitches on size 1 needles. k2, slide the stitches over and k2 again (you are knitting in the round). Do this until your rope is 6 inches long. You are going to make 4 of these.
Sew one end of each rope into the inside of the shoes right up next to your fir trim. Refer to the photo on the left. Make loops in the rope by tack stitching three more times, evenly, along the rope.
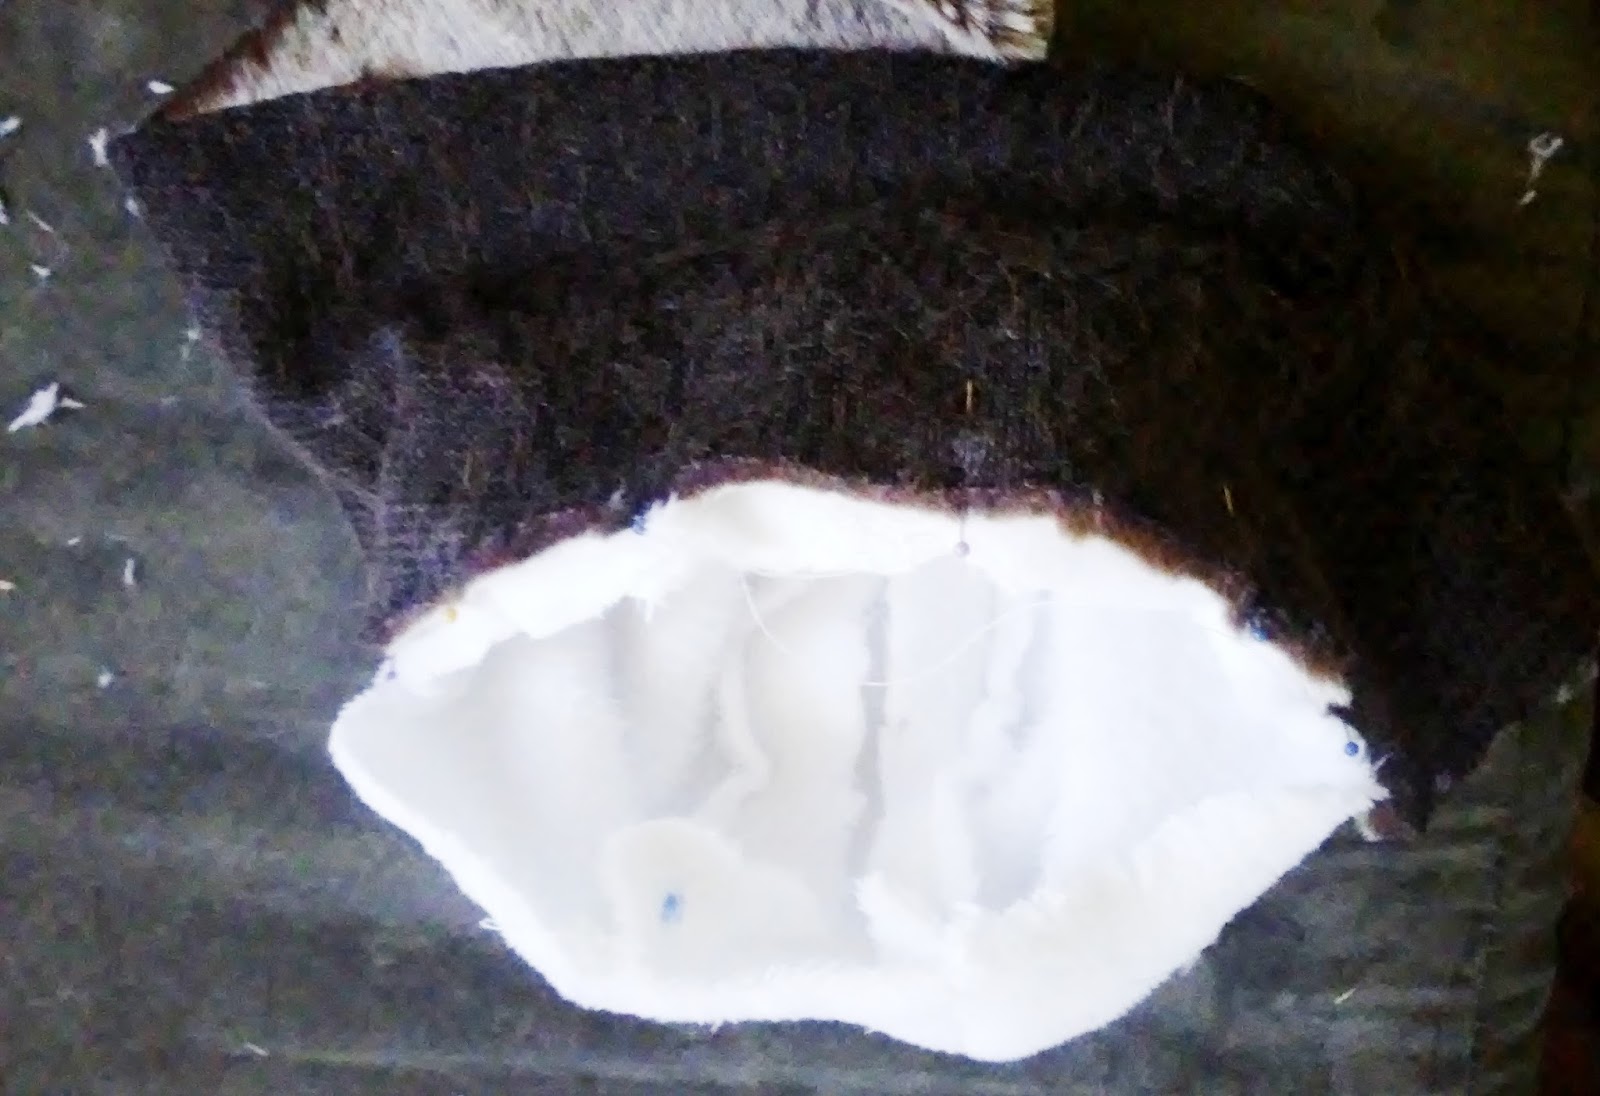
Use your felt pattern pieces to make the pattern for the soft fleece lining. You will want to make the fleece pattern pieces a little larger to accommodate for seam allowance.
Once the fleece lining is sewn together, turn it inside out and tuck it down into the boot. Use the thread that is the same color as the sole to sew the lining to the bottom of the shoe. It is easiest to sew along the sides from the outside of the shoe, hiding the threads in the knit.

At the top of the boot, fold the soft fleece edges under and pin them in place. Use the thread that is the color of the upper boot to sew it in place, again, hiding the stitches in the weave of the knitted fabric.

Insole


The insole is made using the same pattern used for the outer sole and cutting slightly to the inside.
I used a piece of flat sheet sorbant (PIG brand), which is essentially stiff cotton. You can use any stiff padded flat substance.
The blue is a shammy, bought in the automobile section of your local big box store.
Glue the shammy to the padding with spray adhesive.
Turn the boot inside out and glue the insole to the bottom, with the shammy fabric on the top.
Once dry, you can turn the boots right side out again. The last thing you need to do is make the laces.


Laces

Make rope just as you did in the trim and lining section. I chose white to have a contrasting color. Knit the rope to approximately 20 inches.
Once the rope is finished, you will have a small length of yarn left on each side. Leave them here. Lace your boots before tying on the poms.
Make small poms by taking the two colors of your boot and winding them around the palm of your hand six to eight times. Lay this on your rope ends, right at the knot and use the attached excess yarn to tie it in place. Wrap the upper section in the two colors and tie in place. Cut the bottoms of the poms so that they are about an inch long.