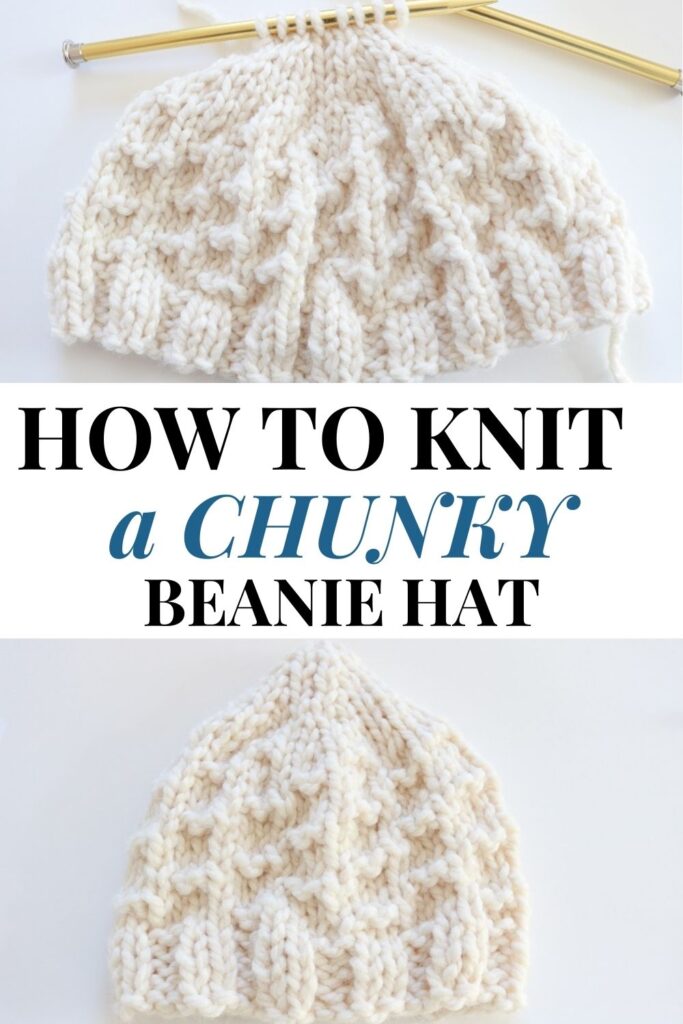
How to Knit a Chunky Beanie Hat
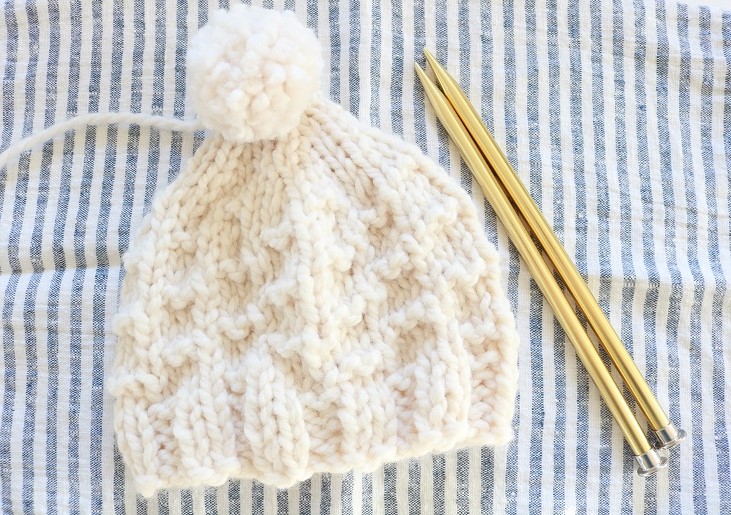
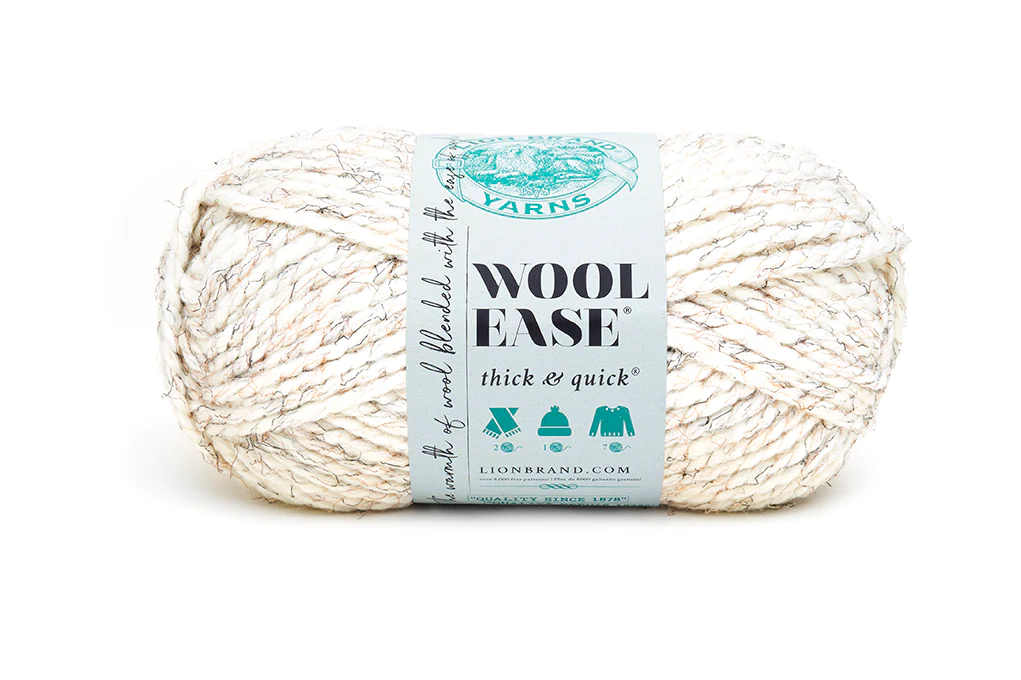
The weather is getting colder, and our heads need covering. There’s no reason why our winter hats can’t be both functional and cute. How would you like an easy pattern for a knit beanie hat? You can quickly make this adorable chunky knit textured beanie in an all-time favorite yarn – LION BRAND’S WOOL-EASE THICK & QUICK in color FISHERMAN. I bet it will be the first hat you reach for this winter.
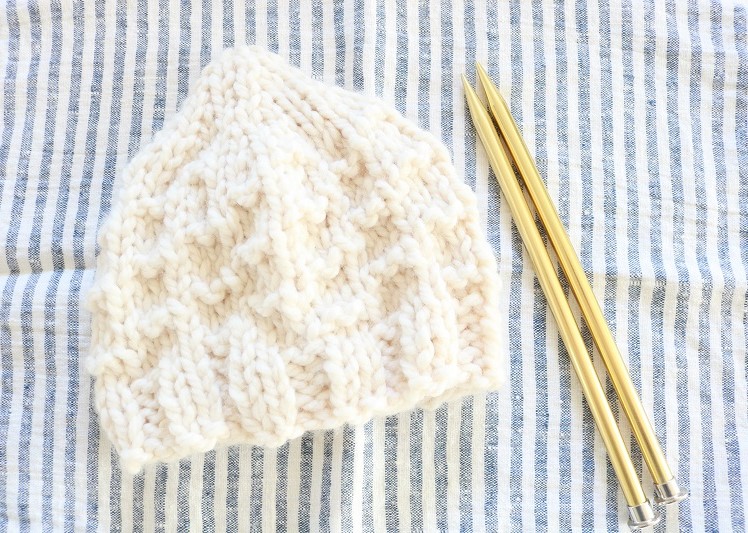
Ready to get started with this easy knit beanie pattern? Just grab the minimal supplies listed below, and set aside a couple hours time to knit.
This post may contain affiliate links. That means if you click and buy, I may make a commission at no cost to you. Please see my full disclosure policy for more details.
Read below to get the entire free chunky knit hat pattern. I also have it available (ad-free) as a pdf in my ETSY SHOP.
Supplies
- Size 15 (10 mm) straight knitting needles
- approx. 45-50 yards of size 6 Super Bulky yarn. I used LION BRAND’S WOOL-EASE THICK & QUICK in color FISHERMAN.
- yarn needle, scissors
This textured beanie hat is knit on straight needles back and forth, so it is a perfect pattern for beginners. You only need to be familiar with the Knit and Purl stitches, as well as K2tog (knit 2 together).
Abbreviations
K – knit stitch
K2tog – knit 2 together
P – purl stitch
RS – Right Side (side that faces you when finished)
sts – stitches
How to Knit a Beanie
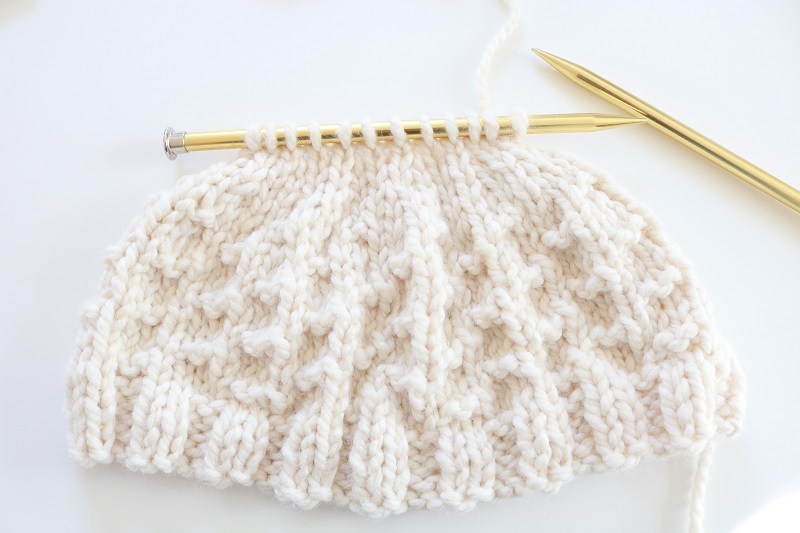
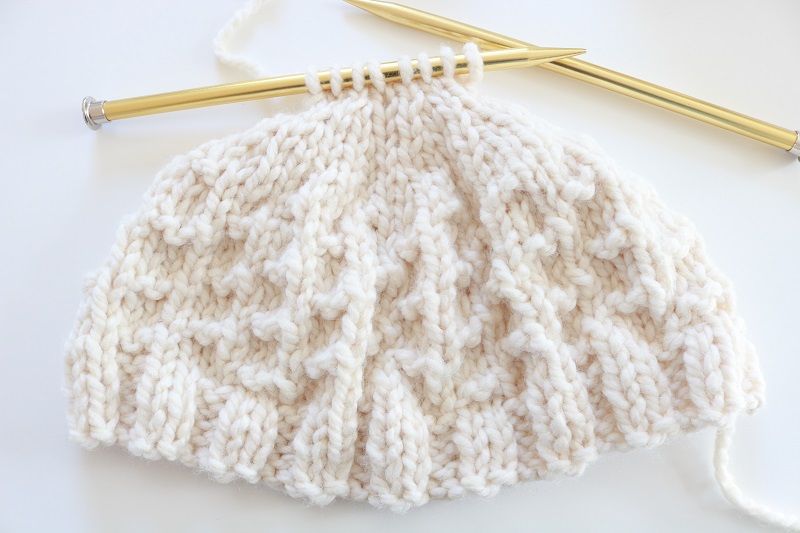
The chunky knit beanie hat pattern begins with a few rows of ribbing to form the lower band.
PATTERN FOR KNIT BEANIE
Finished Size
* This pattern should fit a teen or woman’s head. It will measure approximately 8″ height by 20″ circumference.
Ribbing Band
Beginning with the Size 15 knitting needles, cast on 40 stitches with your SUPER BULKY YARN.
Row 1 (RS): *K2, p2; repeat from * to end.
Rows 2-4: Repeat Row 1.
Beanie Hat Texture
The next 12 rows will comprise the main texture of the beanie hat.
Row 5 (RS): Knit across.
Row 6: P4, *k2, p4; repeat from * to end.
Row 7: Knit across.
Row 8: P1, *k2, p4; repeat from * to last 3 sts, k2, p1.
Rows 9-16: repeat Rows 5-8 twice.
Hat Decrease
At this point you will slowly decrease the stitches in each row, in order to shape the top of the hat.
Row 17: K4, *k2tog, k4; repeat from * to end. (34 sts)
Row 18: P4, *k1, p4; repeat from * to end.
Row 19: K1, *k2tog, k3; repeat from * to last 3 sts, k2tog, k1. (27 sts)
Row 20: Purl across.
Row 21: *K1, k2tog; repeat from * to end. (18 sts)
Row 22: Purl across.
Row 23: *K1, k2tog; repeat from * to end. (12 sts)
Row 24: Purl across.
By now you should see your beanie hat taking shape, as follows:
Row 25: *K1, k2tog; repeat from * to end. (8 sts)
Row 26: Purl across.
Cut the yarn, leaving a 24″ tail to work with. Using a yarn needle, thread this tail through the remaining 8 stitches as follows:
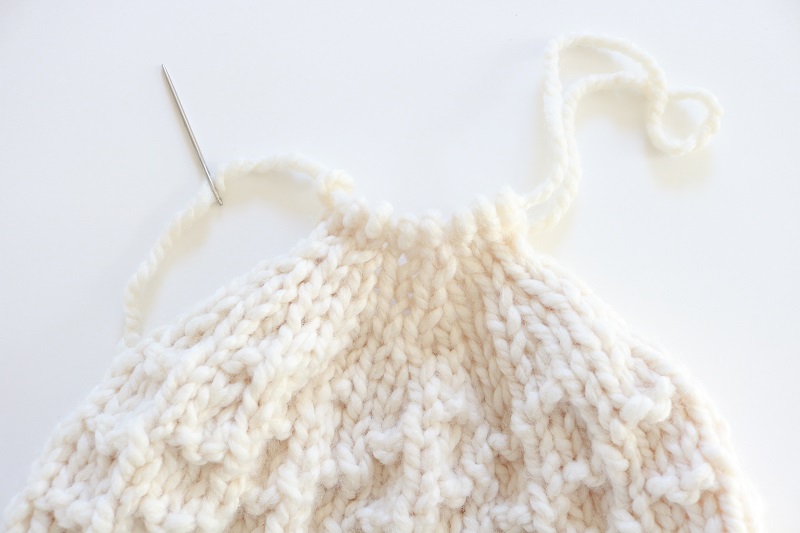
Pull the yarn to draw the stitches tightly together. Do not fasten off.
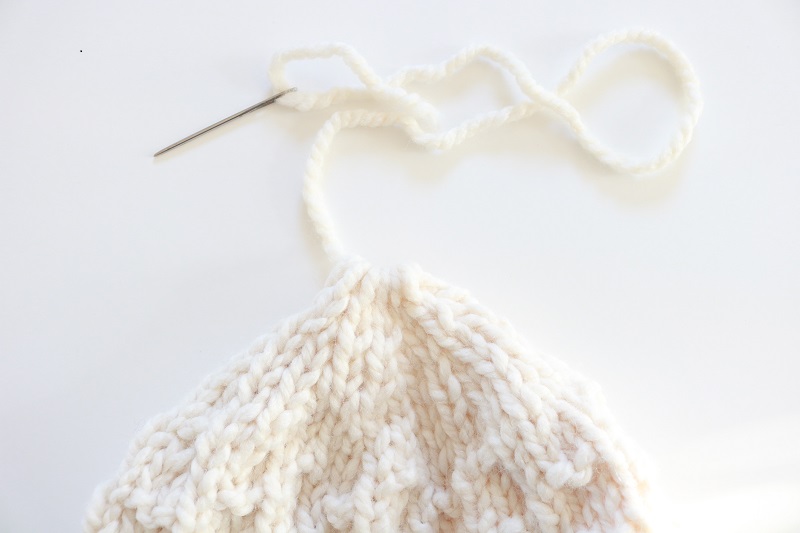
Make Up the Hat with a Seam
Using the long tail end, sew the hat Right Sides together creating a back seam. I used the Back stitch to sew up the seam:
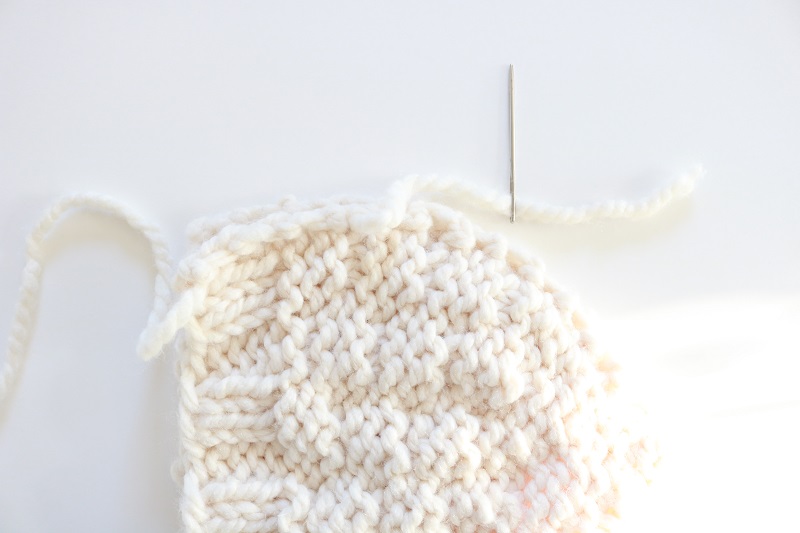
Weave in all loose ends.
Turn Right Sides out. Here is a look at the back of the hat, with the seam:
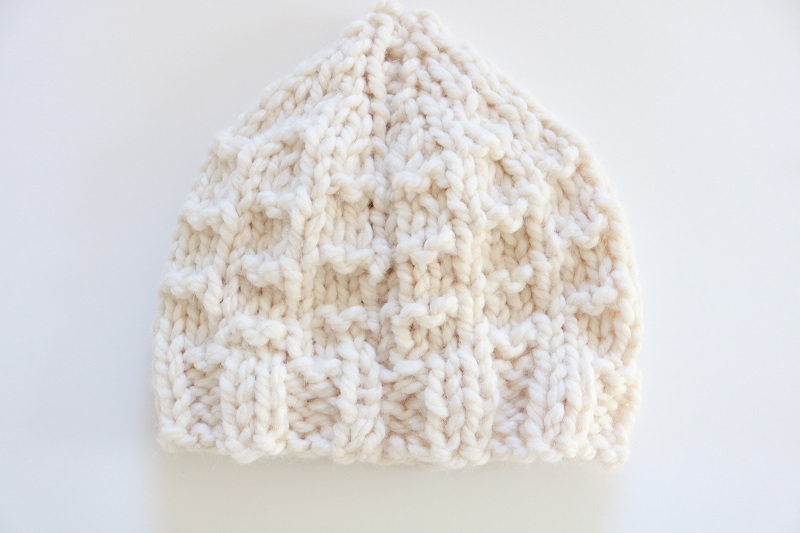
And here is a view of the front of the knit beanie hat:
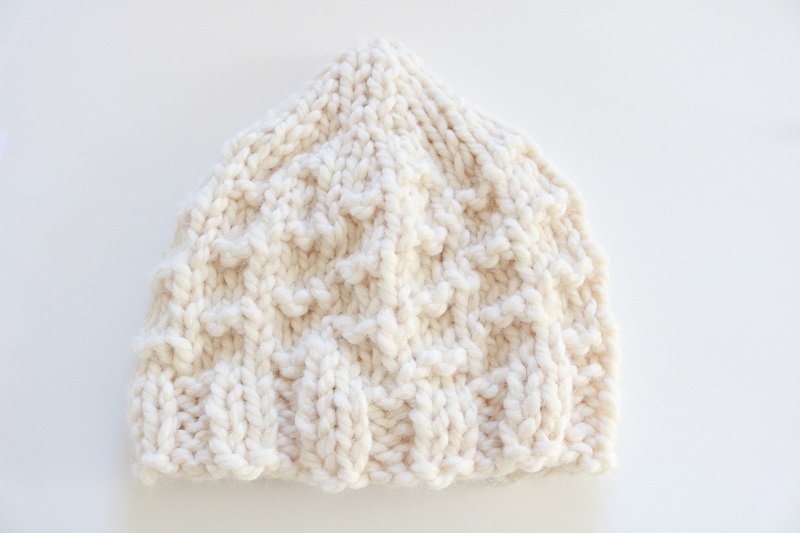
Finished Cream Beanie Hat
Now it is time to enjoy your finished knit hat! Give it as a gift or add it to your wardrobe. You can boast that you made it yourself. No one needs to know it only took a couple of hours with this easy cream beanie pattern.
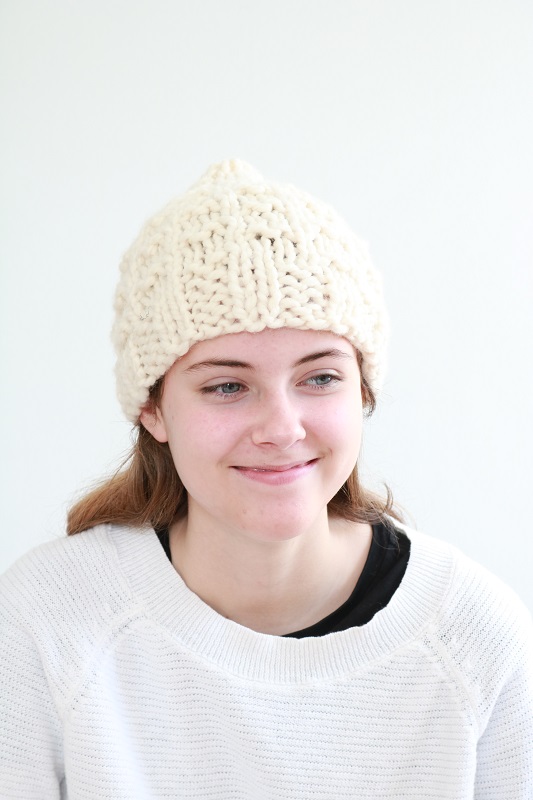
(Teens, especially, may enjoy the beanie so much they get silly!)

Add an optional handmade yarn pom-pom to the top for a fun look…
…or leave the beanie hat as is:
You could also pair the beanie with these CHUNKY KNIT FINGERLESS MITTENS, using the same yarn.
Remember… I also have this written pattern (with photos!) available (ad-free) as a pdf in my ETSY SHOP.
Feel free to share the beanie free knitting pattern with friends…
===> Remember to PIN for later! <===


4 Comments
Cory Diener
No worries Suzan, thanks so much.
I ended up using 6 mm and I cast on 52 to start. I did the 5-8 pattern an extra time and cast off the same way. I made it for my friends baby. I’m sure she’ll love it!!
Susan
Wonderful! I am sure your friend will love this sweet handmade gift for her baby. Thanks so much for trying out my pattern!
Cory Diener
this hat is gorgeous. How many cast on and how many rows if I want to make for a baby say 0-3 month?
Susan
Hi there, thanks so much for your interest in my hat pattern. Although I do not offer baby patterns at this time, if I ever do in the future, I will plan to update my existing hat patterns accordingly.