Knit Hooded Sweater with Teddy Bear Ears
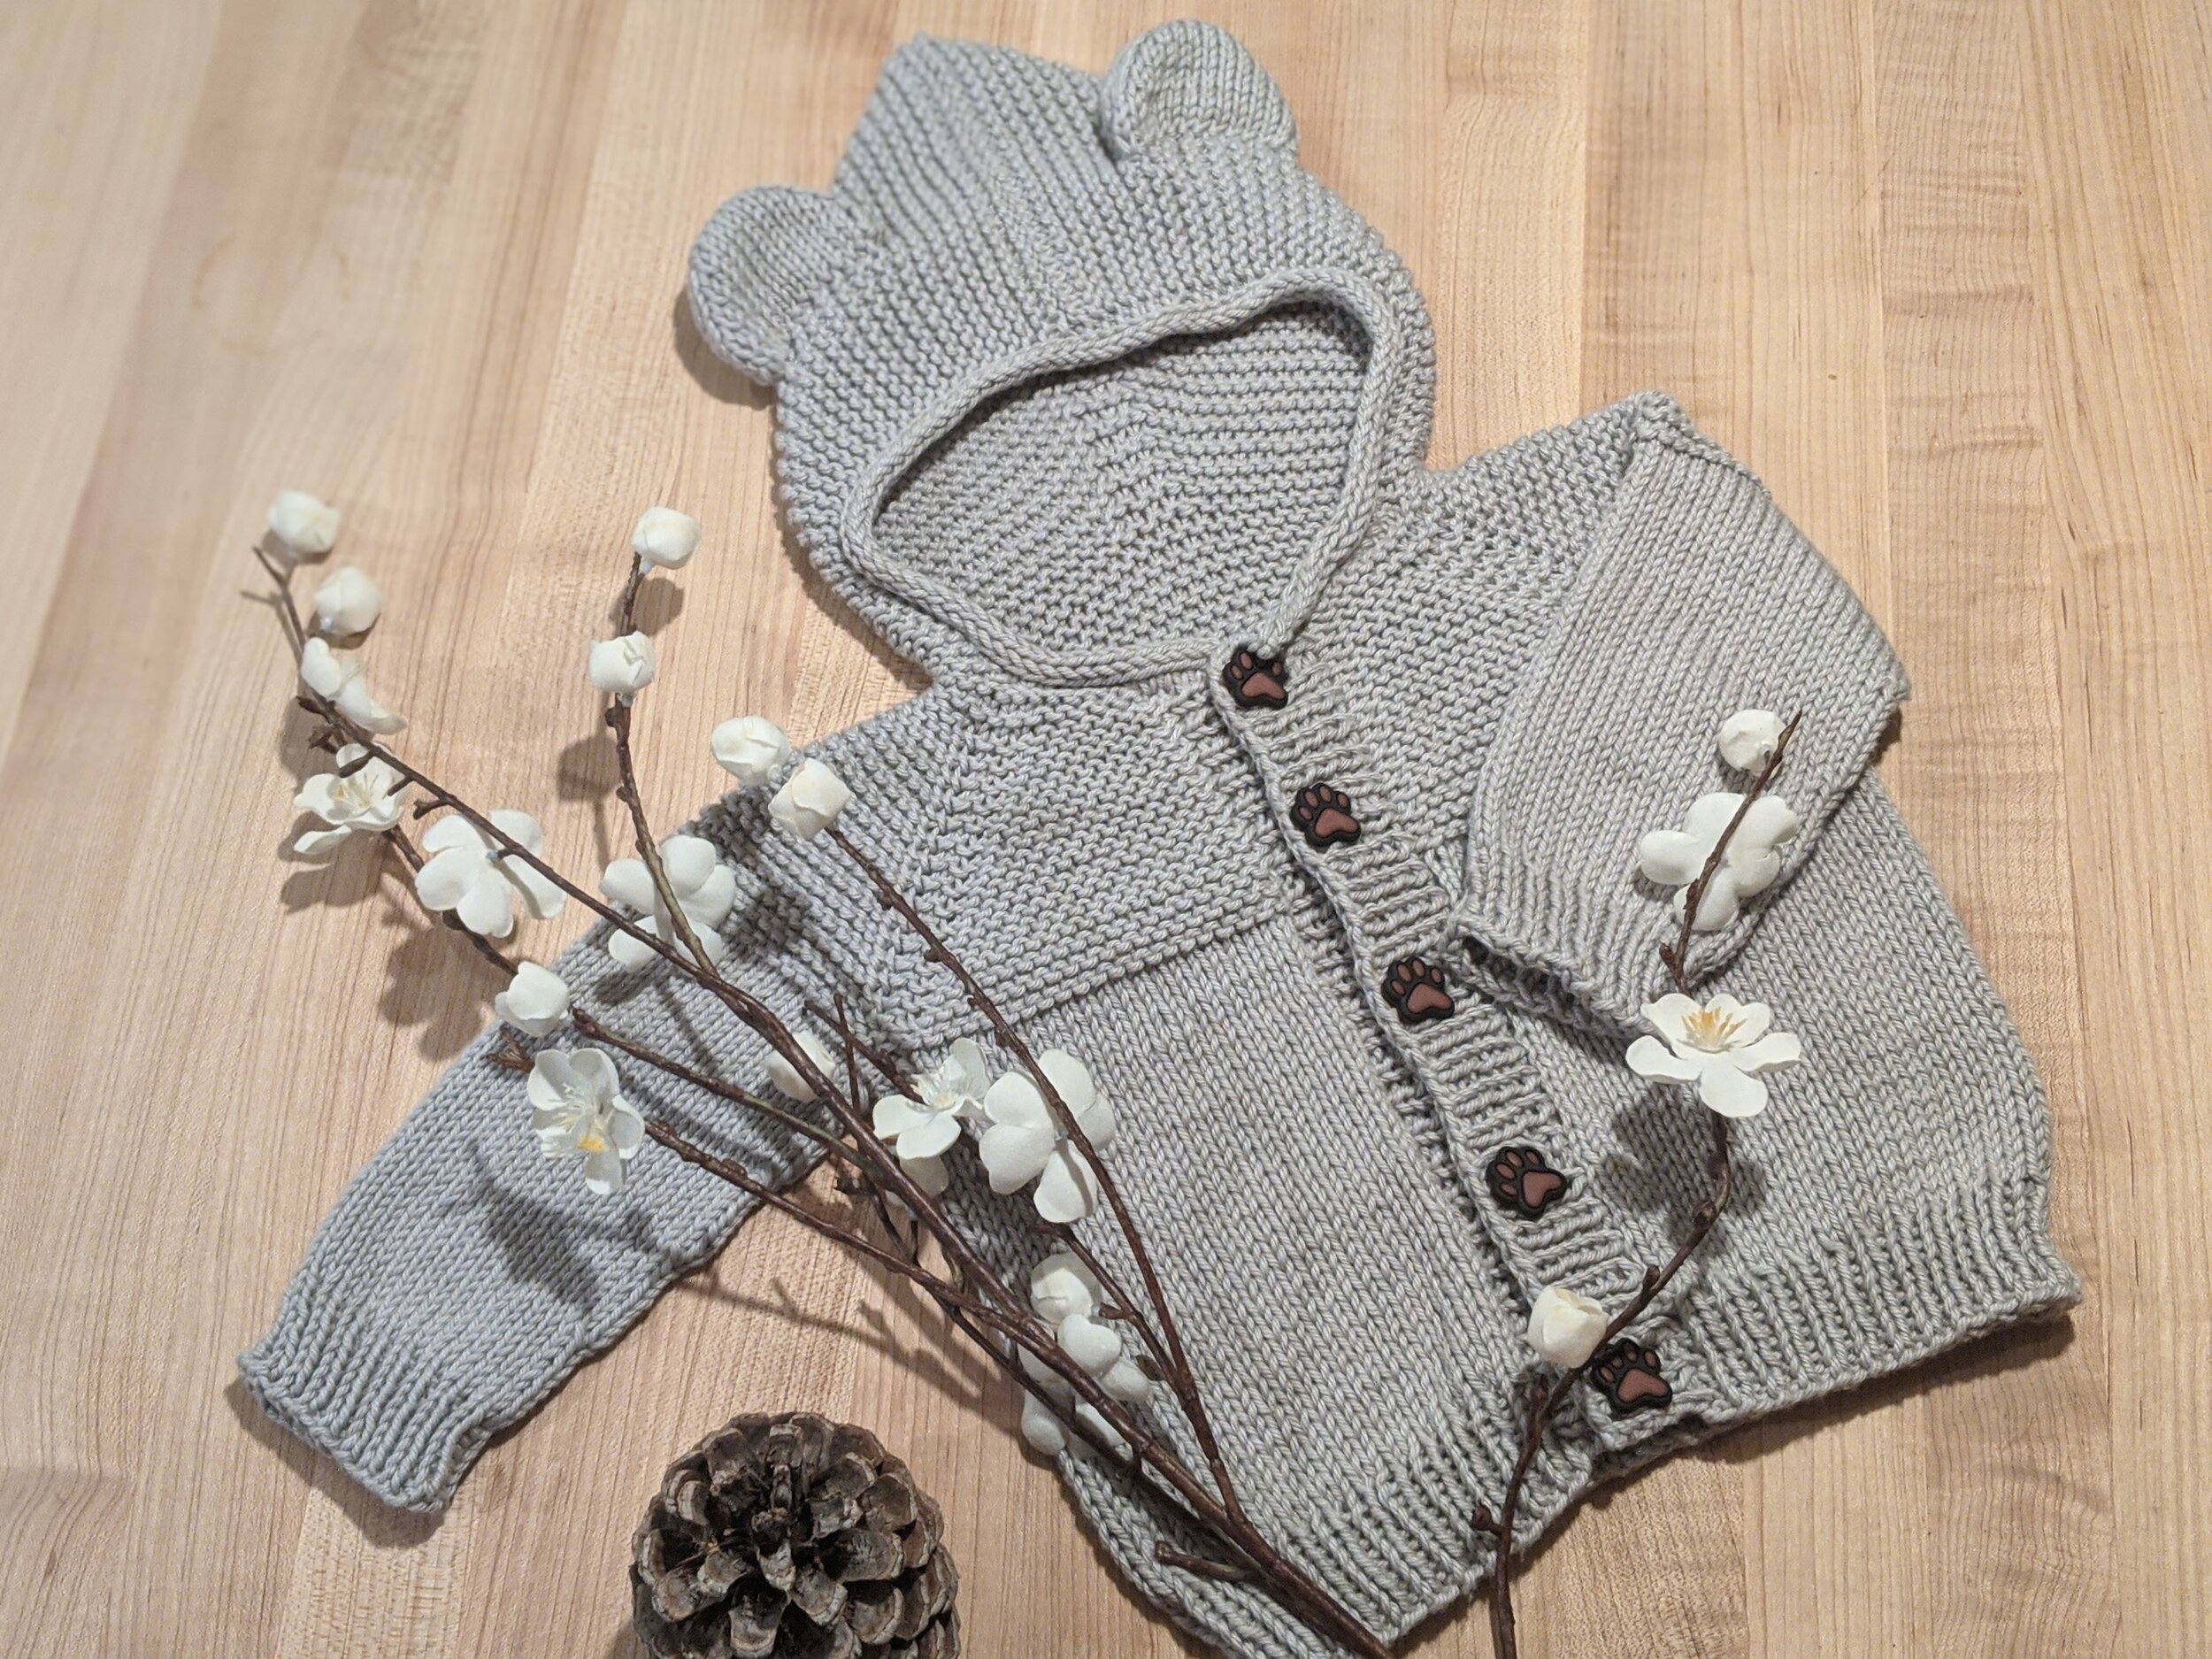
I have some exciting news to share: my brother and his wife are expecting their 2nd child this summer - a baby boy! If you follow my blog, you know that I love teddy bears, and what better way to welcome my new nephew to this world than to make him a cozy little teddy bear hooded sweater.
I love this pattern because it’s super versatile and can work for both baby boys and baby girls. After all, what baby doesn’t look absolutely adorable in a sweater with animal ears! I live in California, so medium weight cotton yarn makes for a great fall/winter sweater that can be worn everyday. If you live in a colder climate you could also substitute for a soft wool yarn of similar weight for an even warmer sweater.
The sweater is knit from the top down, starting with the hood, followed by neck, raglan increase, body, and finally sleeves. The body of the sweater is a simple garter stitch followed by a stockinette stitch pattern. You can add extra personality to the sweater by finishing it off with some super cute buttons like these bear paw ones, similar to the ones that I used from Joann’s.
To complete this baby gift, I also paired it with my favorite blanket, burp cloth and bib set in a cute matching teddy bear pattern. You can find the sewing pattern for this set on the blog here.
Note: an ad-free, PDF of this pattern can also be purchased on my Etsy shop here.
SPECIFICATIONS
SIZES
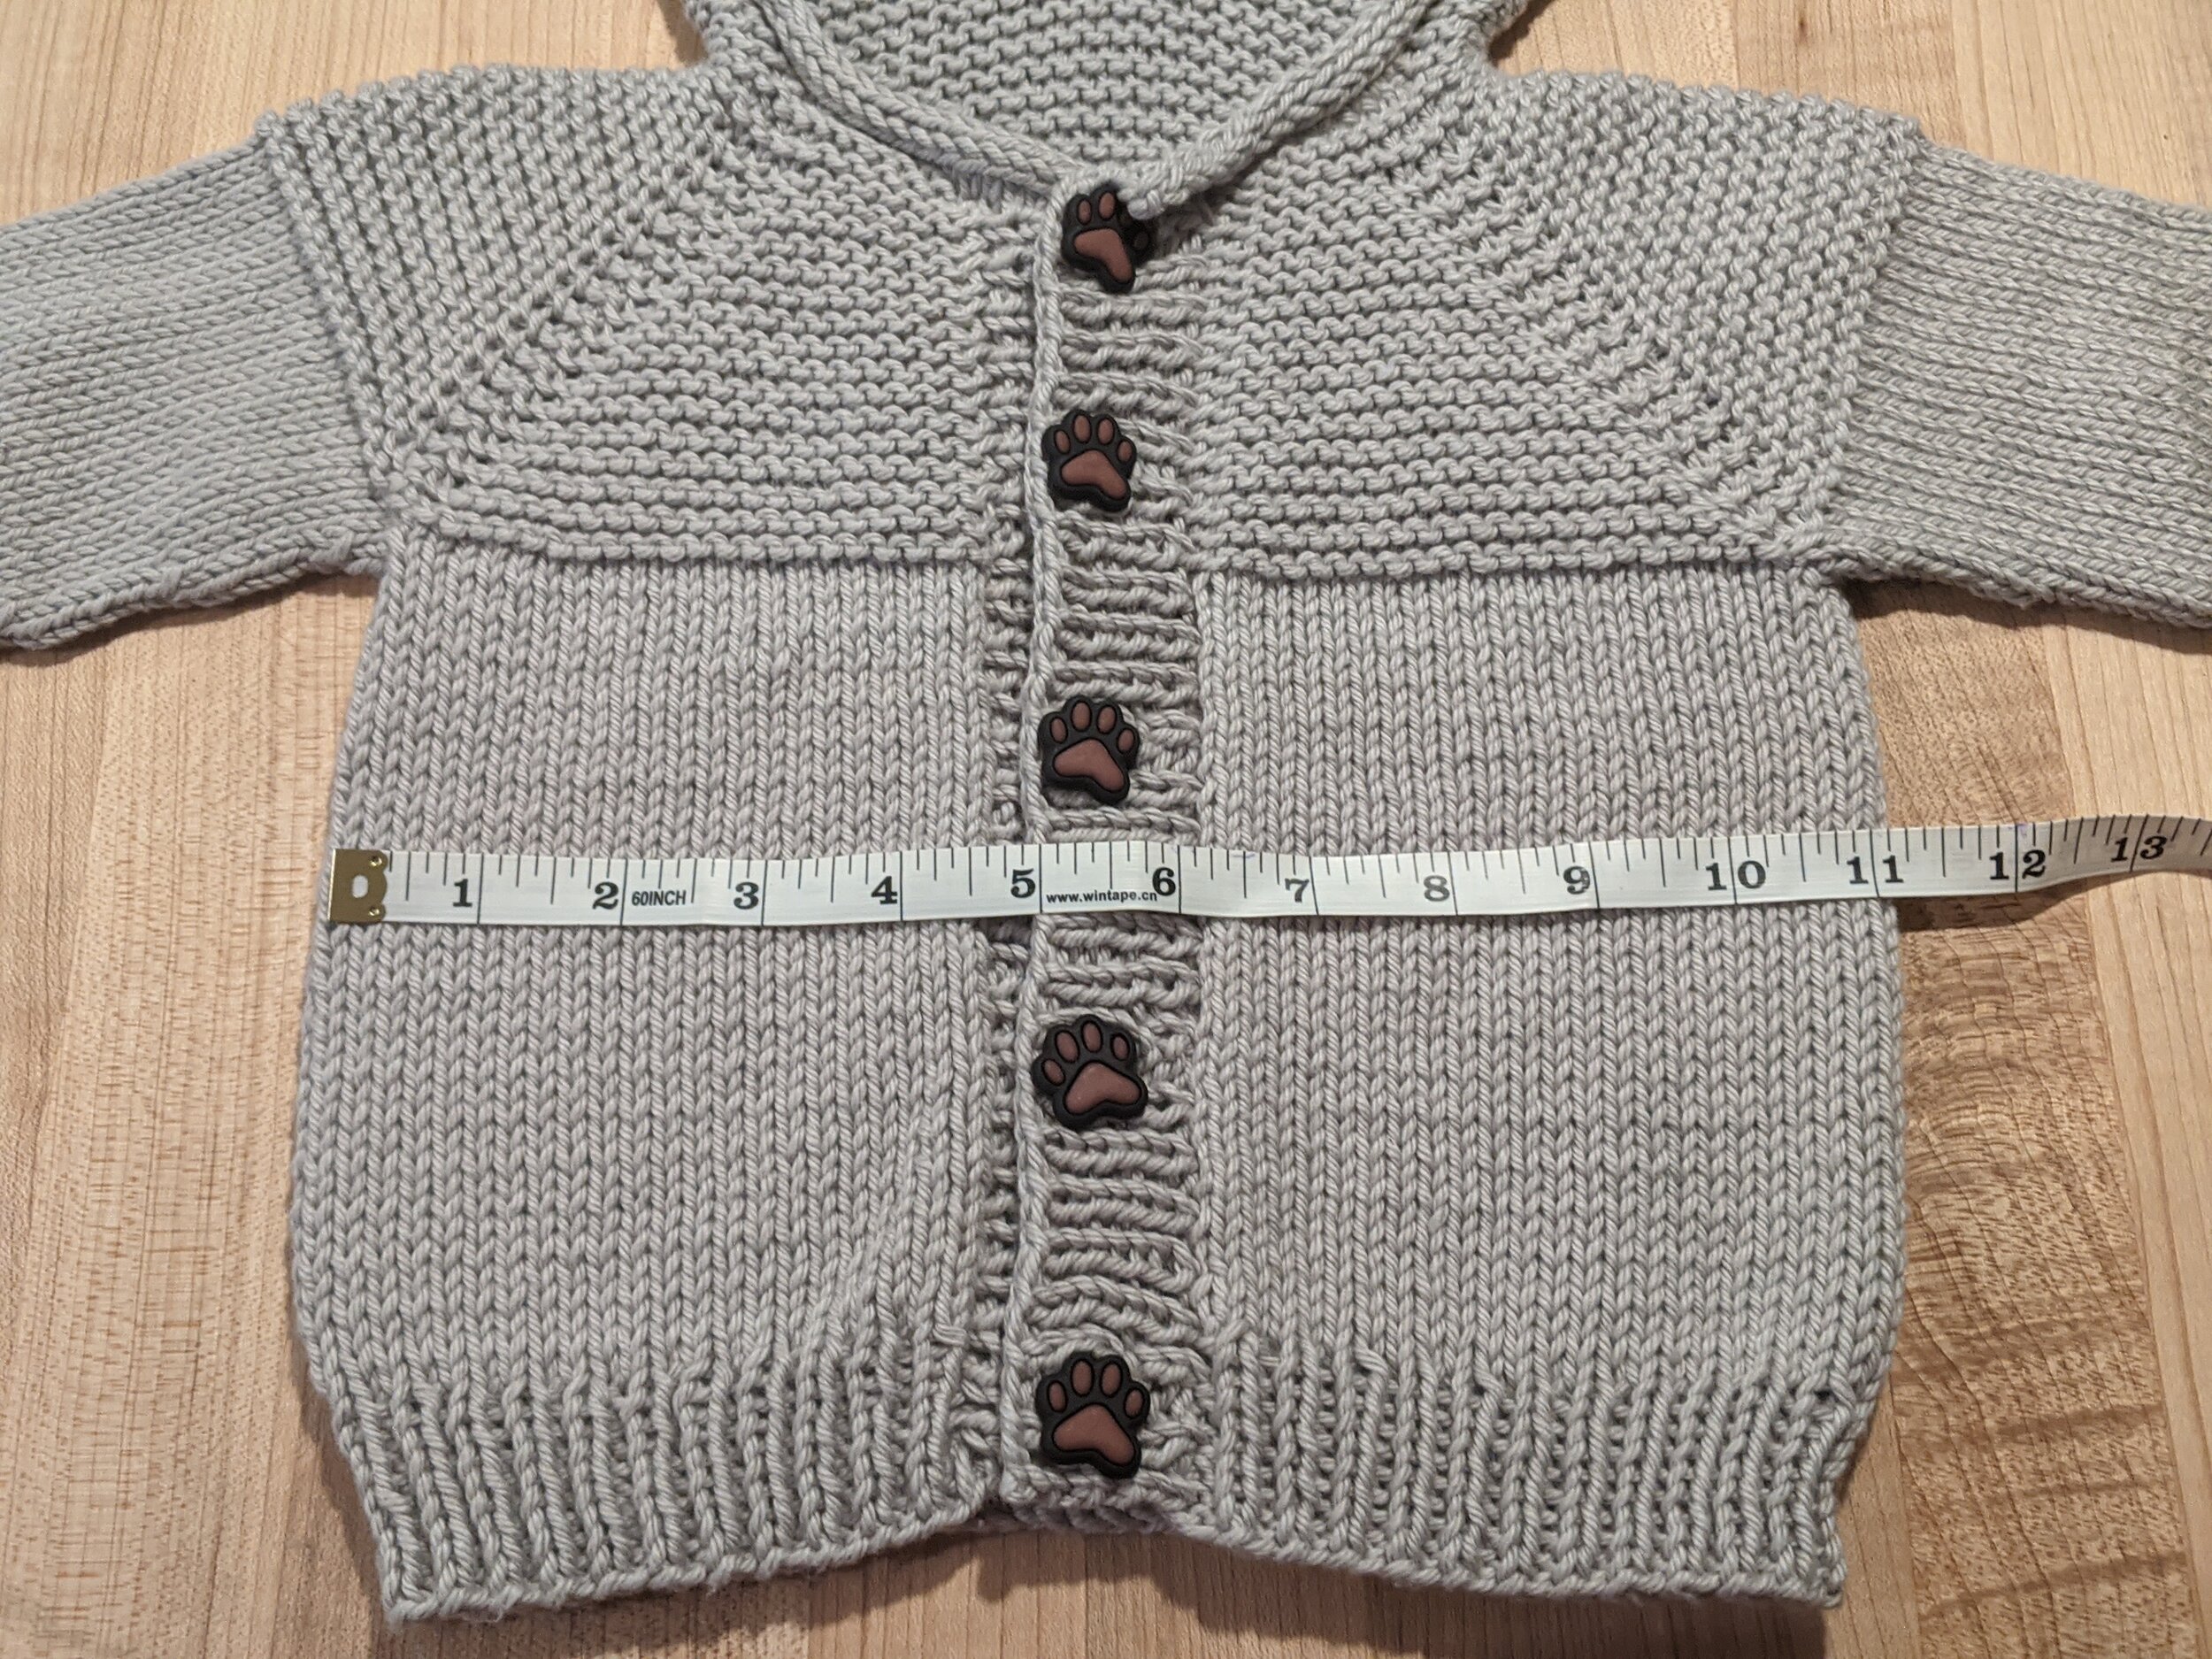
One size: should fit ~9 mo. - 1 year old; chest measures 11” across when lying flat

GAUGE
~5 sts x 6 rows = 1” x 1” in stockinette stitch
MATERIALS
Yarn: I used 2 skeins of Hobby Lobby’s “I love this cotton” yarn in Dove; depending on availability you can also buy it on Amazon here.
Needles: US5 and US7 40” circular needle (for magic loop). For hood and body of the sweater you can use straight needles and then switch to circular or DPN for sleeves. I personally use the circular needles to knit the entire project (hood, body and sleeves), but you can choose whatever works best for you.
Additional supplies: yarn needle, scissors, stitch markers, 5 buttons - I used bear paw buttons purchased at Joann’s, but you can find similar ones like this on Amazon as well.
ABBREVIATIONS
co - cast on
k - knit
p - purl
K2tog - knit 2 together
P2tog - purl 2 together
m1 - make 1
ssk - slip 2 stitches knitwise to right needle. Insert left needle through the front loops and knit tog.
pm - place marker
sm - slip marker
RS - right side
WS - wrong side
INSTRUCTIONS
(A PDF of this pattern can also be found on Etsy)
Hood
To start: Co 56 STS
R1: k across
Repeat row 1 until hat measures 15 cm or ~6” from cast on edge
Decrease:
Prep row: (WS) k28, pm, k28
R1 (RS): k until 3 STS before marker, ssk, k1, sm, k1, k2tog, k until end of row
R2 (WS): k across
Repeat these two decrease rows until 38 STS remain on needle.
Body
Neck:
R1: Cast on 8 sts using cable cast on method, knit across the cast on stitches and continue knitting across the rest of the row (46 sts)
R2: Turn, cast on 8 stitches on the other side using cable cast-on method. Knit across the new cast on stitches and continue knitting across the rest of the row. (54 STS)
R3-R7: knit
Raglan Increase:
Setup row (WS): k8 for front, pm, k8 for sleeve, pm, k22 for back, pm, k8 for sleeve, pm, k8 for front.
R1: *k to 1 st before marker, m1, k1, sm, k1, m1; repeat from * 3 times, k to end
R2: k to end
Repeat rows 1 & 2: 14 times
After completing the above increases your stitch count = 23 / 38 / 52 / 38 / 23 = 174 sts
Underarm divide (RS):
*k to marker, remove it, using tapestry needle threaded with piece of scrap yarn, transfer sleeve sts onto scrap yarn, flip work over and using “knitting-on” CO method, CO 2 sts, flip work back over, remove next marker; repeat from * 1 time, k to end. Total sts on needles 102.
Body:
Knit next 40 rows in stockinette st
Switch to size 5 needles
R1 (RS): k1, P1 - repeat to 1 st remains k1
R2 (WS): p1, k1 - repeat to 1 st remains p1
Repeat rows 1-2, 3 more times, bind off.
Sleeves
Transfer sleeve sts from scrap yarn onto circular needle for magic loop method. Join yarn and pick up 4 sts: k2 sts, pm, pick up and k2 more. Total sts on needles: 42.
The beginning of the round is now where you placed the marker.
R1-4: k
R5: k2tog, k until 2 STS left in round, ask (40 STS)
R6-13: k
R14: k2tog, k until 2 STS left in round, ask (38 STS)
R15-22: k
R23: k2tog, k until 2 STS left in round, ask (36 STS)
R24-31: k
R32: k2tog, k until 2 STS left in round, ask (34 STS)
R33-40: k
Switch to size 5 needles
R1-8: k1, p1, repeat until end of round
Cast off; bind off and weave in ends.
Button Bands
Button bands are worked in k1, p1 ribbing.
Left side button band:
Setup row: With right side facing, pick up and knit 55 sts along garment edge from neckline to the bottom edge ribbing.
R1: *p1, k1* - repeat to end of row ending with p1
R2: *k1, p1* - repeat to end of row ending with p1
R3: *p1, k1* - repeat to end of row ending with p1
R4 (button hole role): k1, p1, k1, *YO, k2tog, p1, k1, p1, k1, p1, k1, p1, k1, p1, k1* - repeat from * 3 more times until 4 sts remain; YO, k2tog, p1, k1
R5: *p1, k1* - repeat to end of row ending with p1
R6: *k1, p1* - repeat to end of row ending with p1
R7: *p1, k1* - repeat to end of row ending with p1
Bind off all stitches. Bind of k sts knitwise, and p sts purlwise. Weave in ends.
Right side button band:
Pick up and knit 55 sts (same number as left side)
Work in k1, p1 ribbing for 7 rows
Bind off all stitches. Bind of k sts knitwise, and p sts purlwise. Weave in ends.
Hood Finishing
Stitch the hood together.
Start by picking up all the stitches at the top of the button band, continue picking up stitches around the hood opening picking up every other stitch, then pick up all stitches across the top of button band on the other side.
Knit one row, then finish off with i-cord cast off.
Ears (make 4)
Cast on 16 sts
R1: k
R2: p
R3: k
R4: p
R5: k1, ssk, knit until 3 STS left, k2tog, k1 (14 STS)
R6: p
Repeat row 5 and 6 three more times, 8 STS remaining on needle.
Cast off.
Stitch ear pieces together: take two of the ears you created above; with knit sides facing each other, use yarn needle to sew the two ear pieces together along the rounded part of the ear, leaving the bottom part open. Bind off. Turn the ear inside out so the knit side is now facing outward. Using the long tail of yarn, stitch the ear in place on the hood.
Repeat the process above for the second ear.

Finishing
Weave in any remaining loose ends.
Attach buttons.
Pair this adorable sweater with a flannel blanket, burp cloth and bib set for super cute, custom gift set. Pattern for the blanket, burp cloth and bib set can be found here.

***You may make and sell products from my patterns but if you do I ask that you link back to my post. Please do not copy and post this pattern and claim it as your own, or attempt to sell this pattern. Please do not re-publish photos as your own.