
Sewing Seeds Cardigan Pt 1

THIS IS PART 1 OF THE PATTERN. IF YOU ARE LOOKING FOR PART 2, PLEASE CLICK HERE
ABOUT THIS Design:
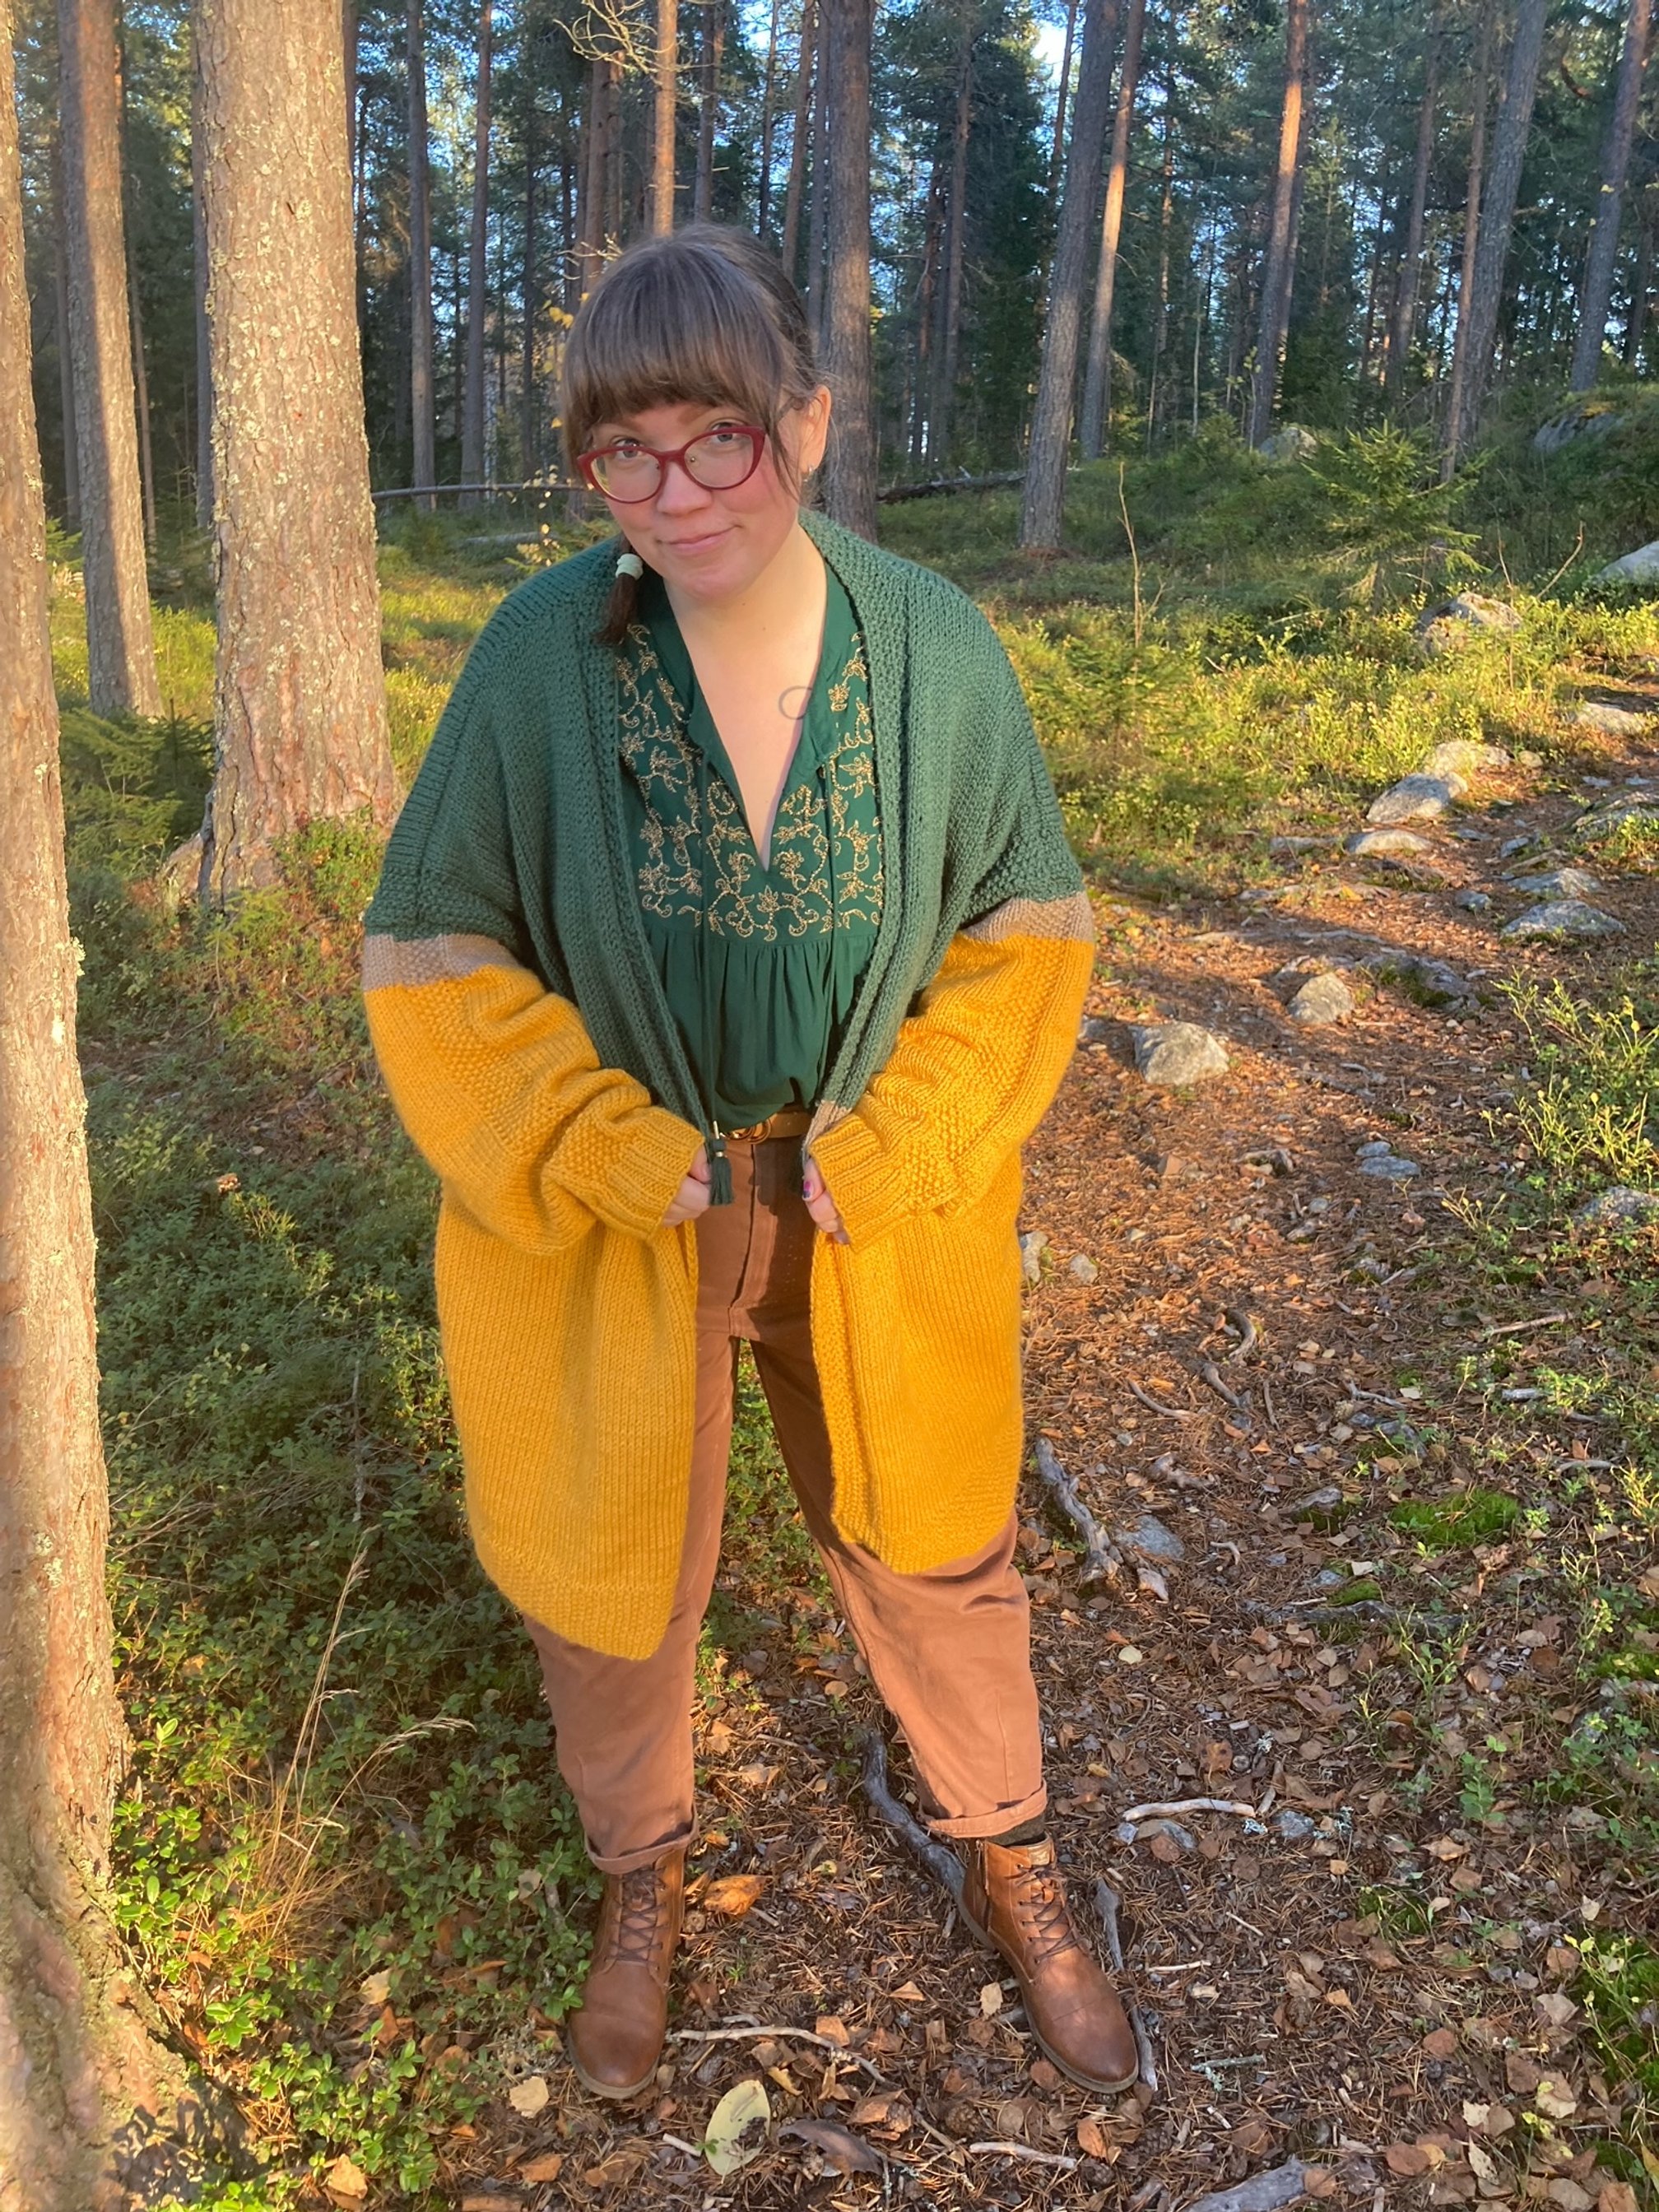
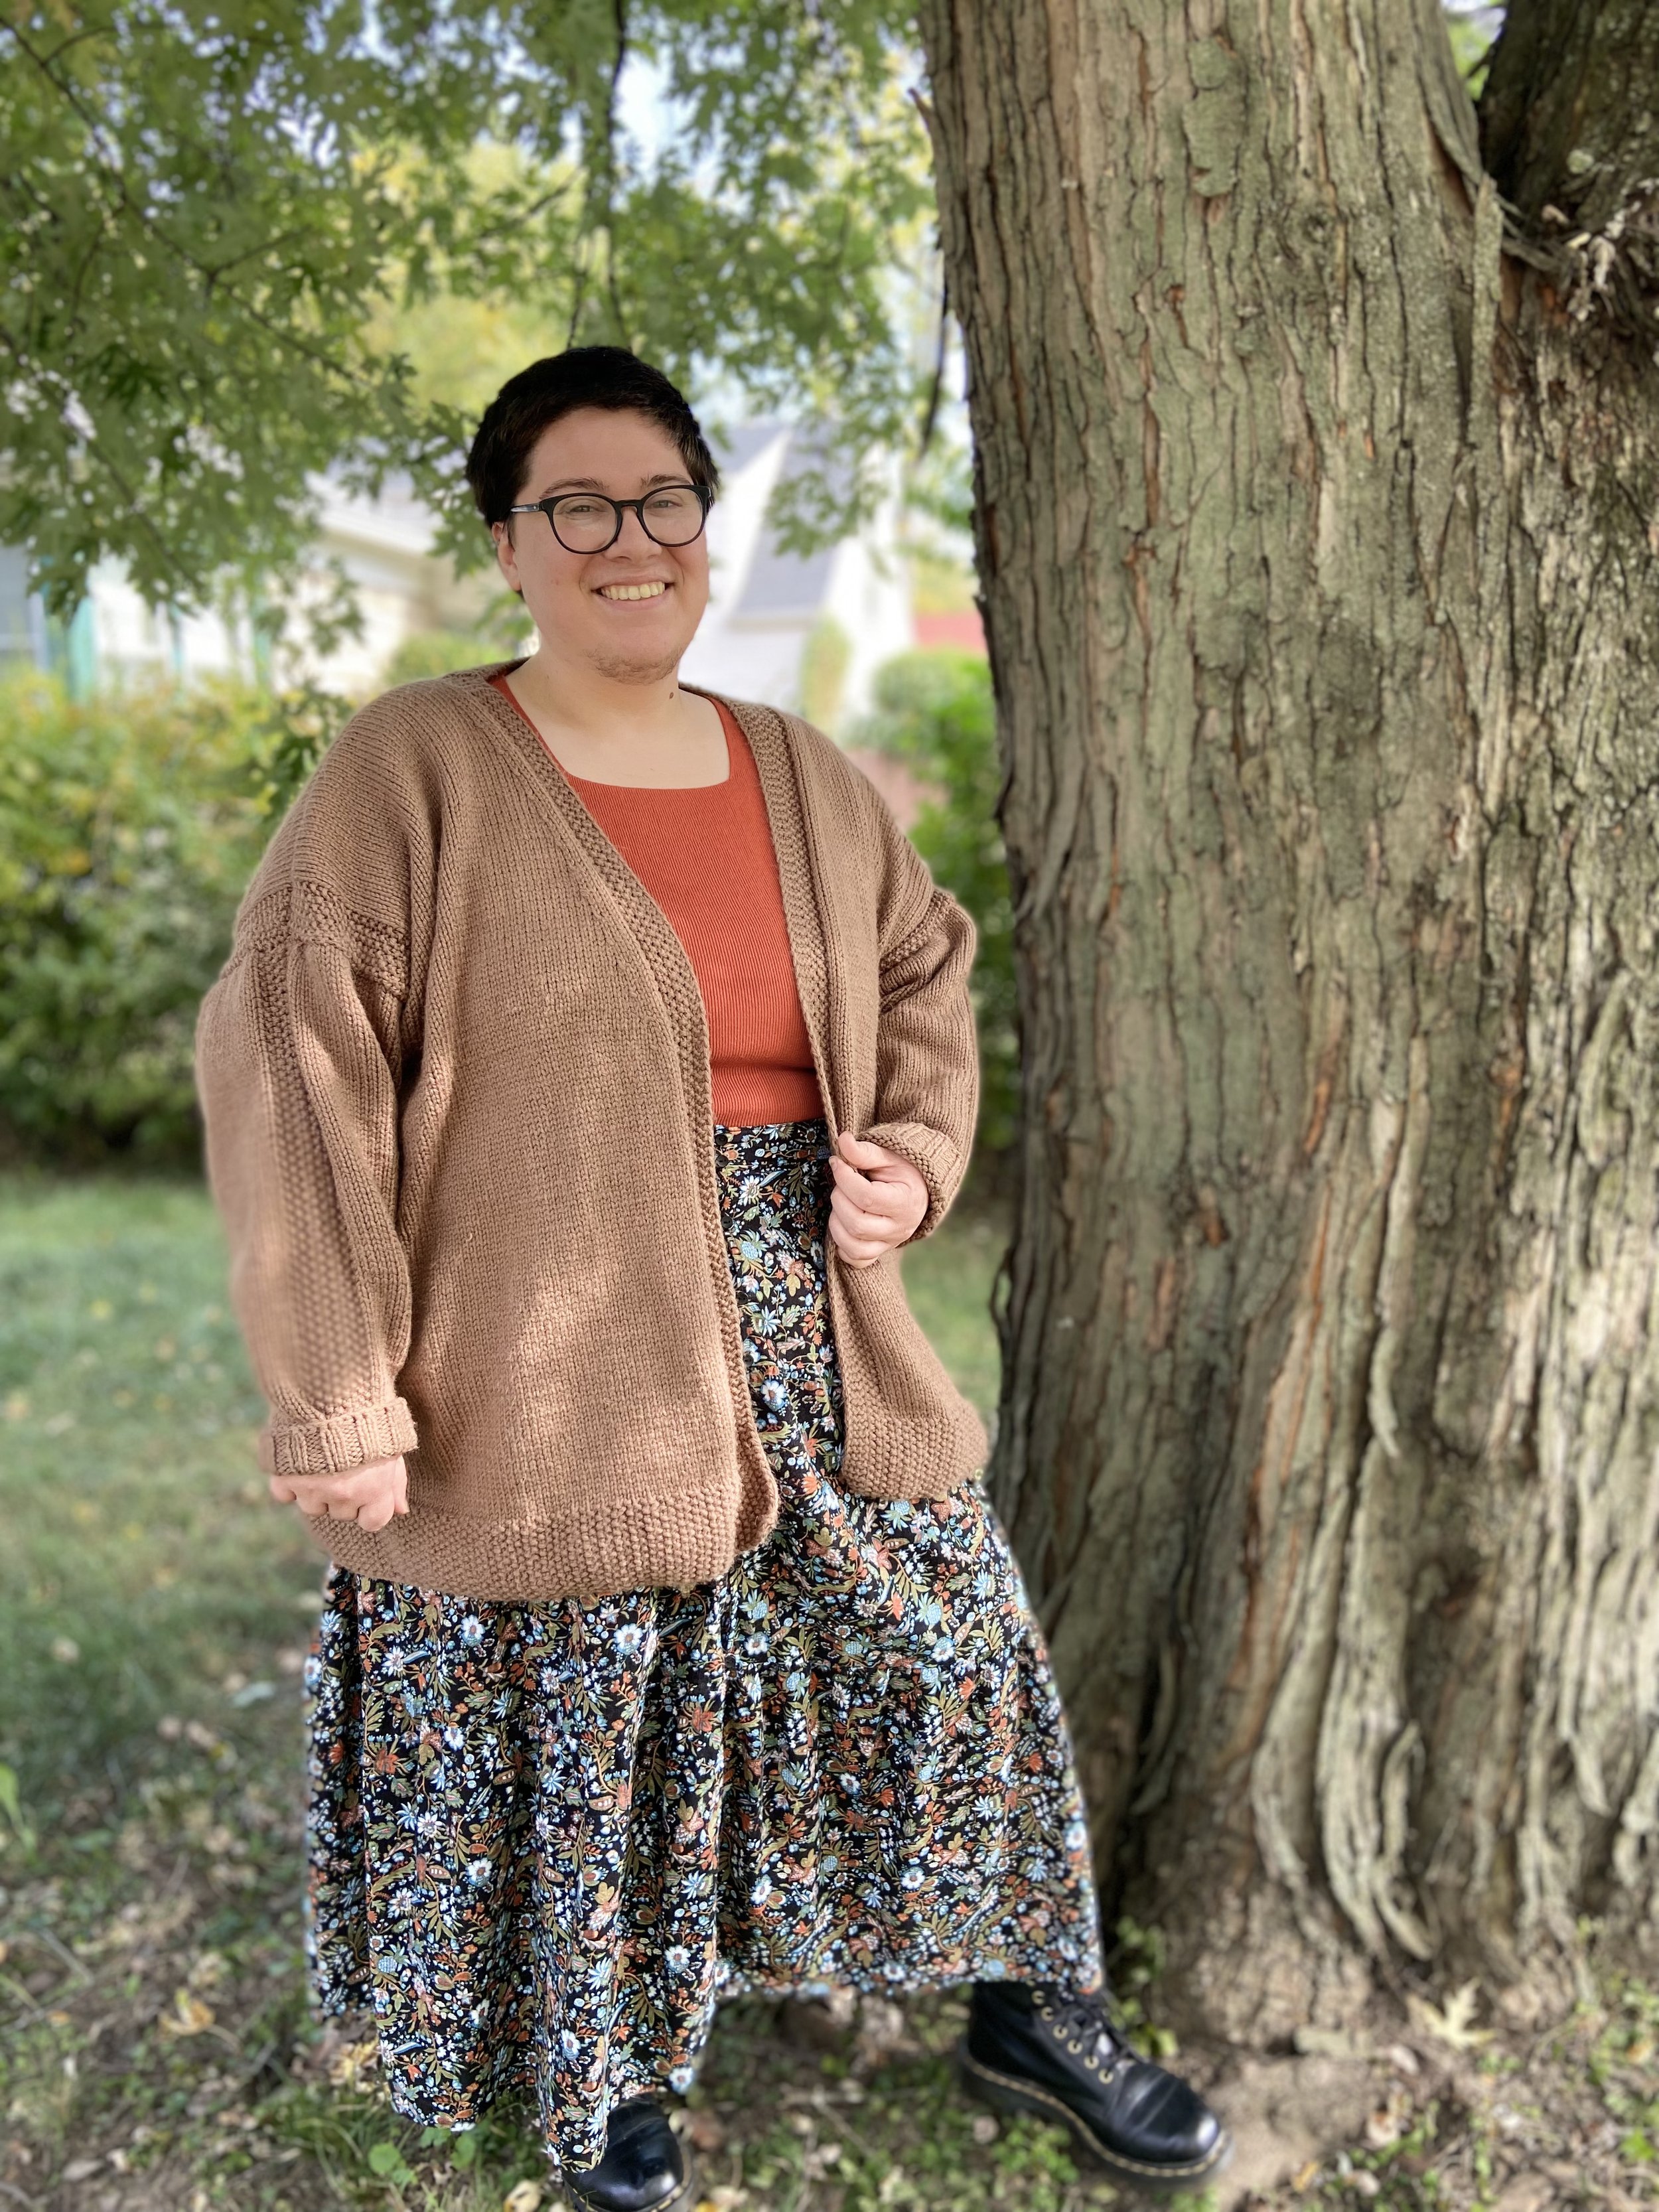
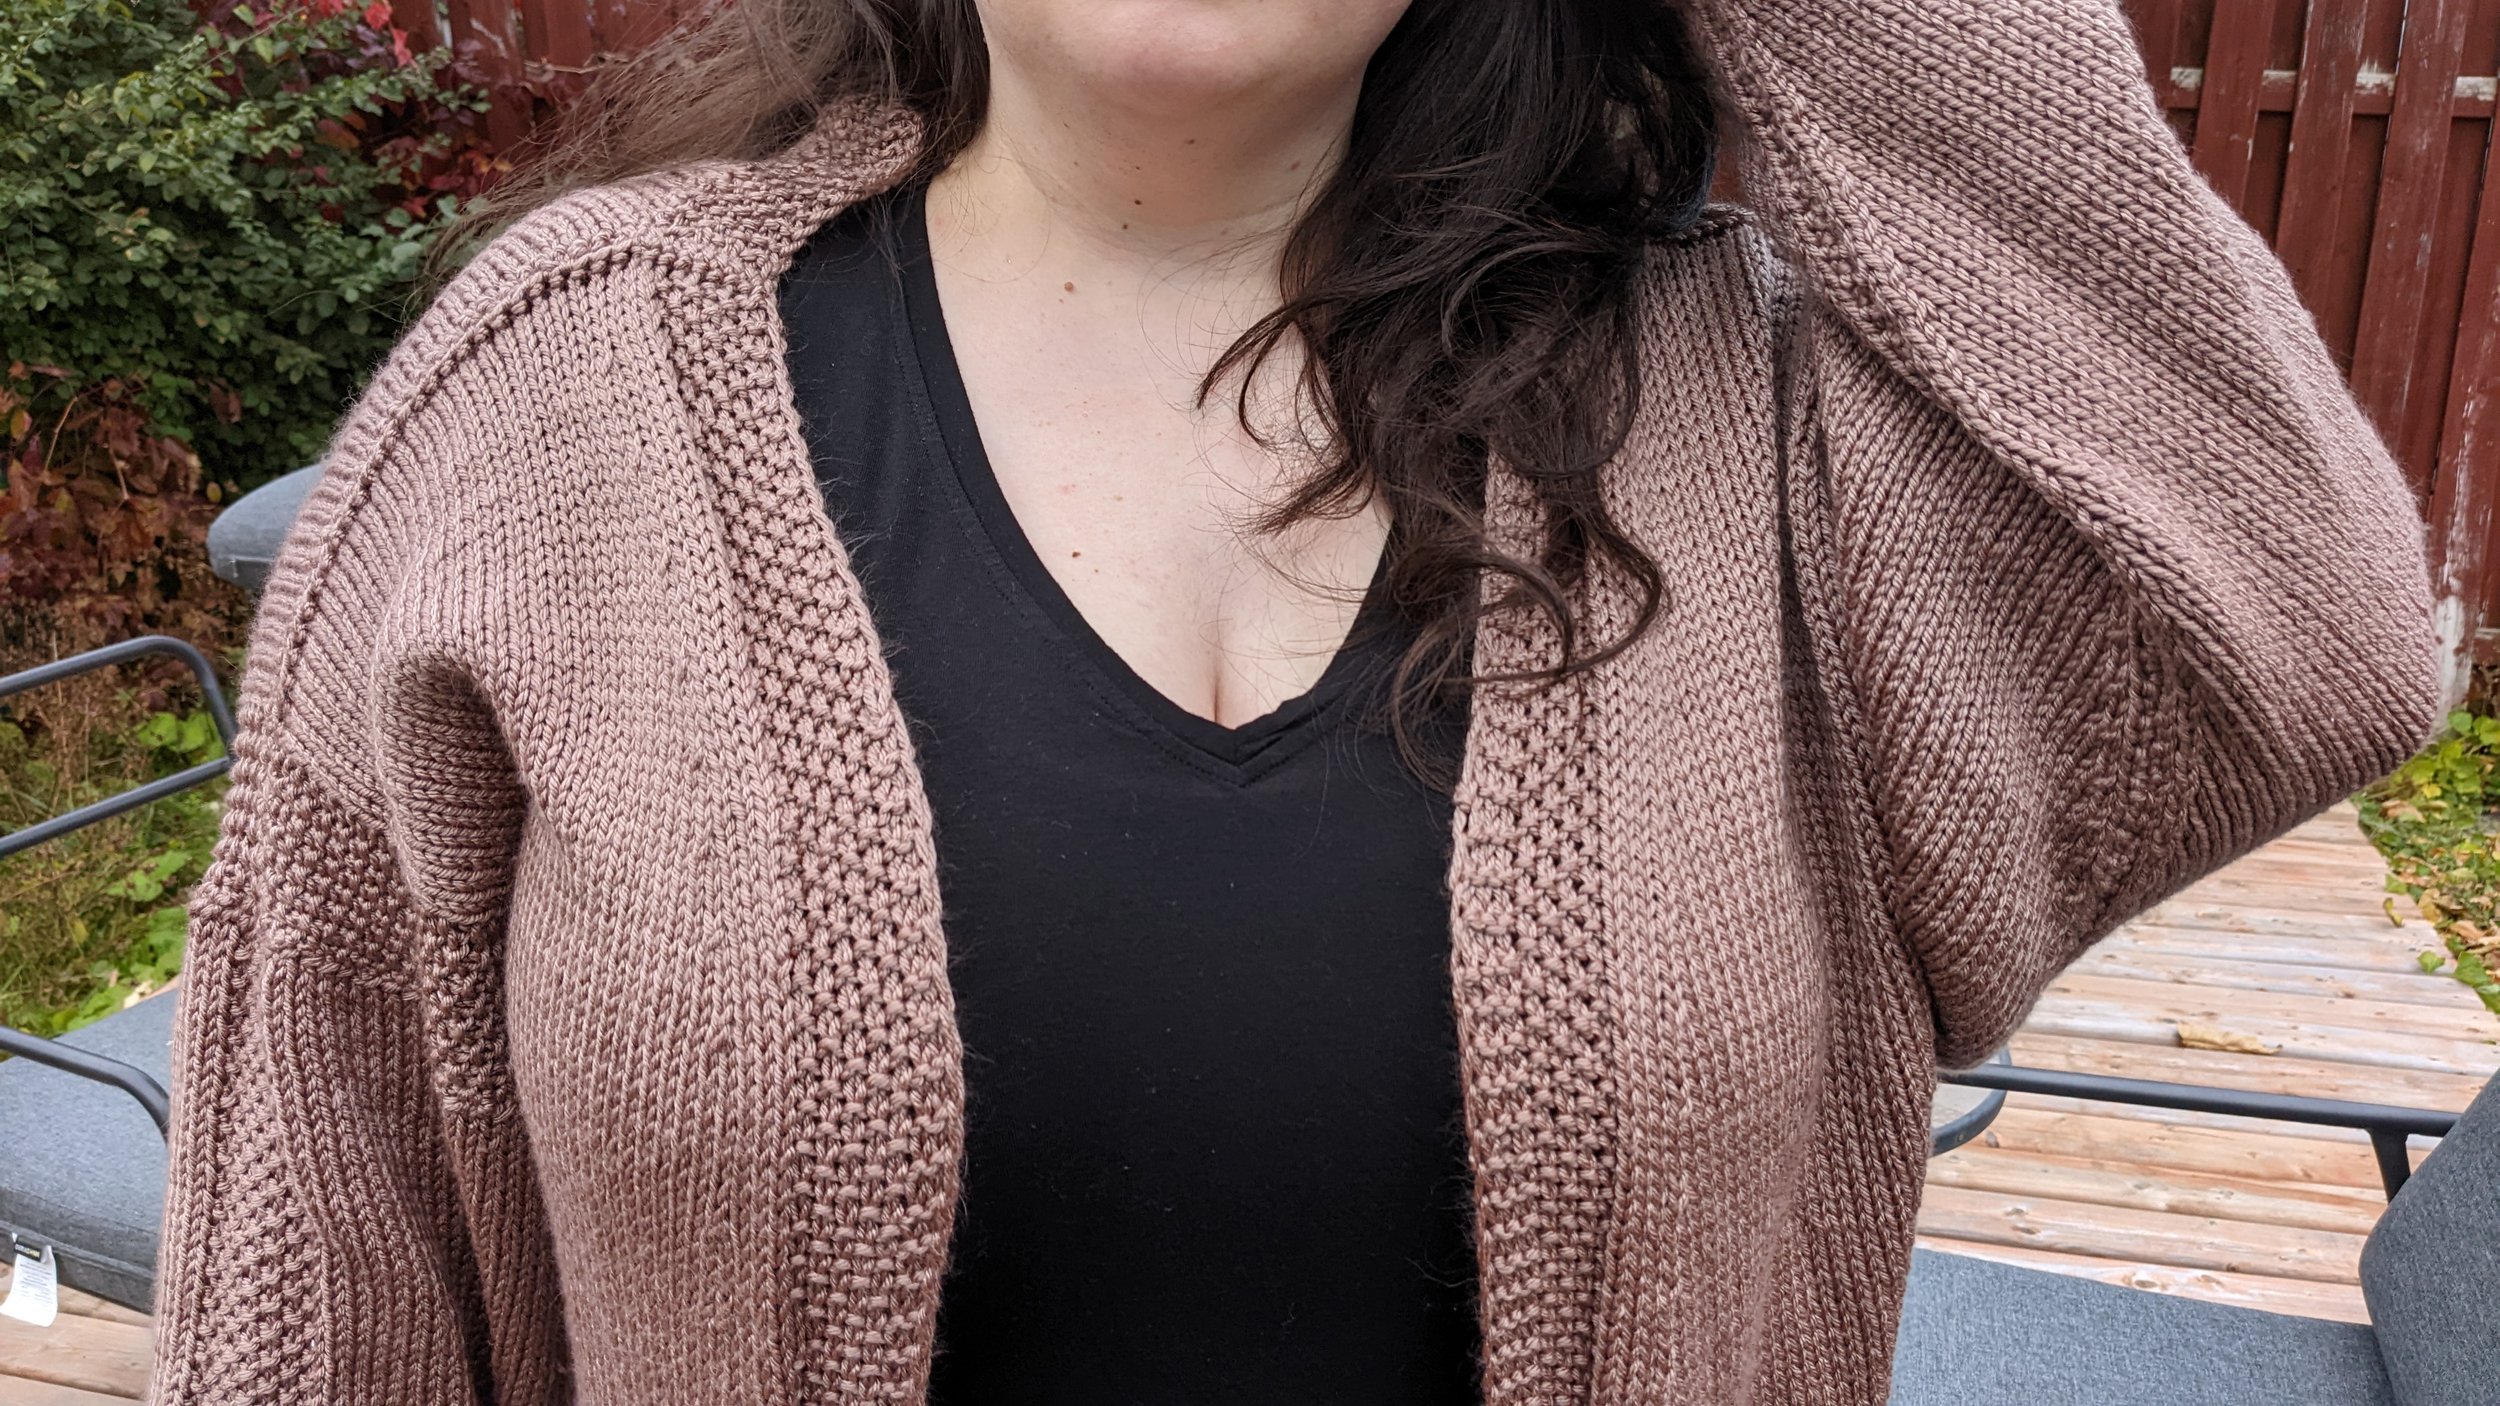
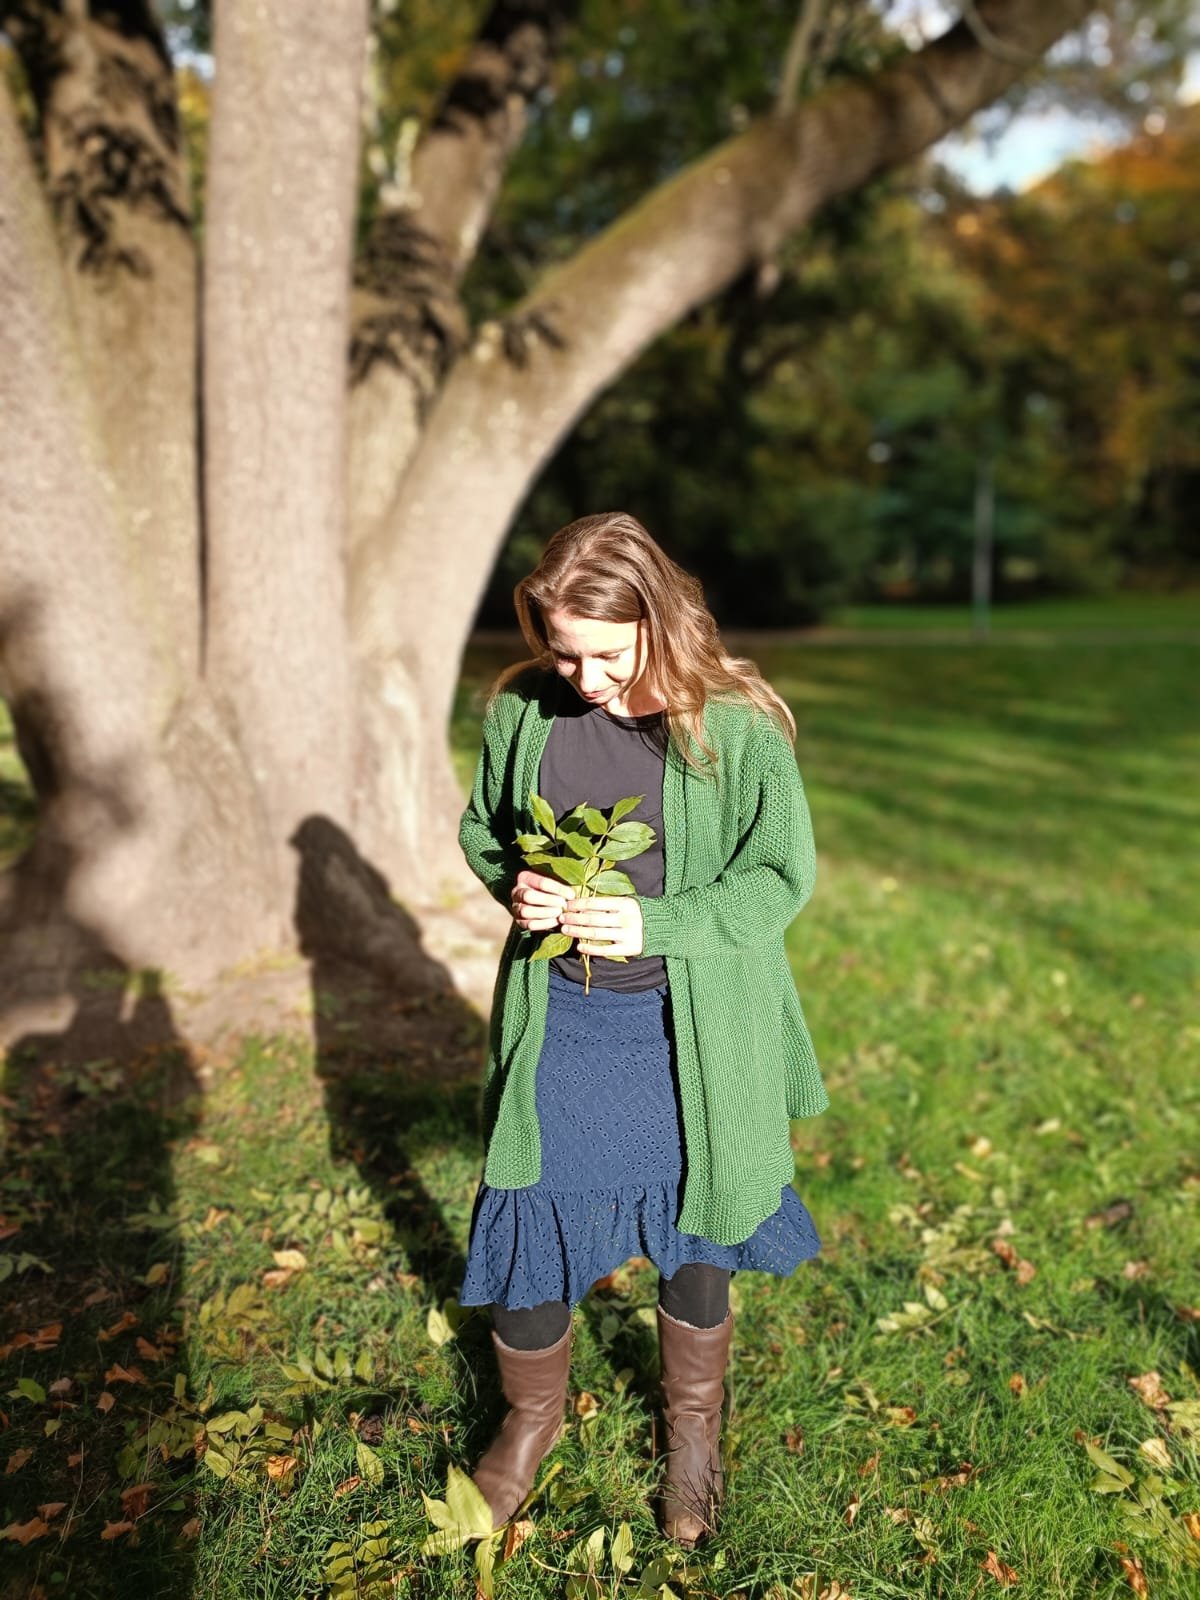
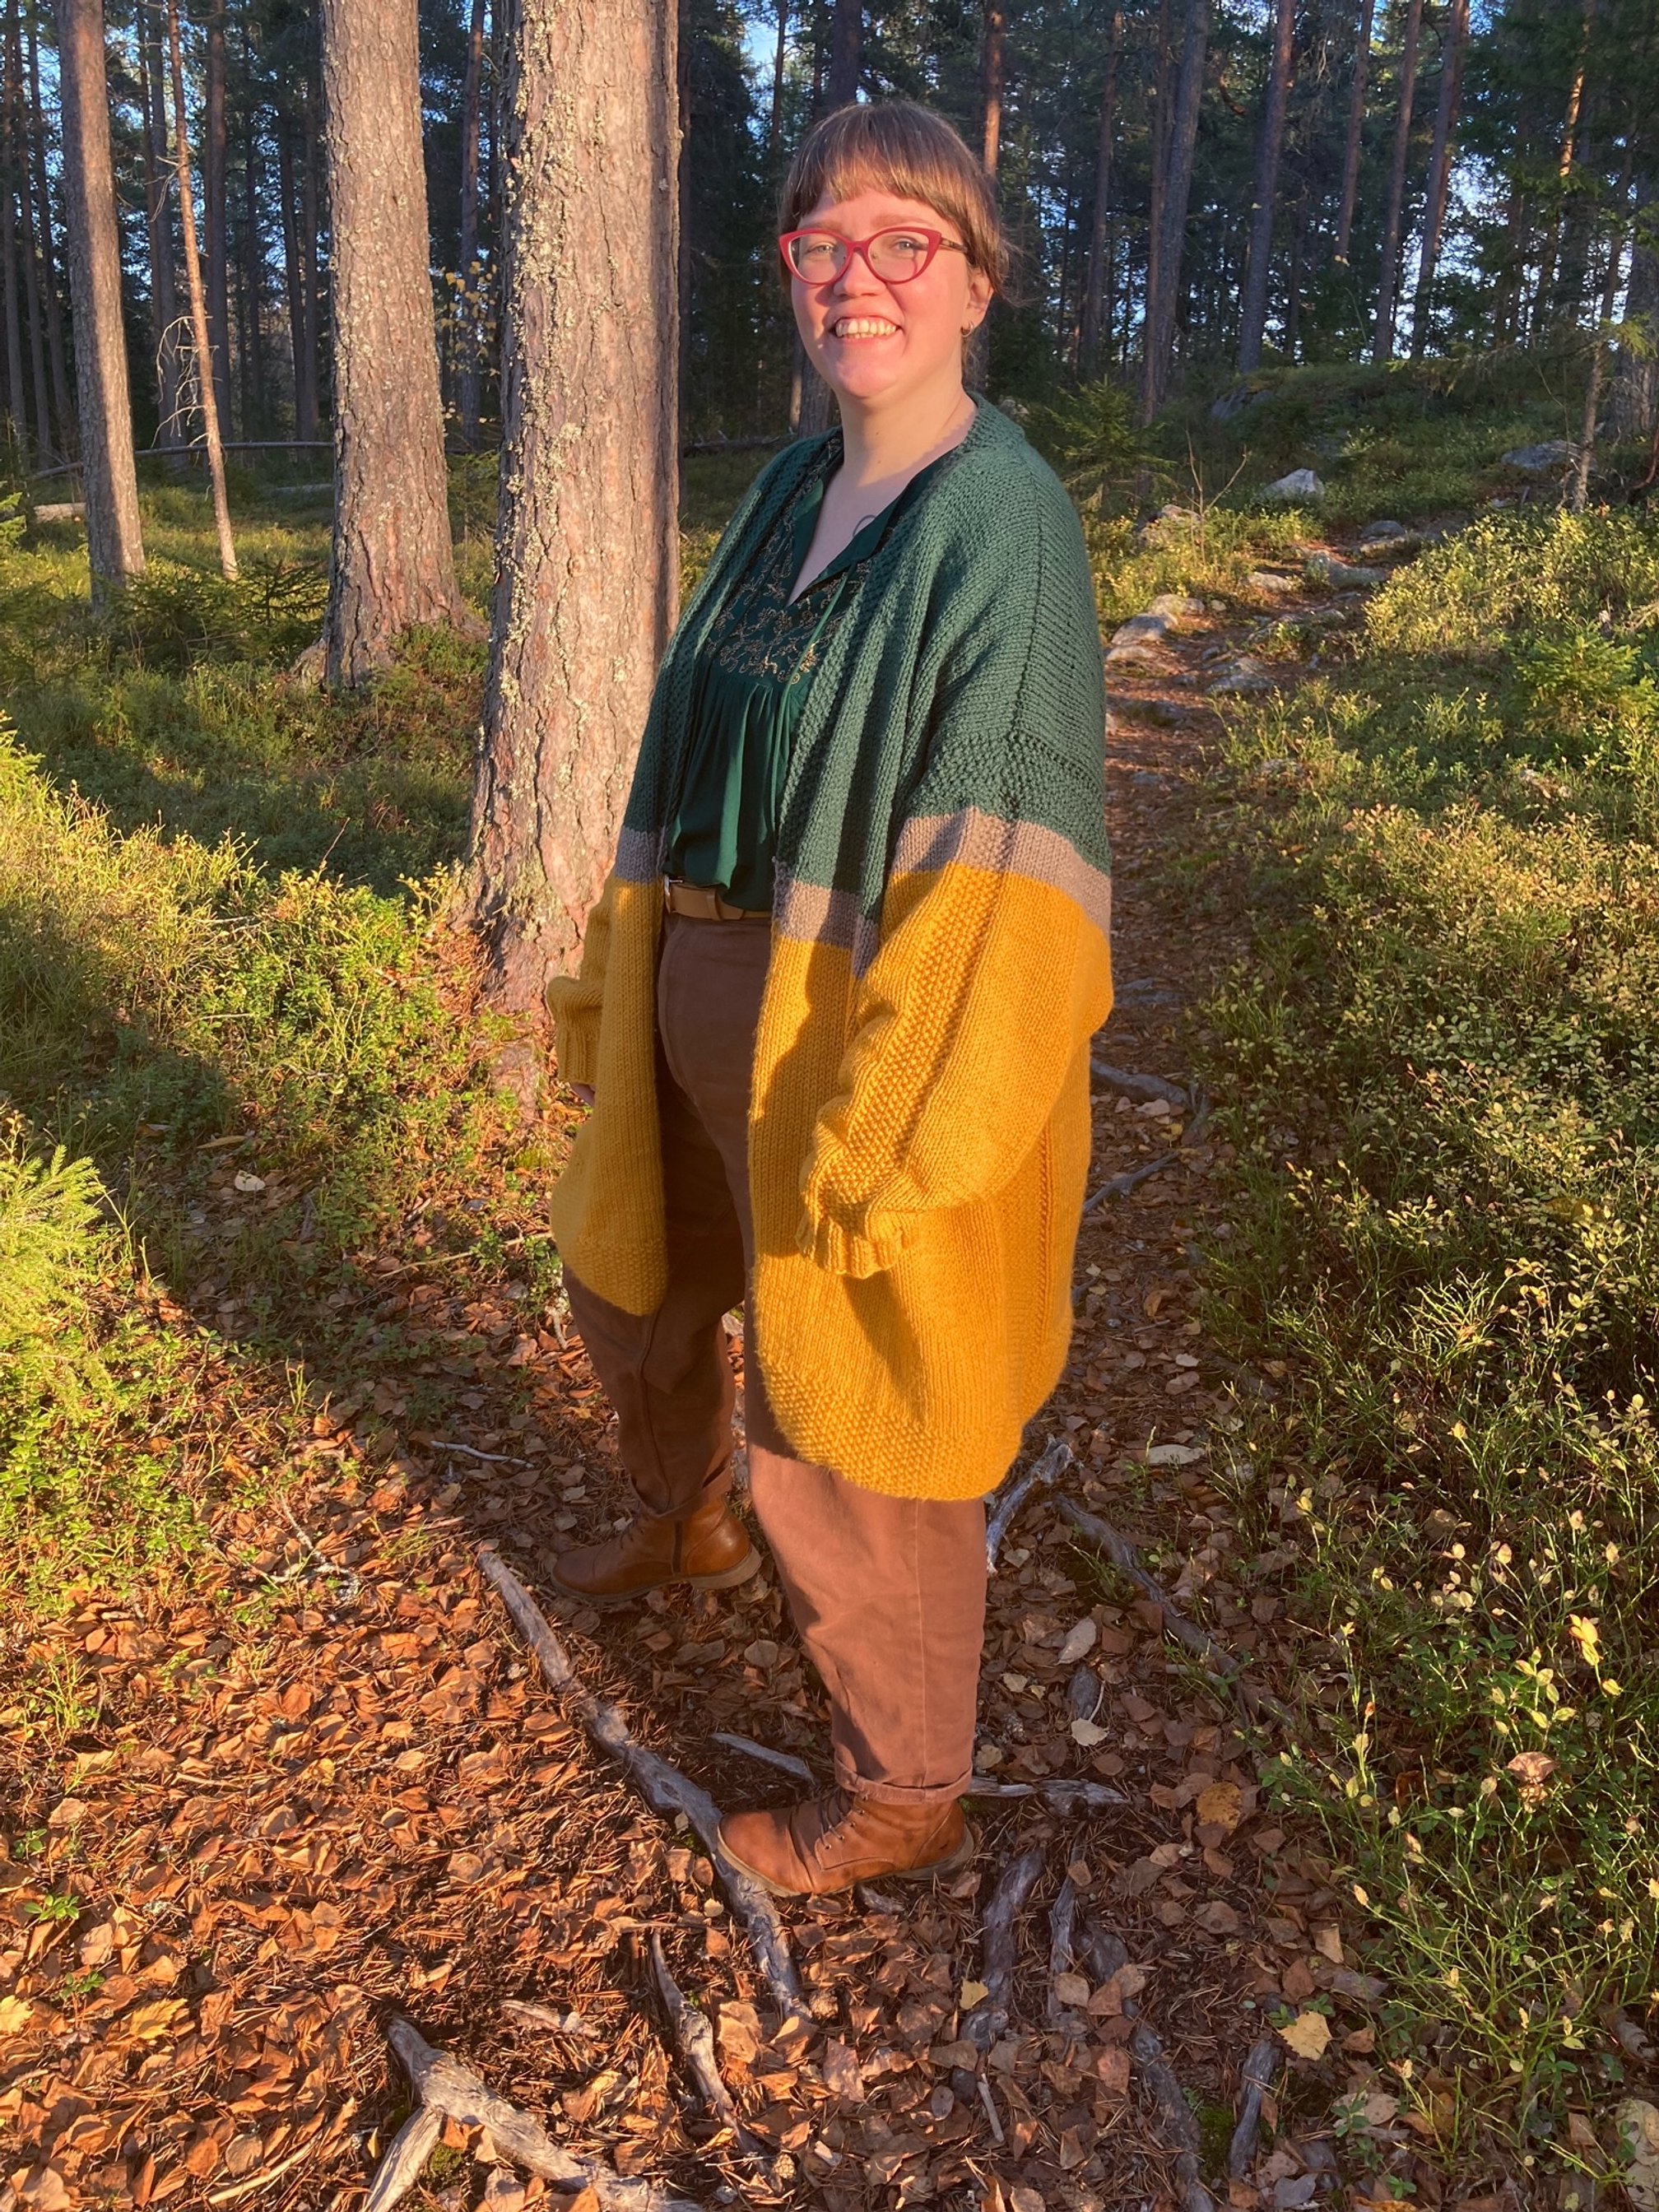
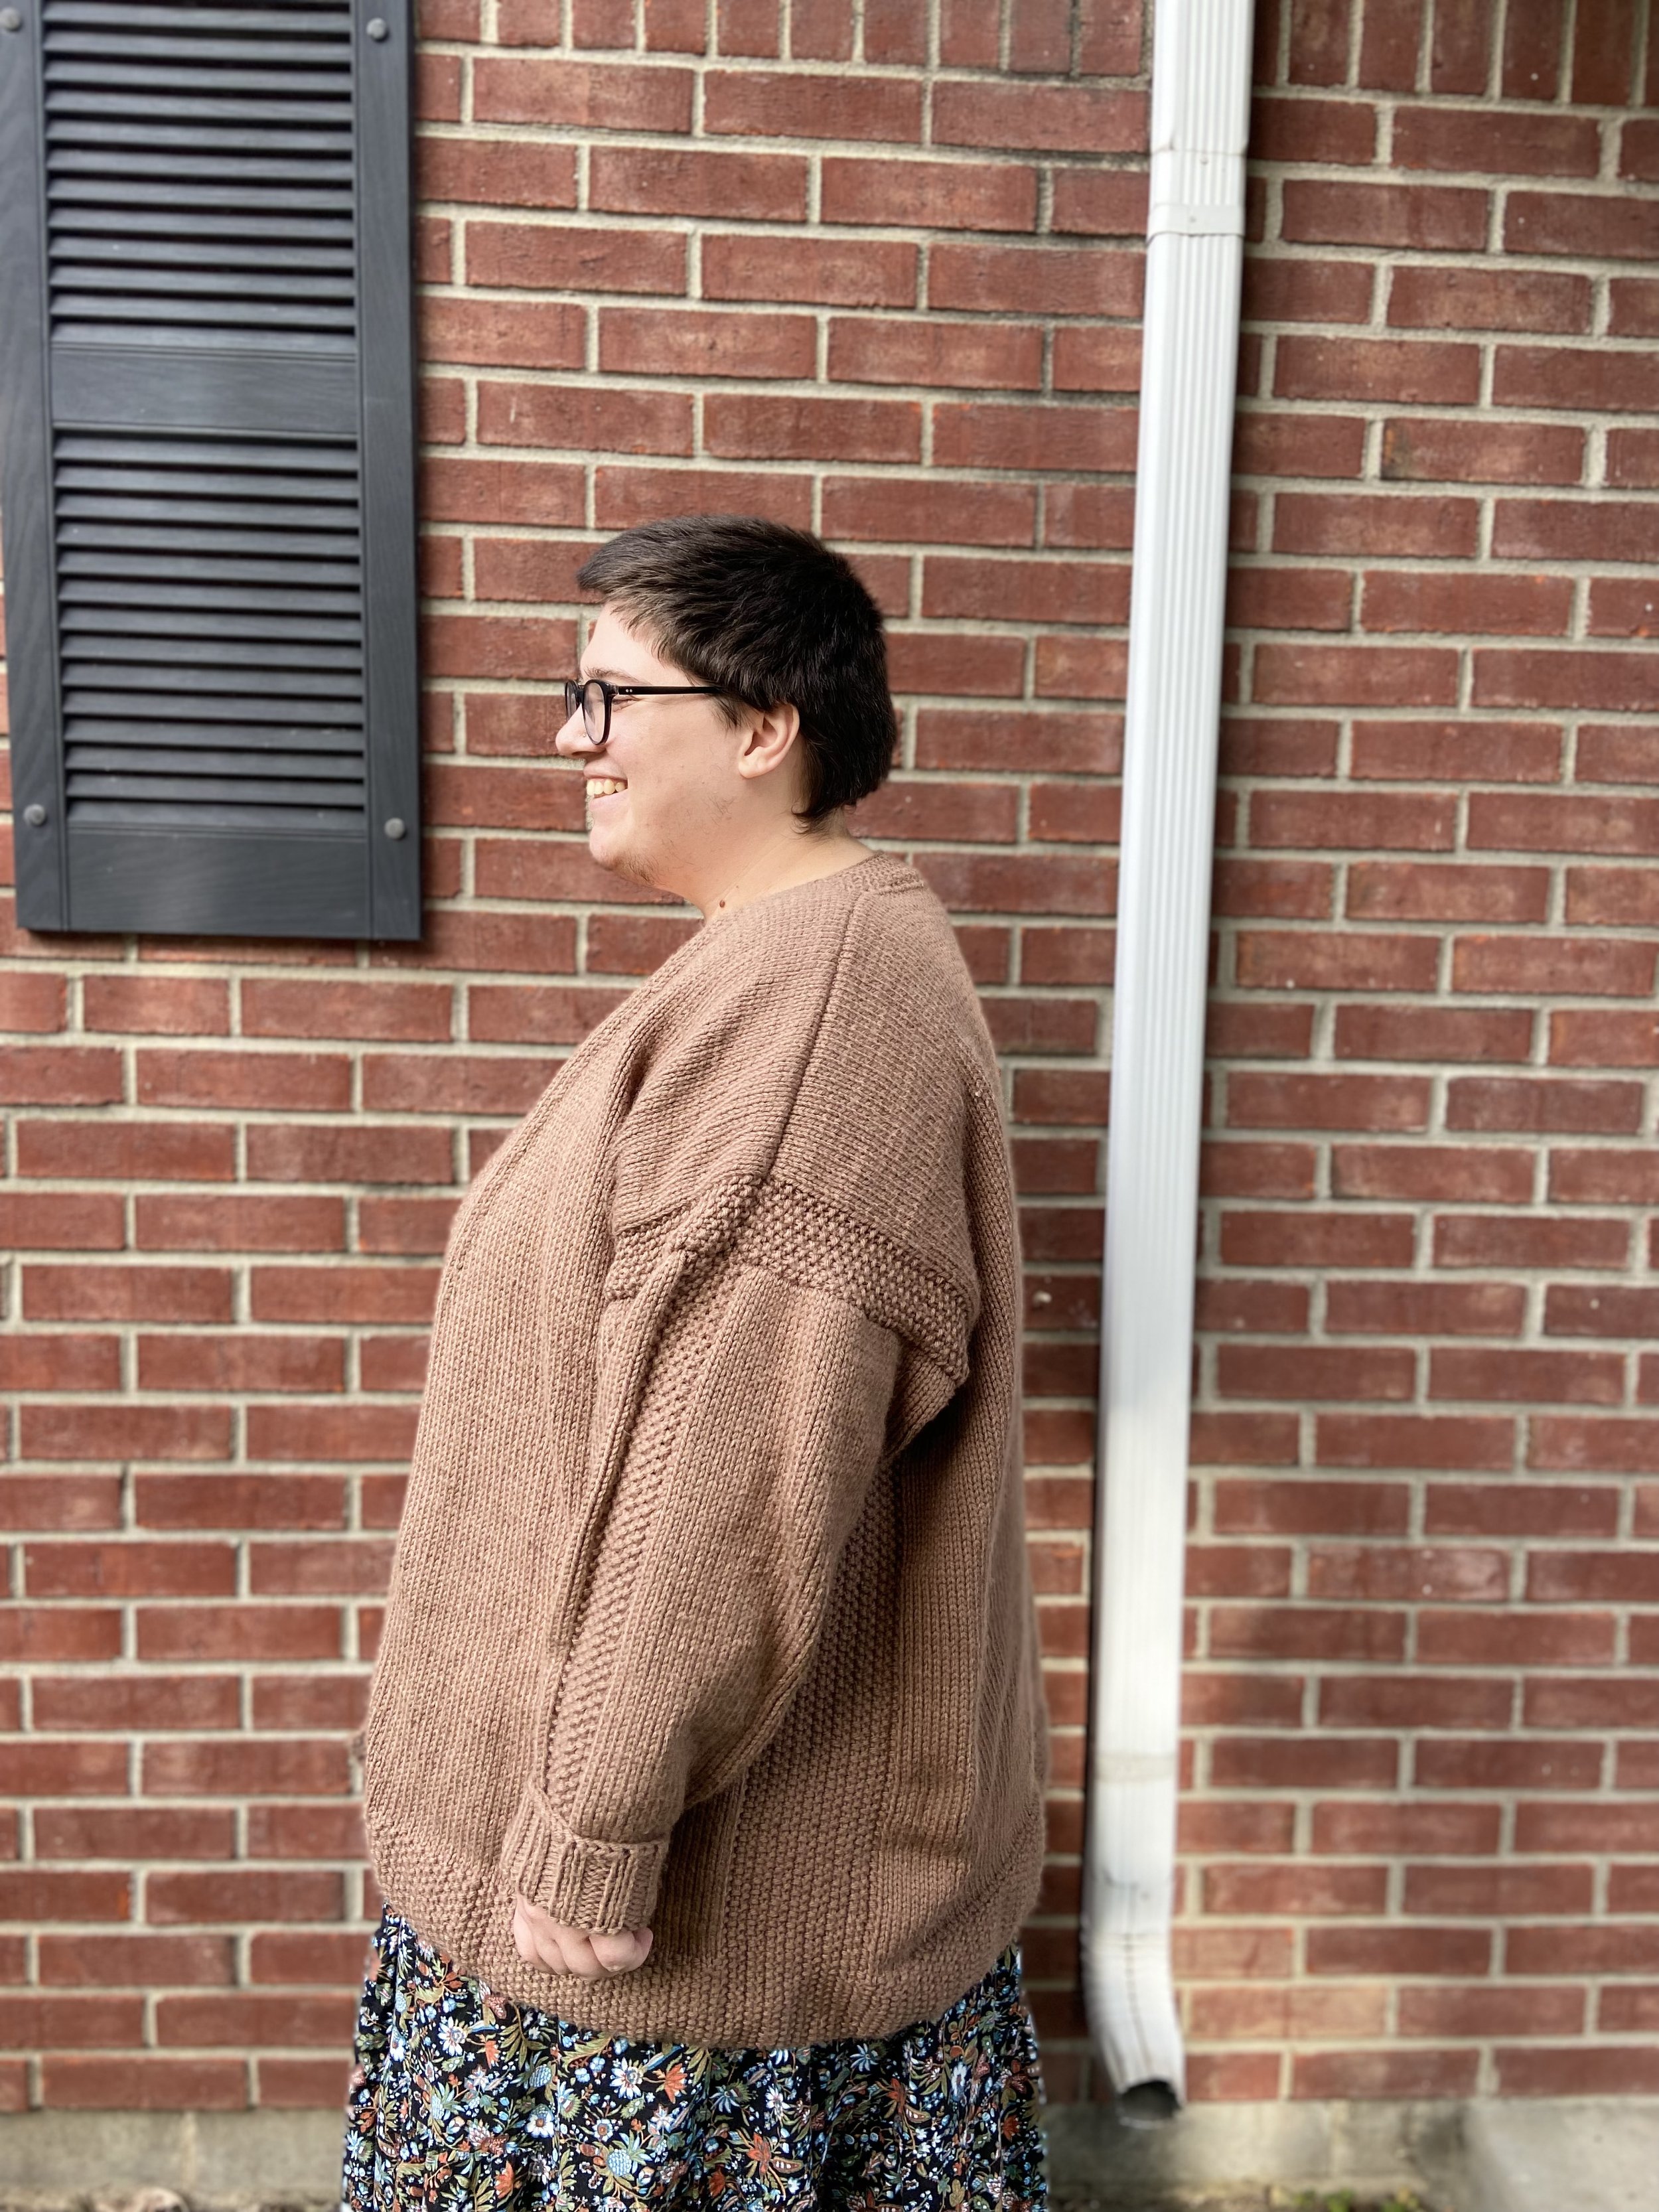
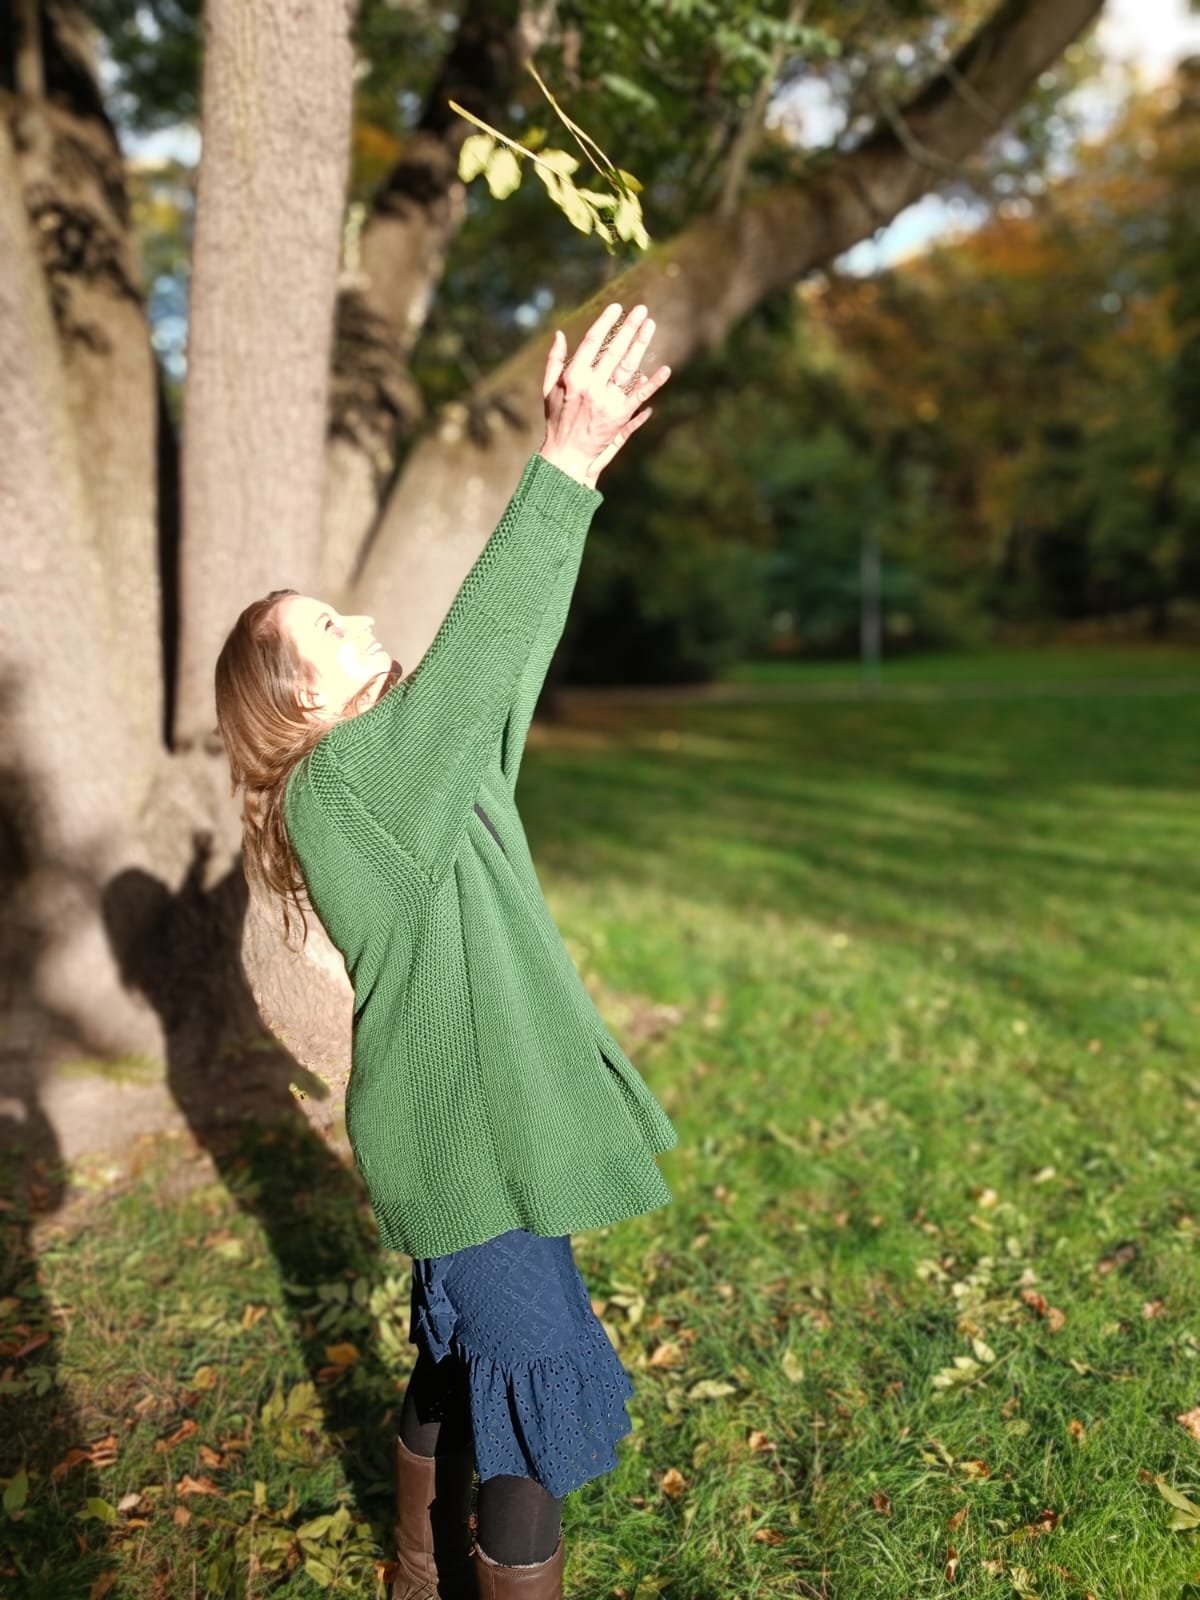
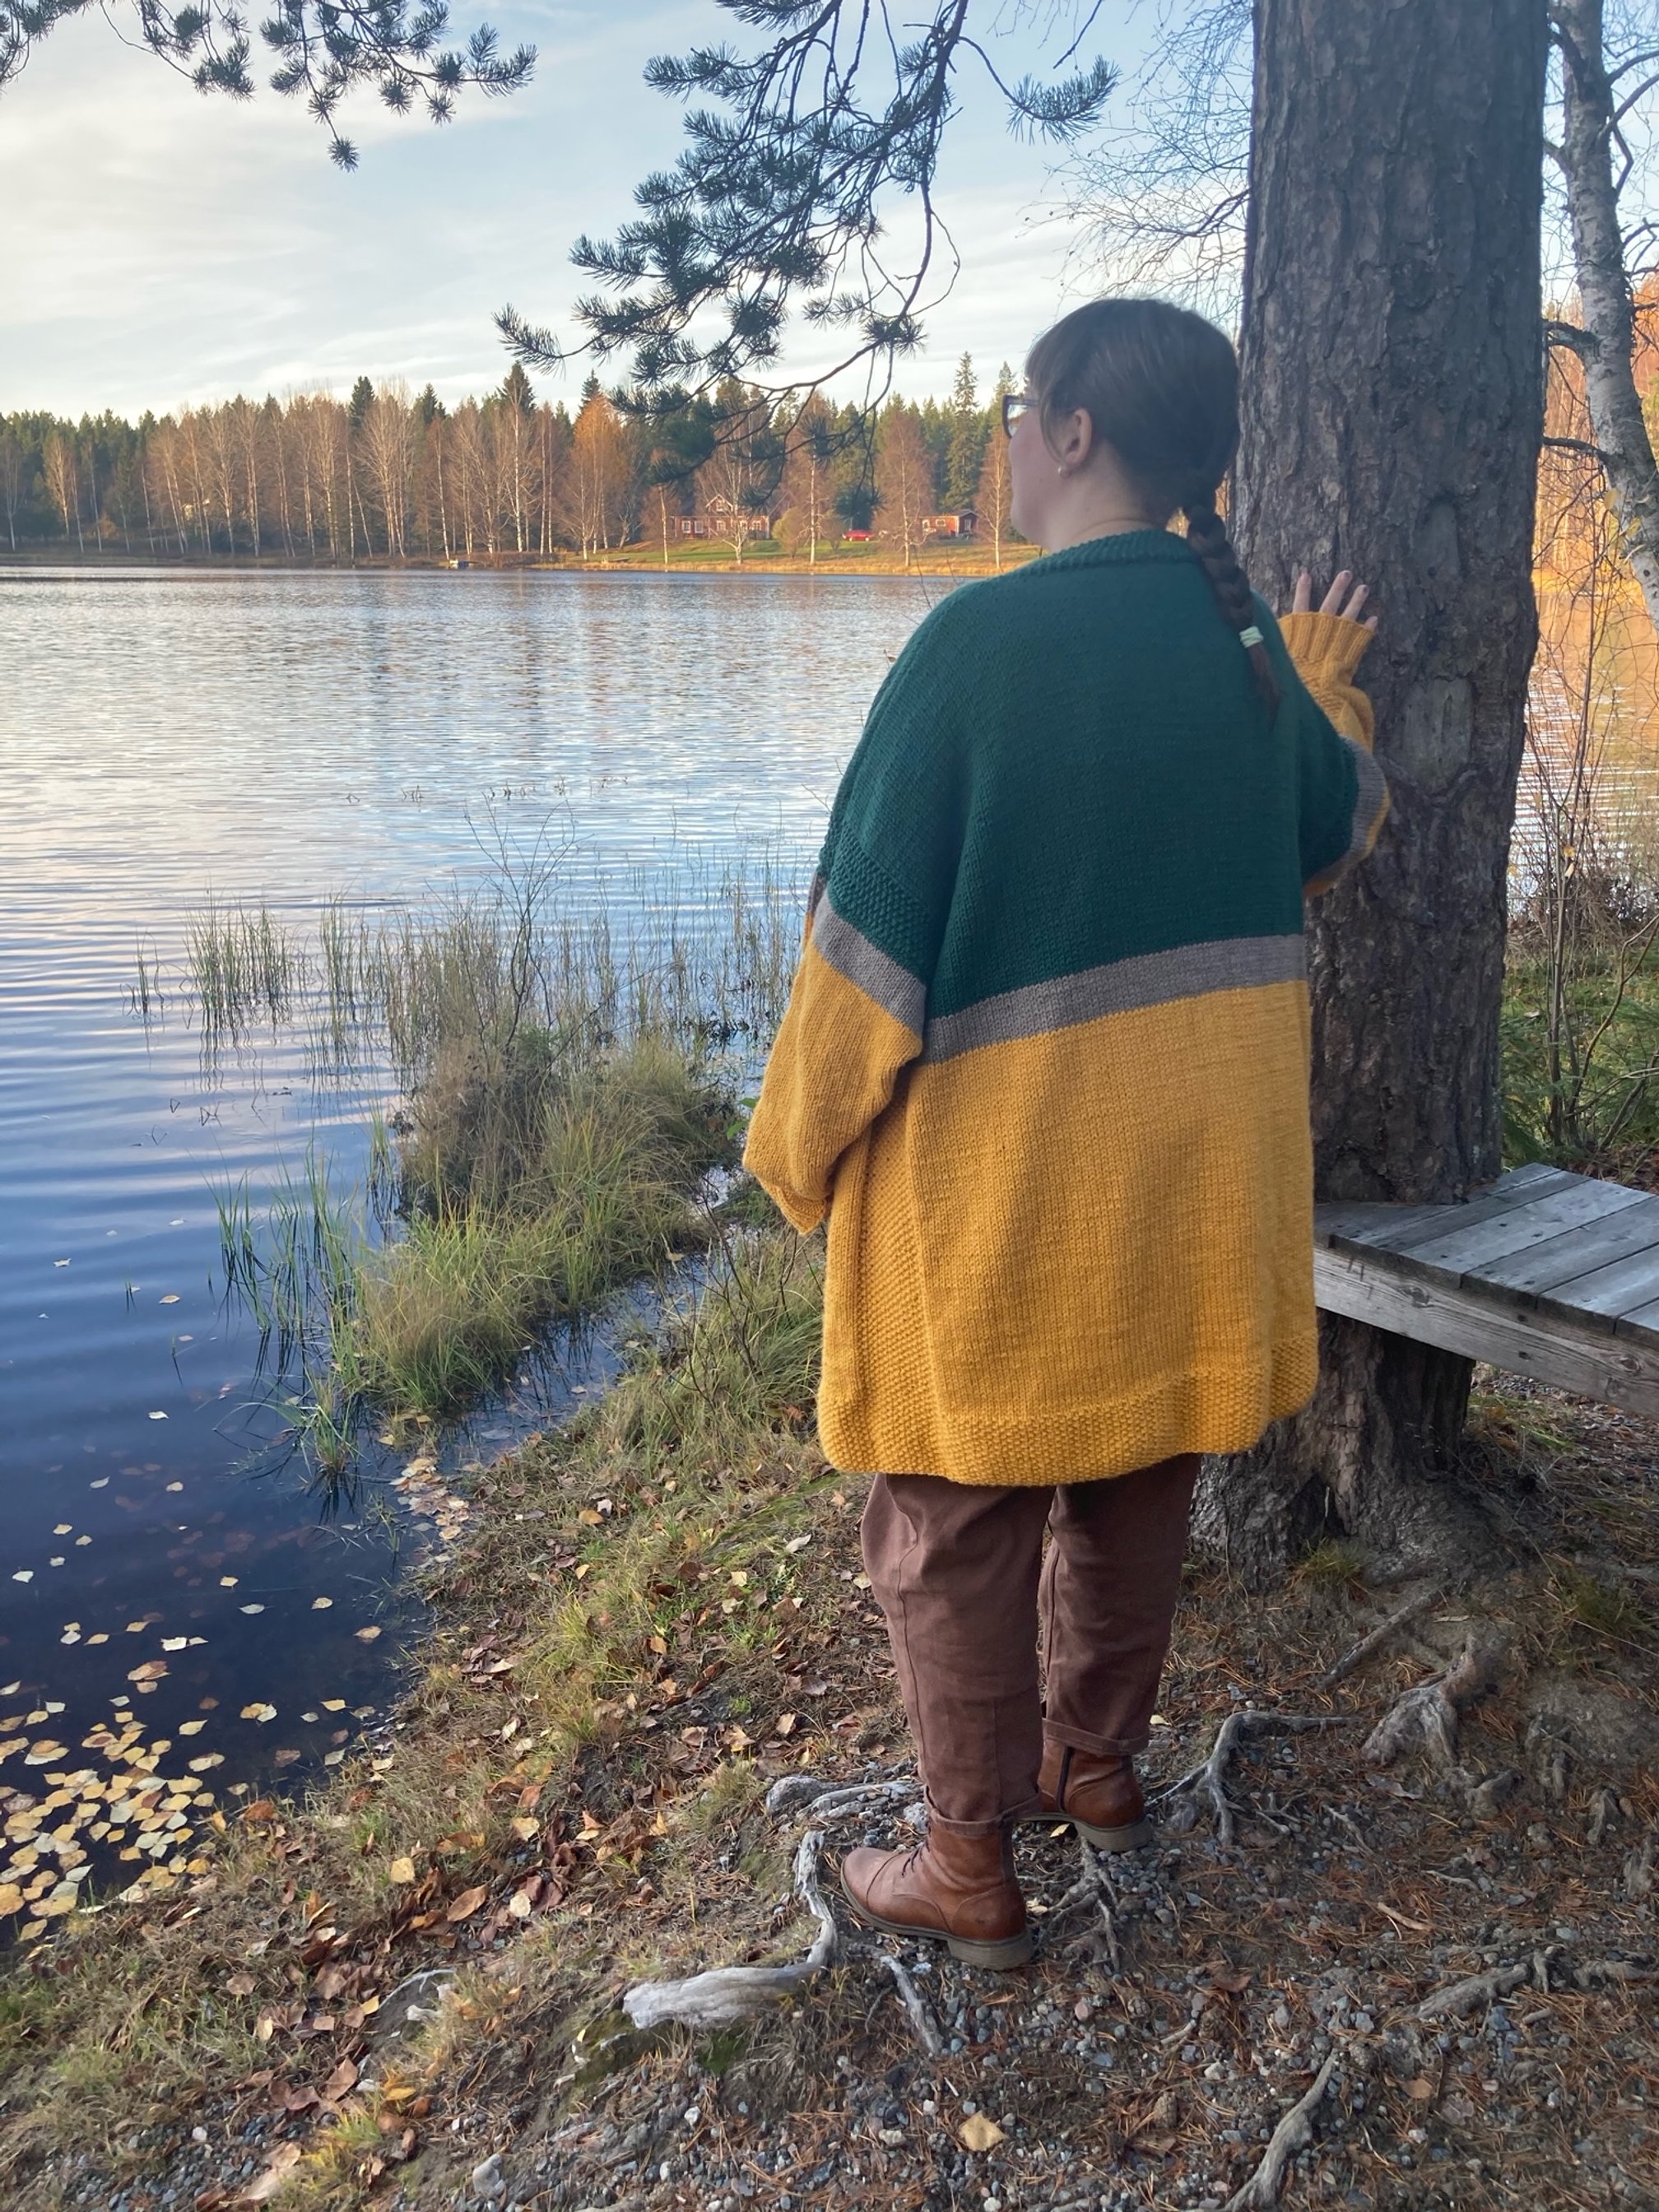
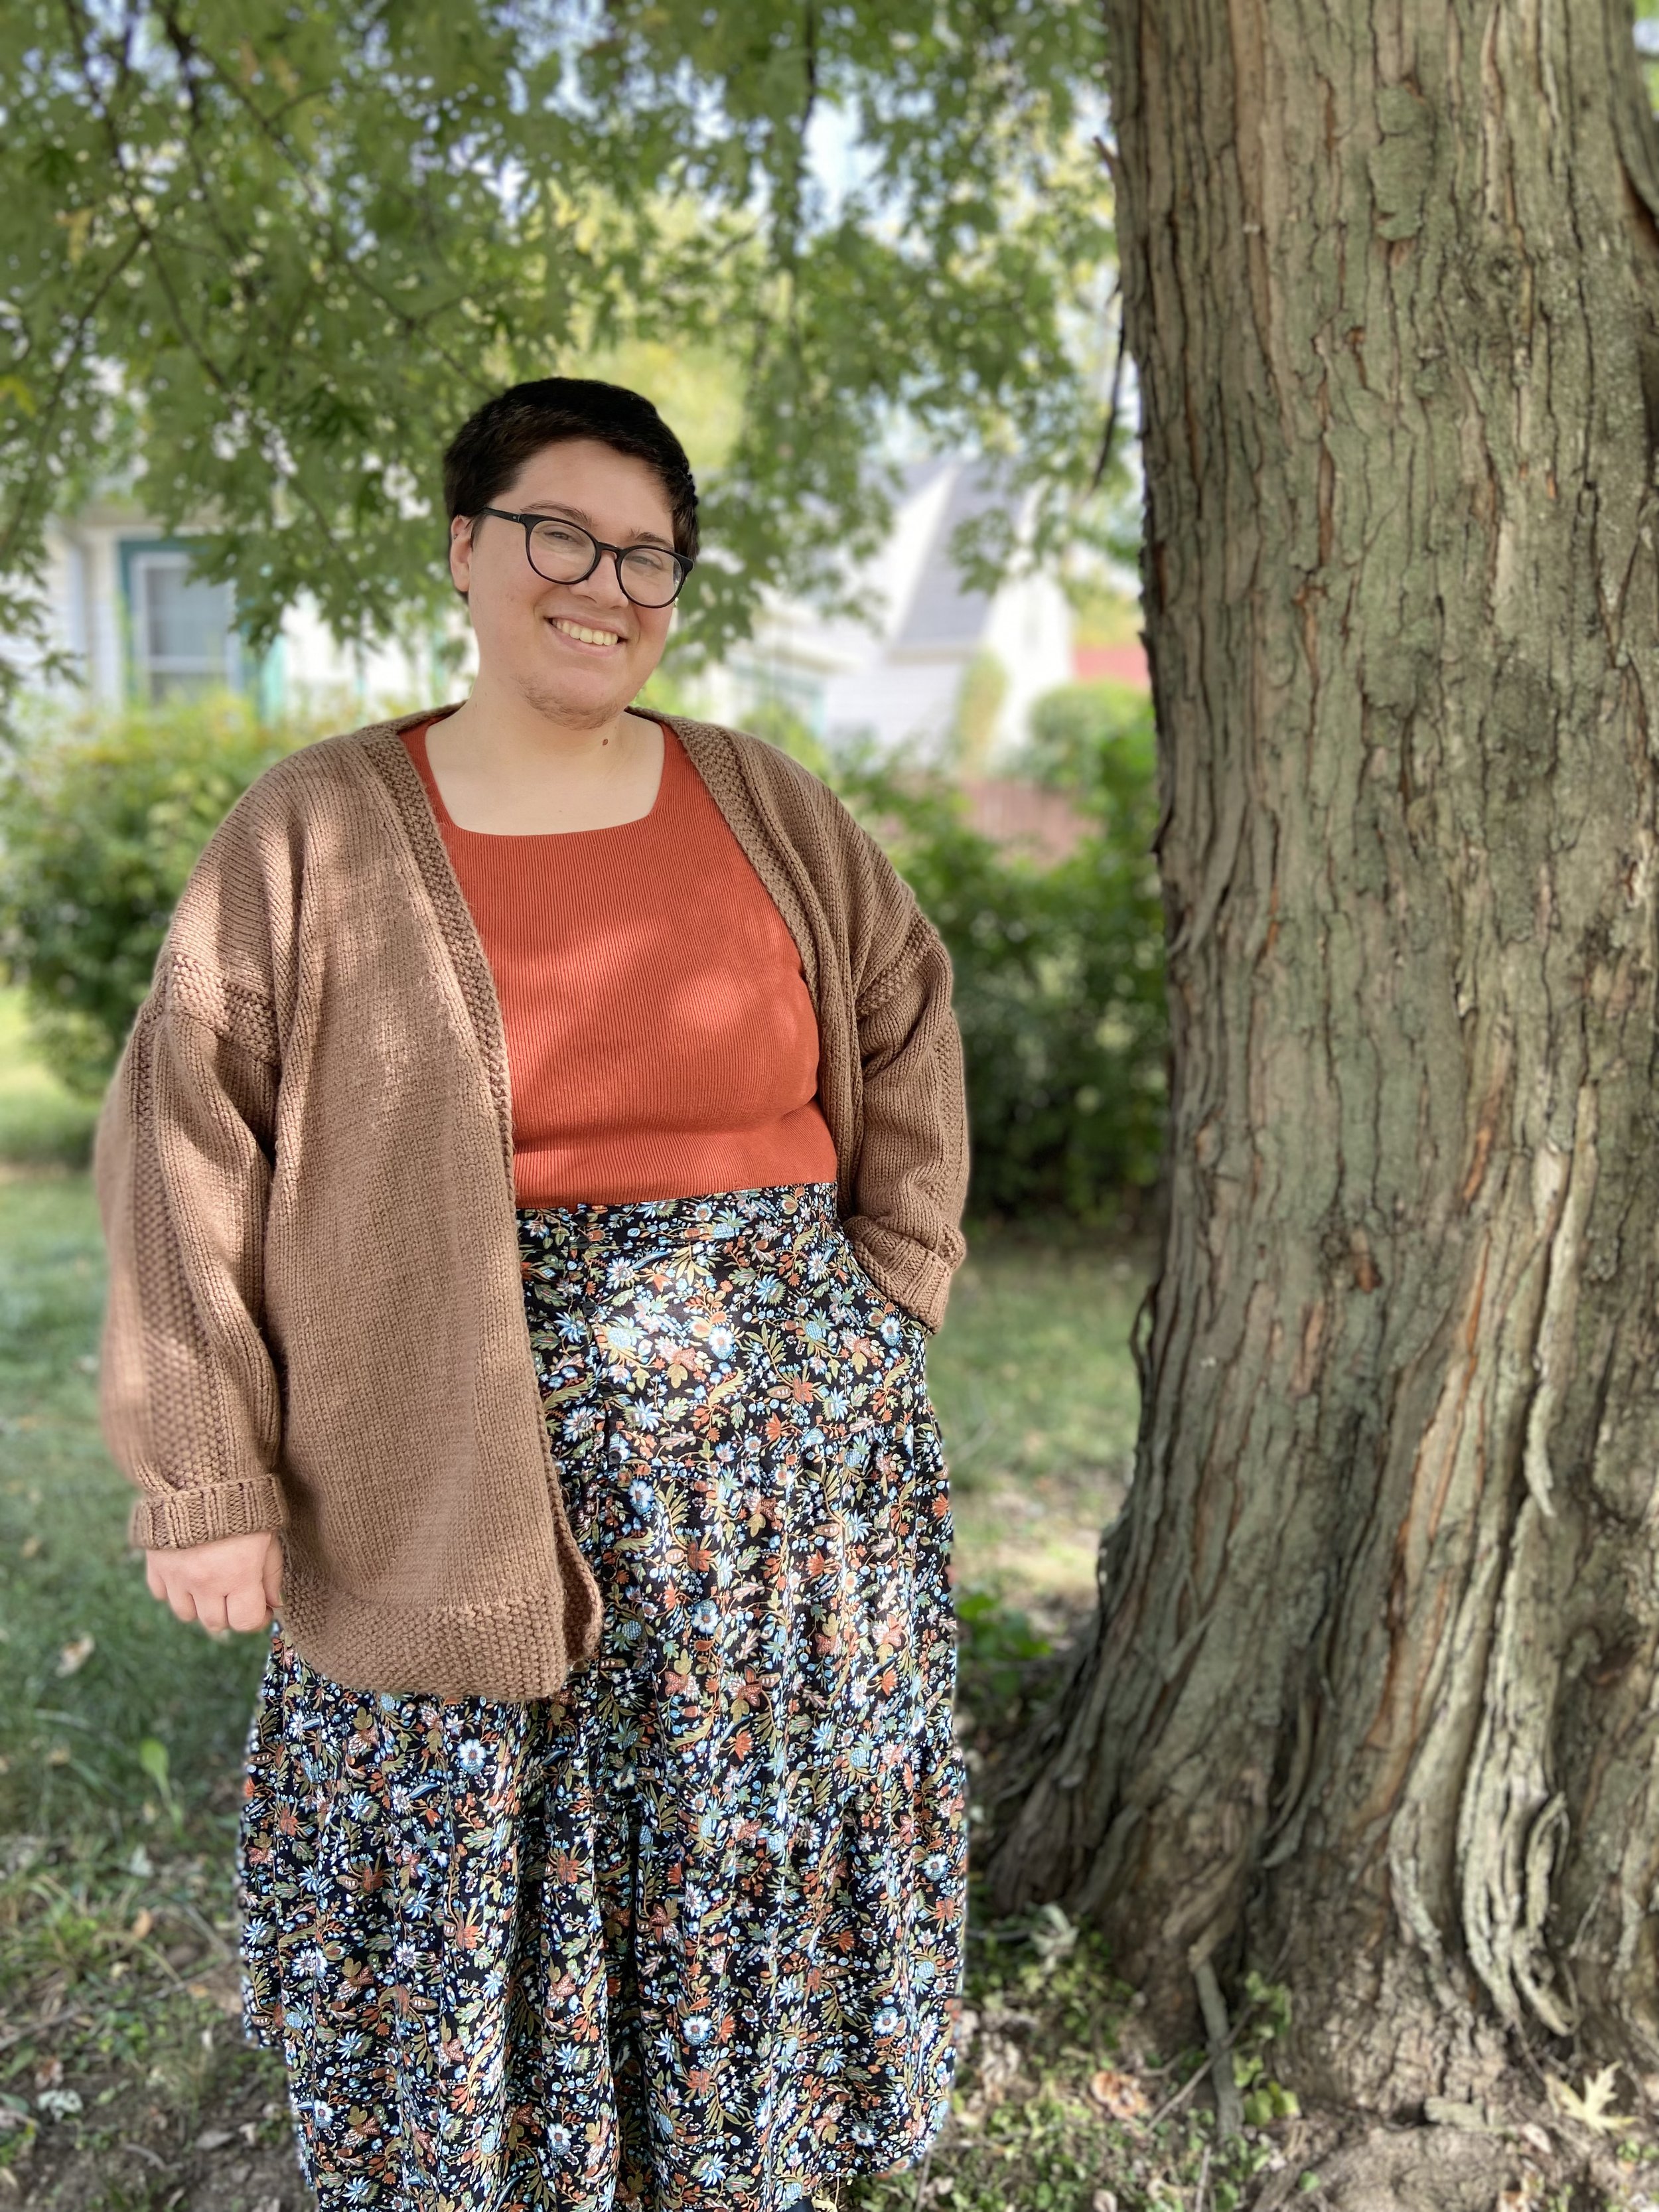
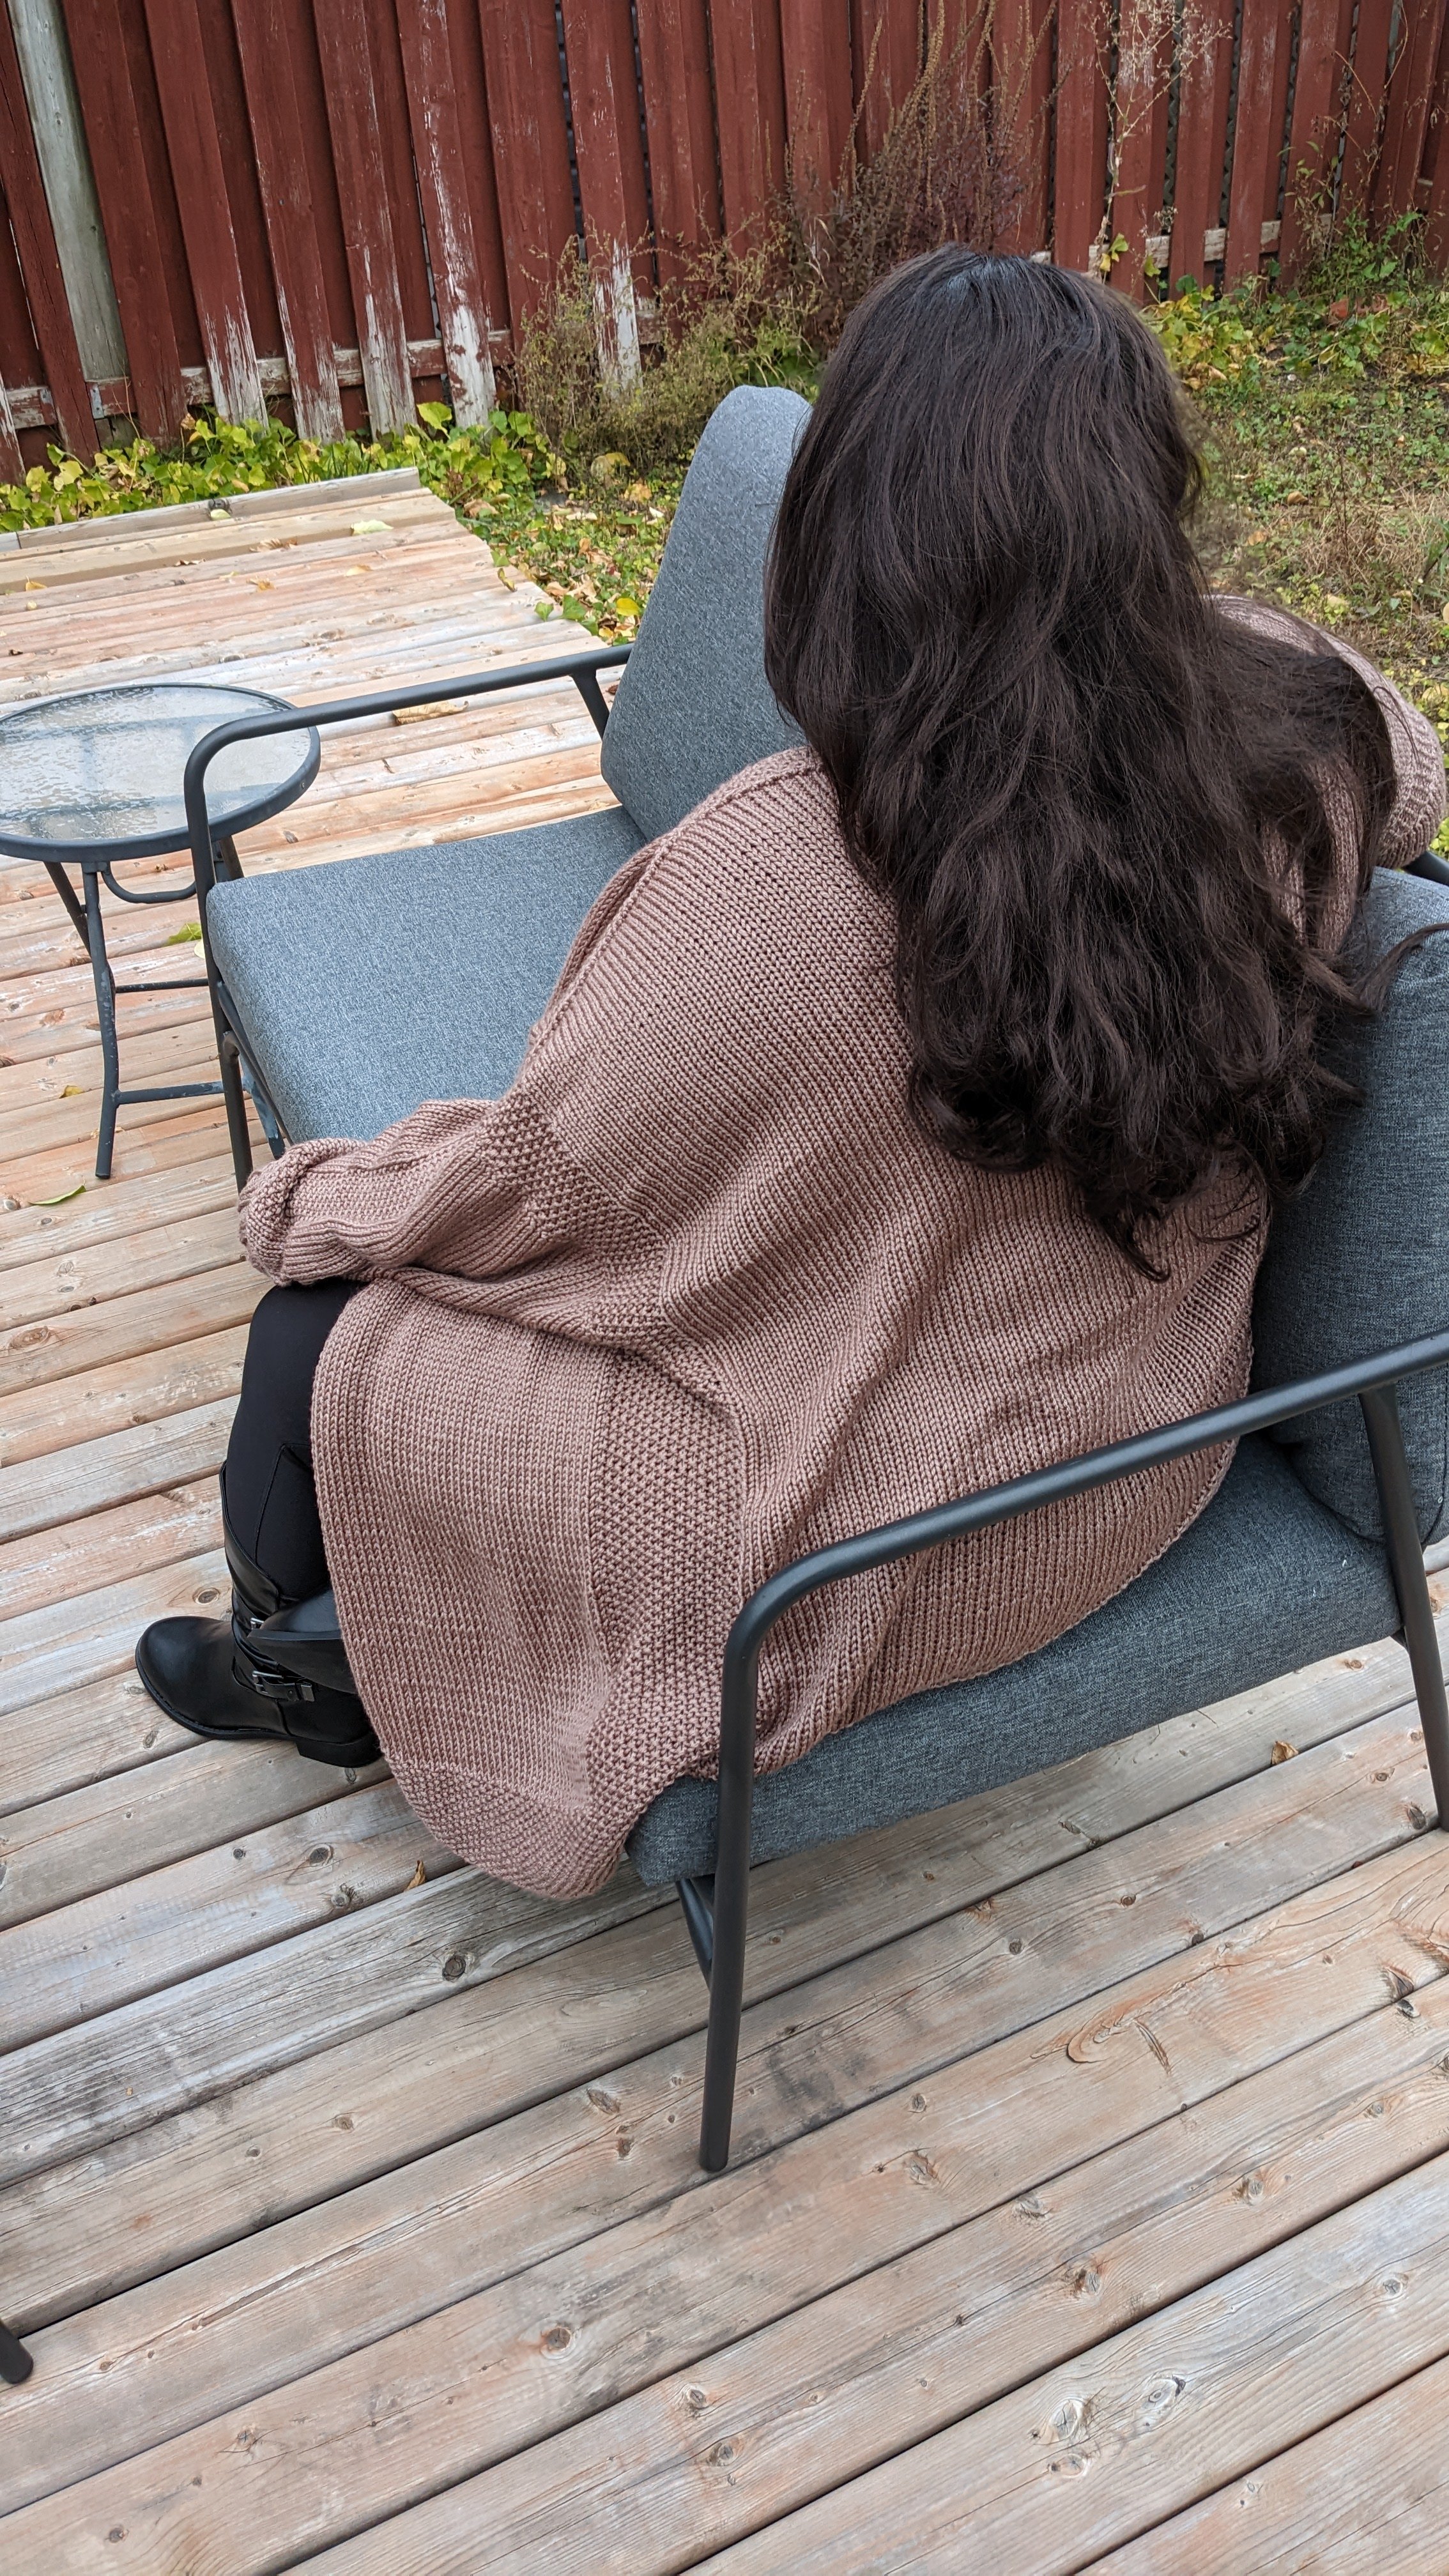
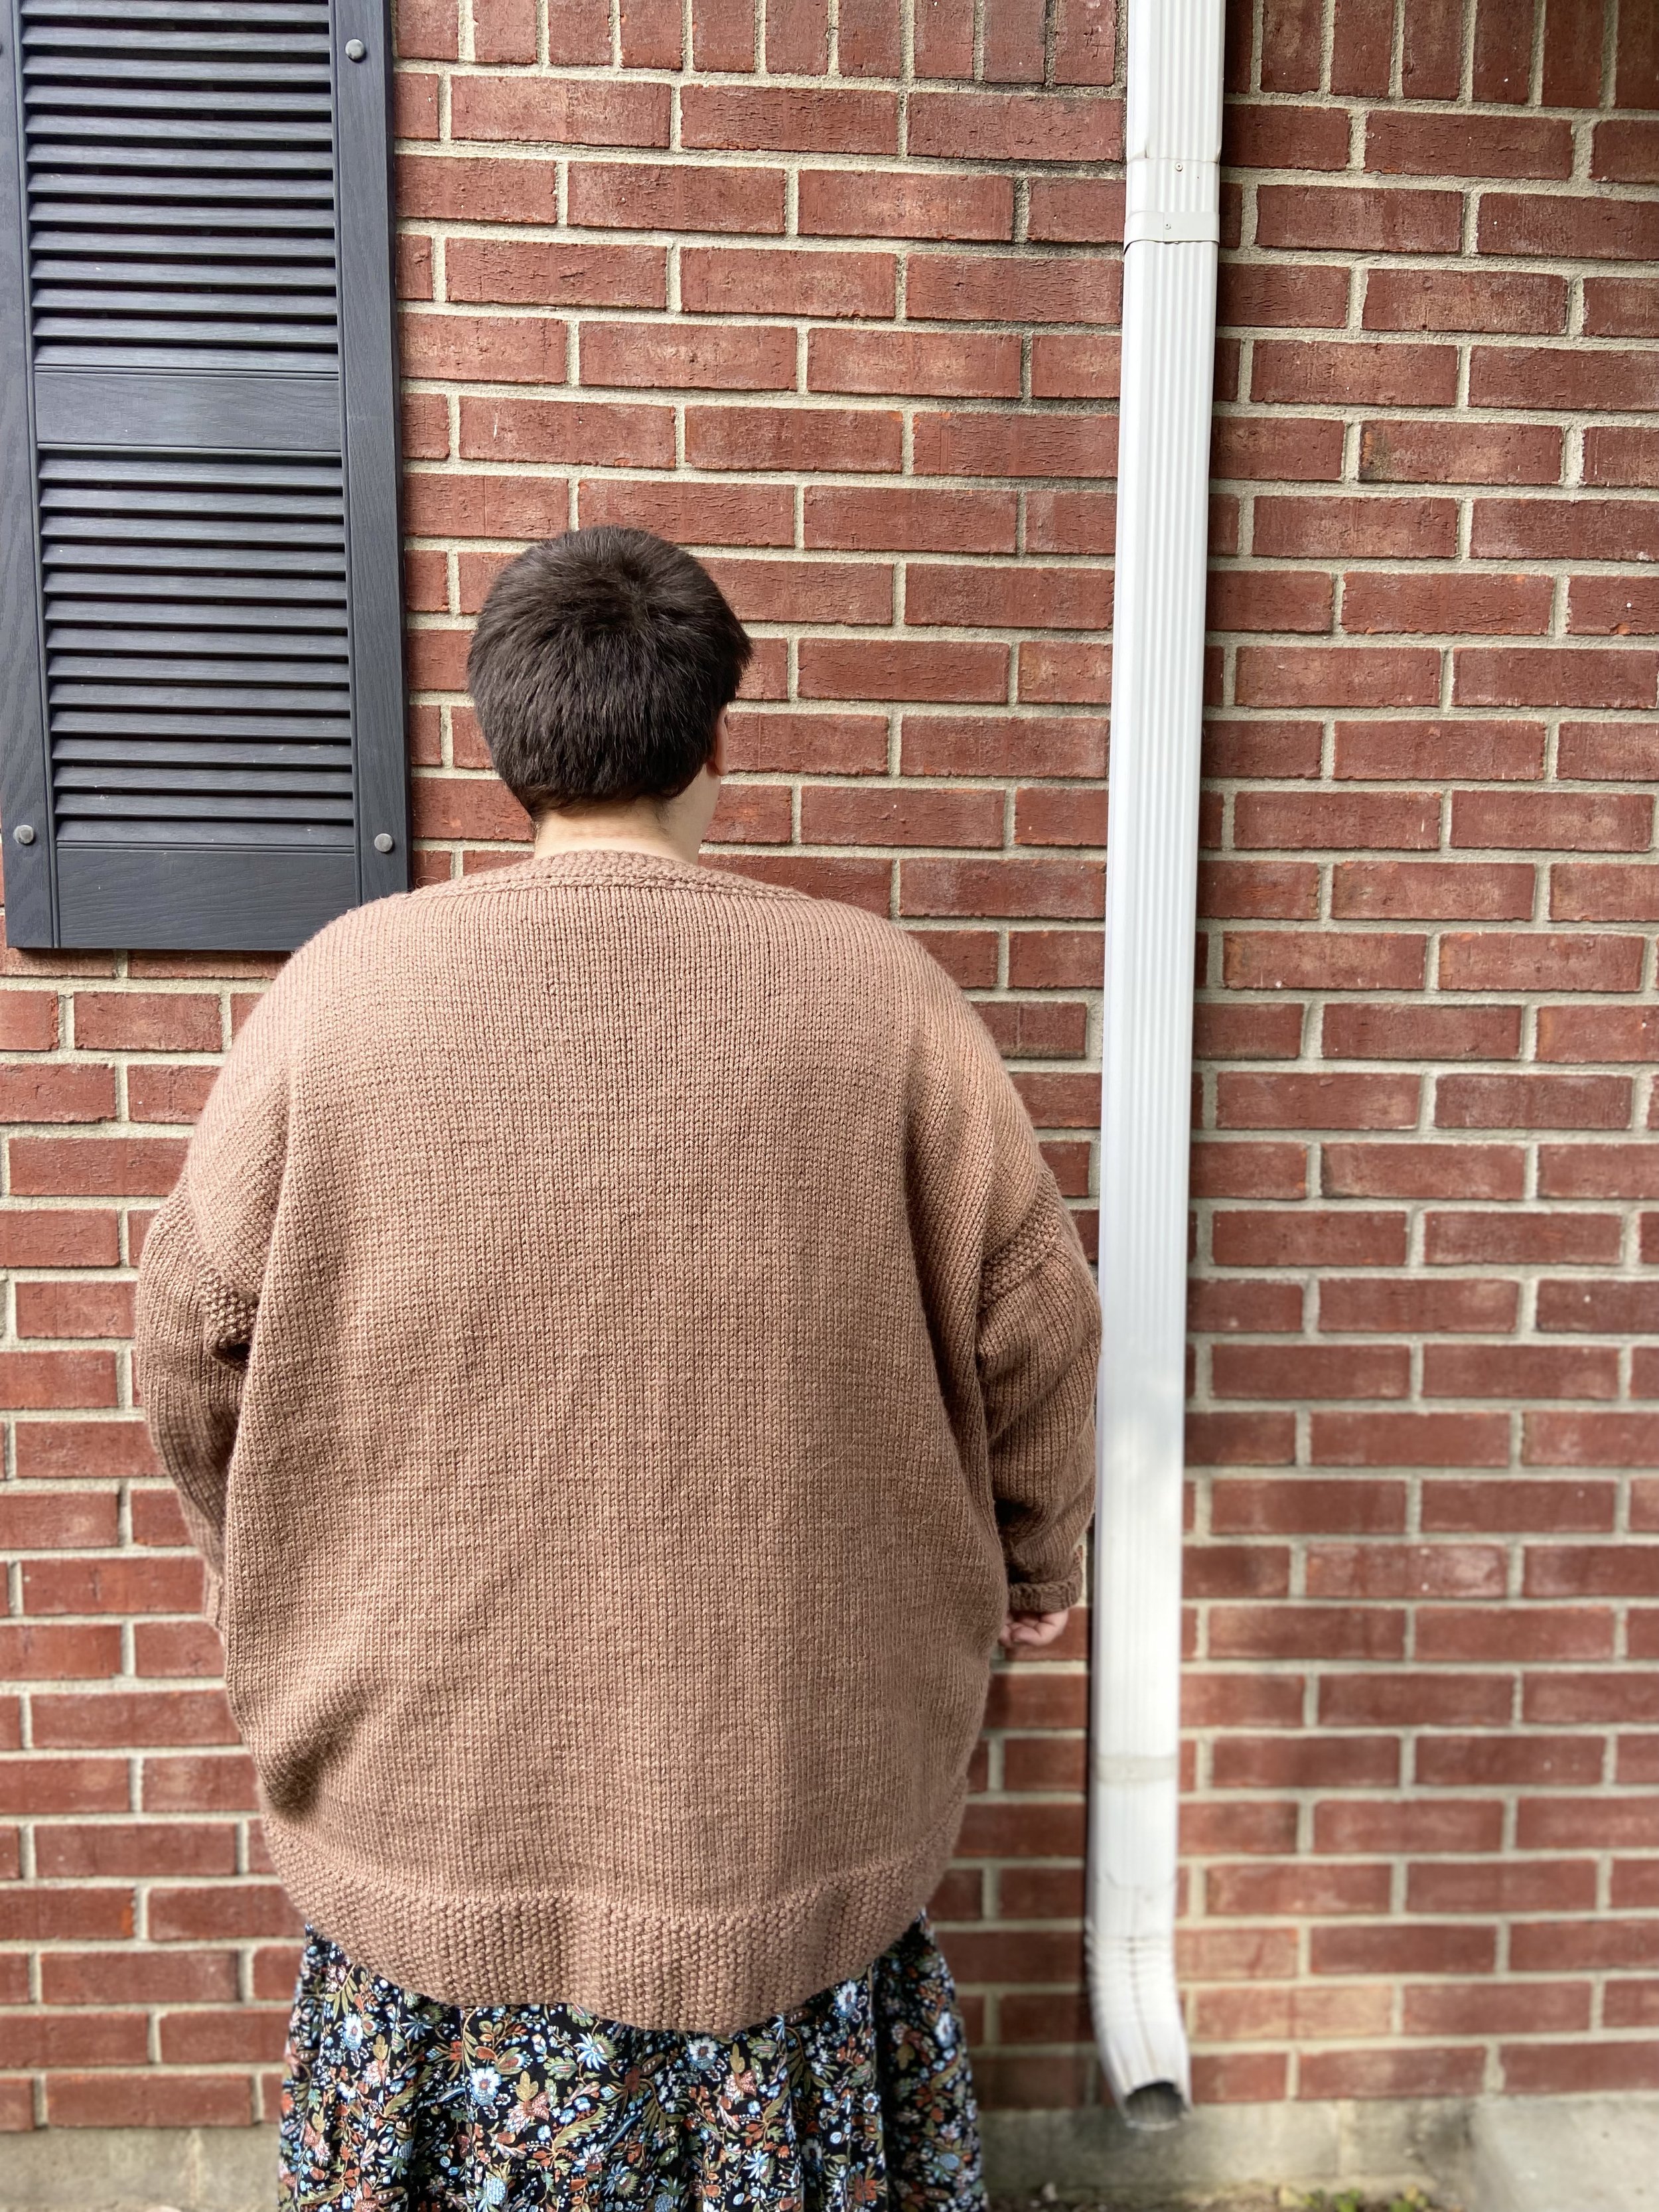
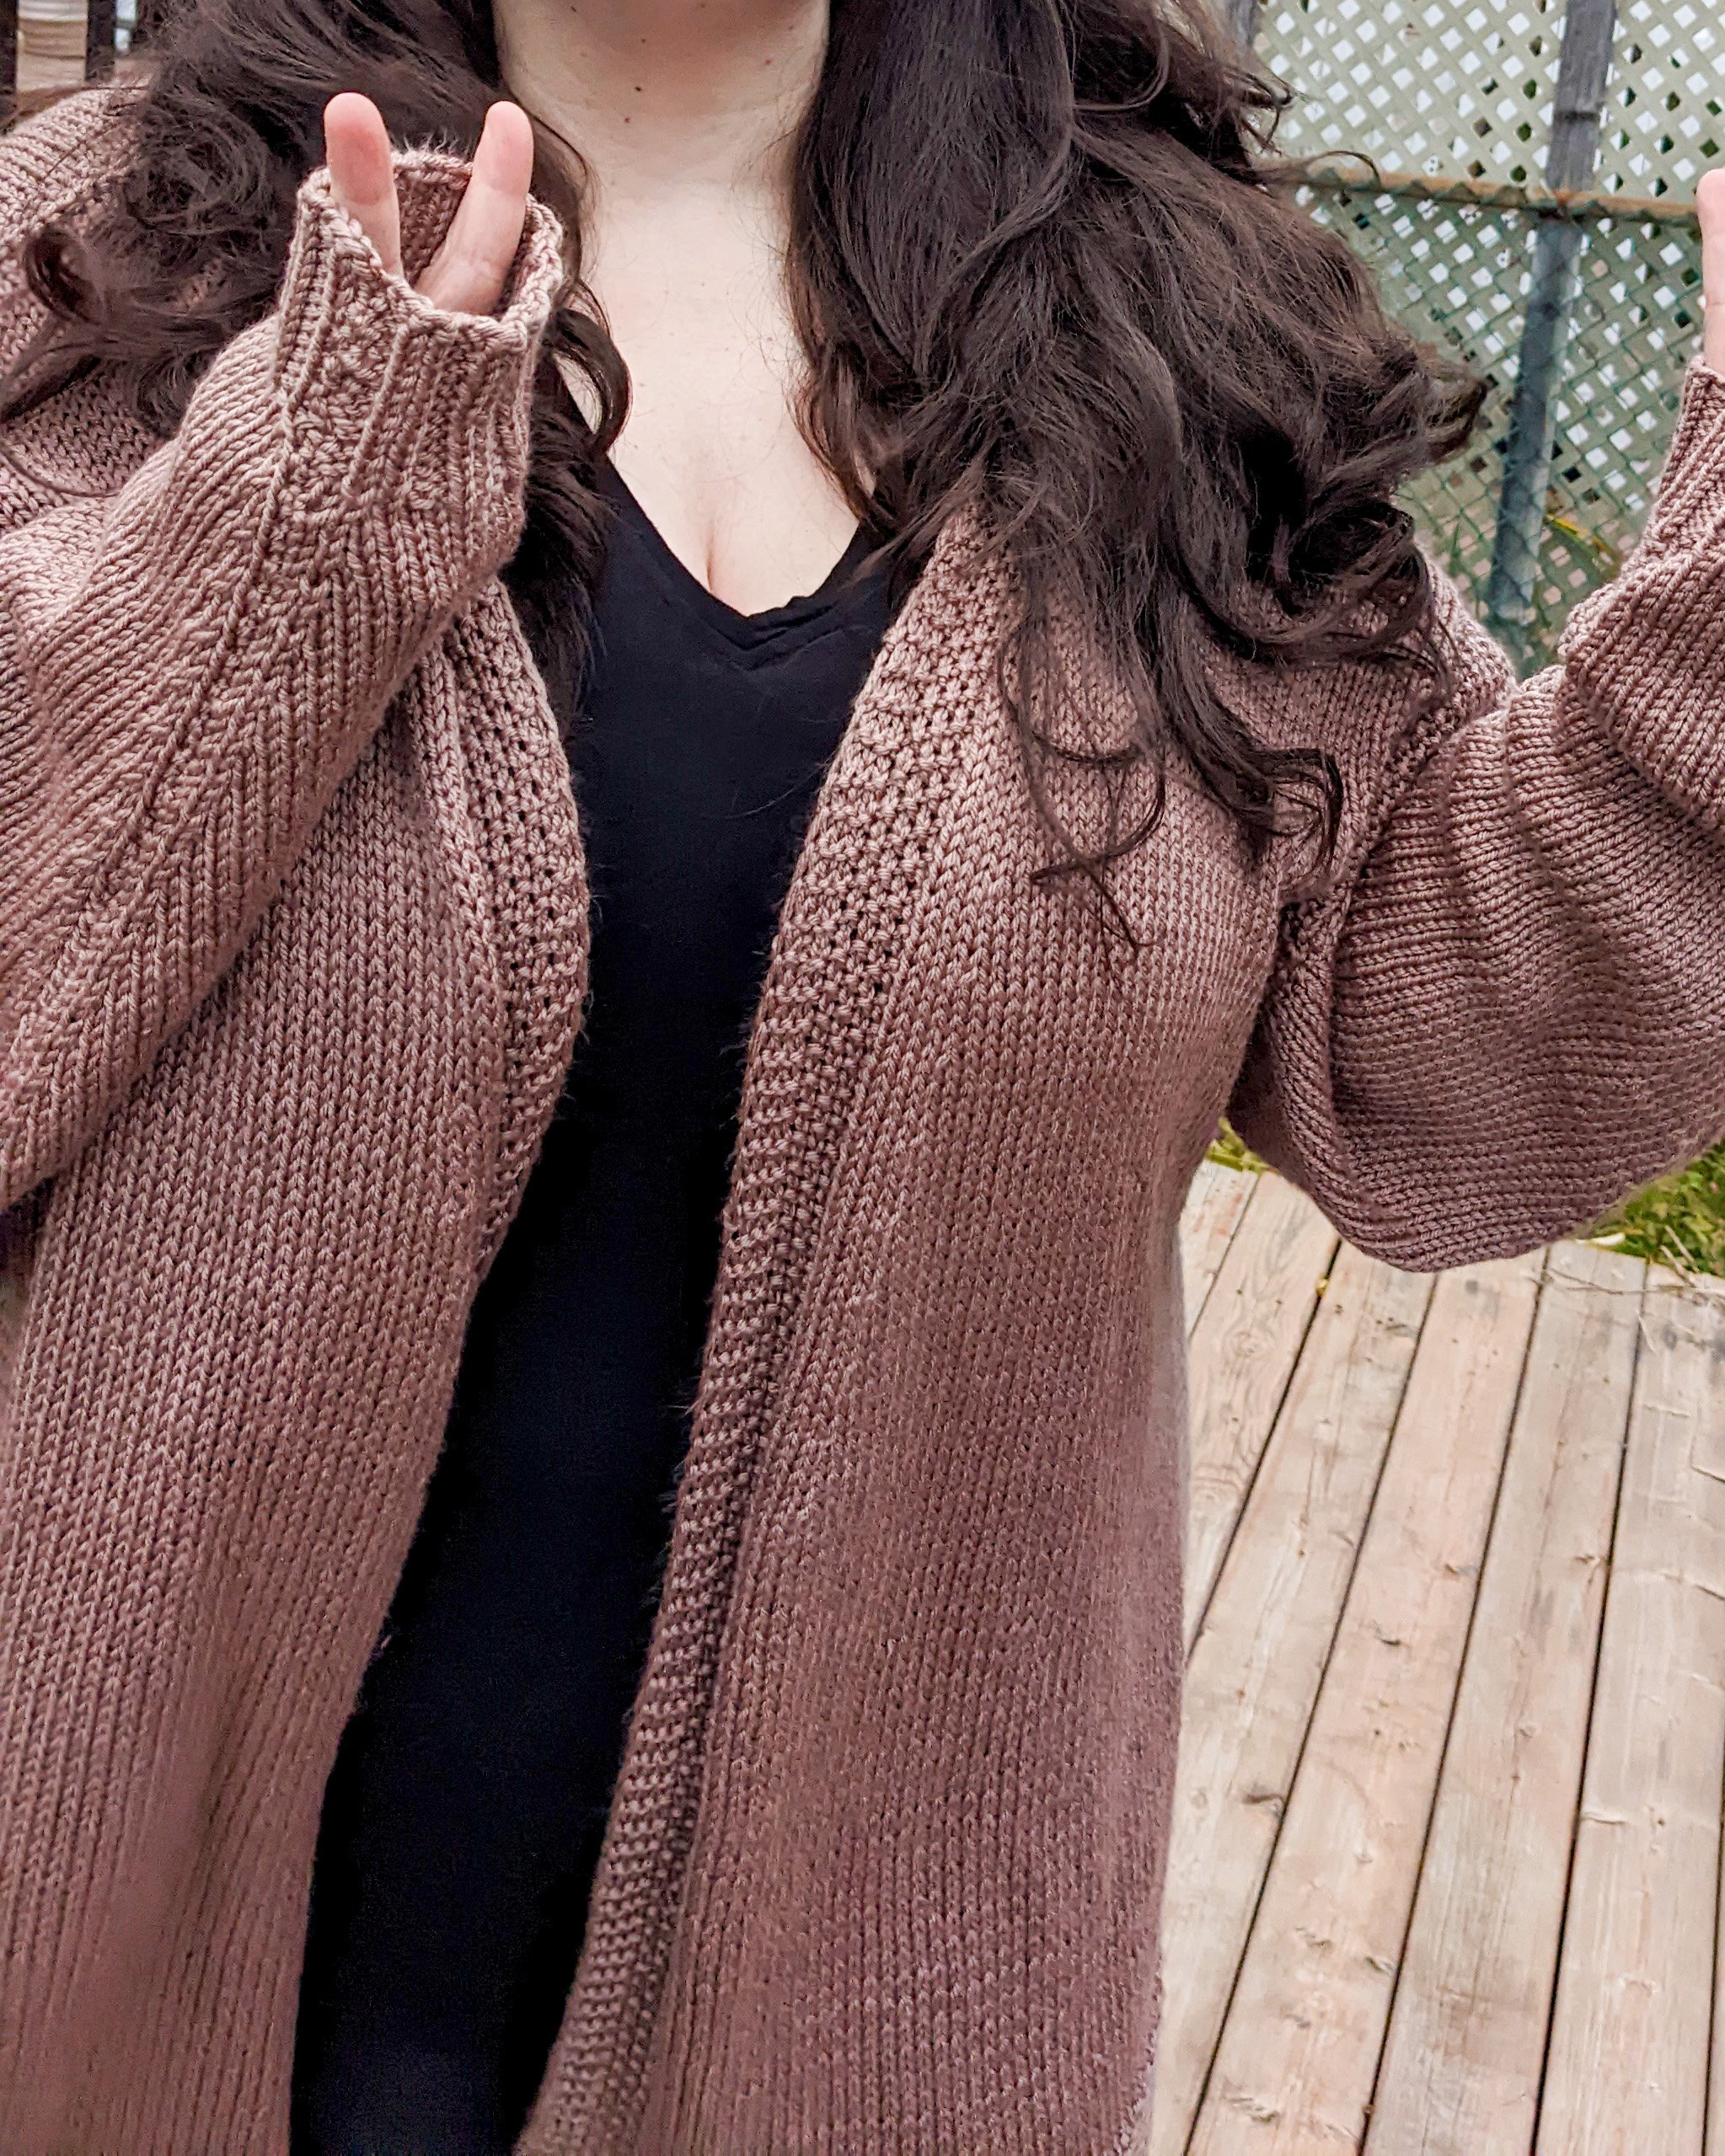
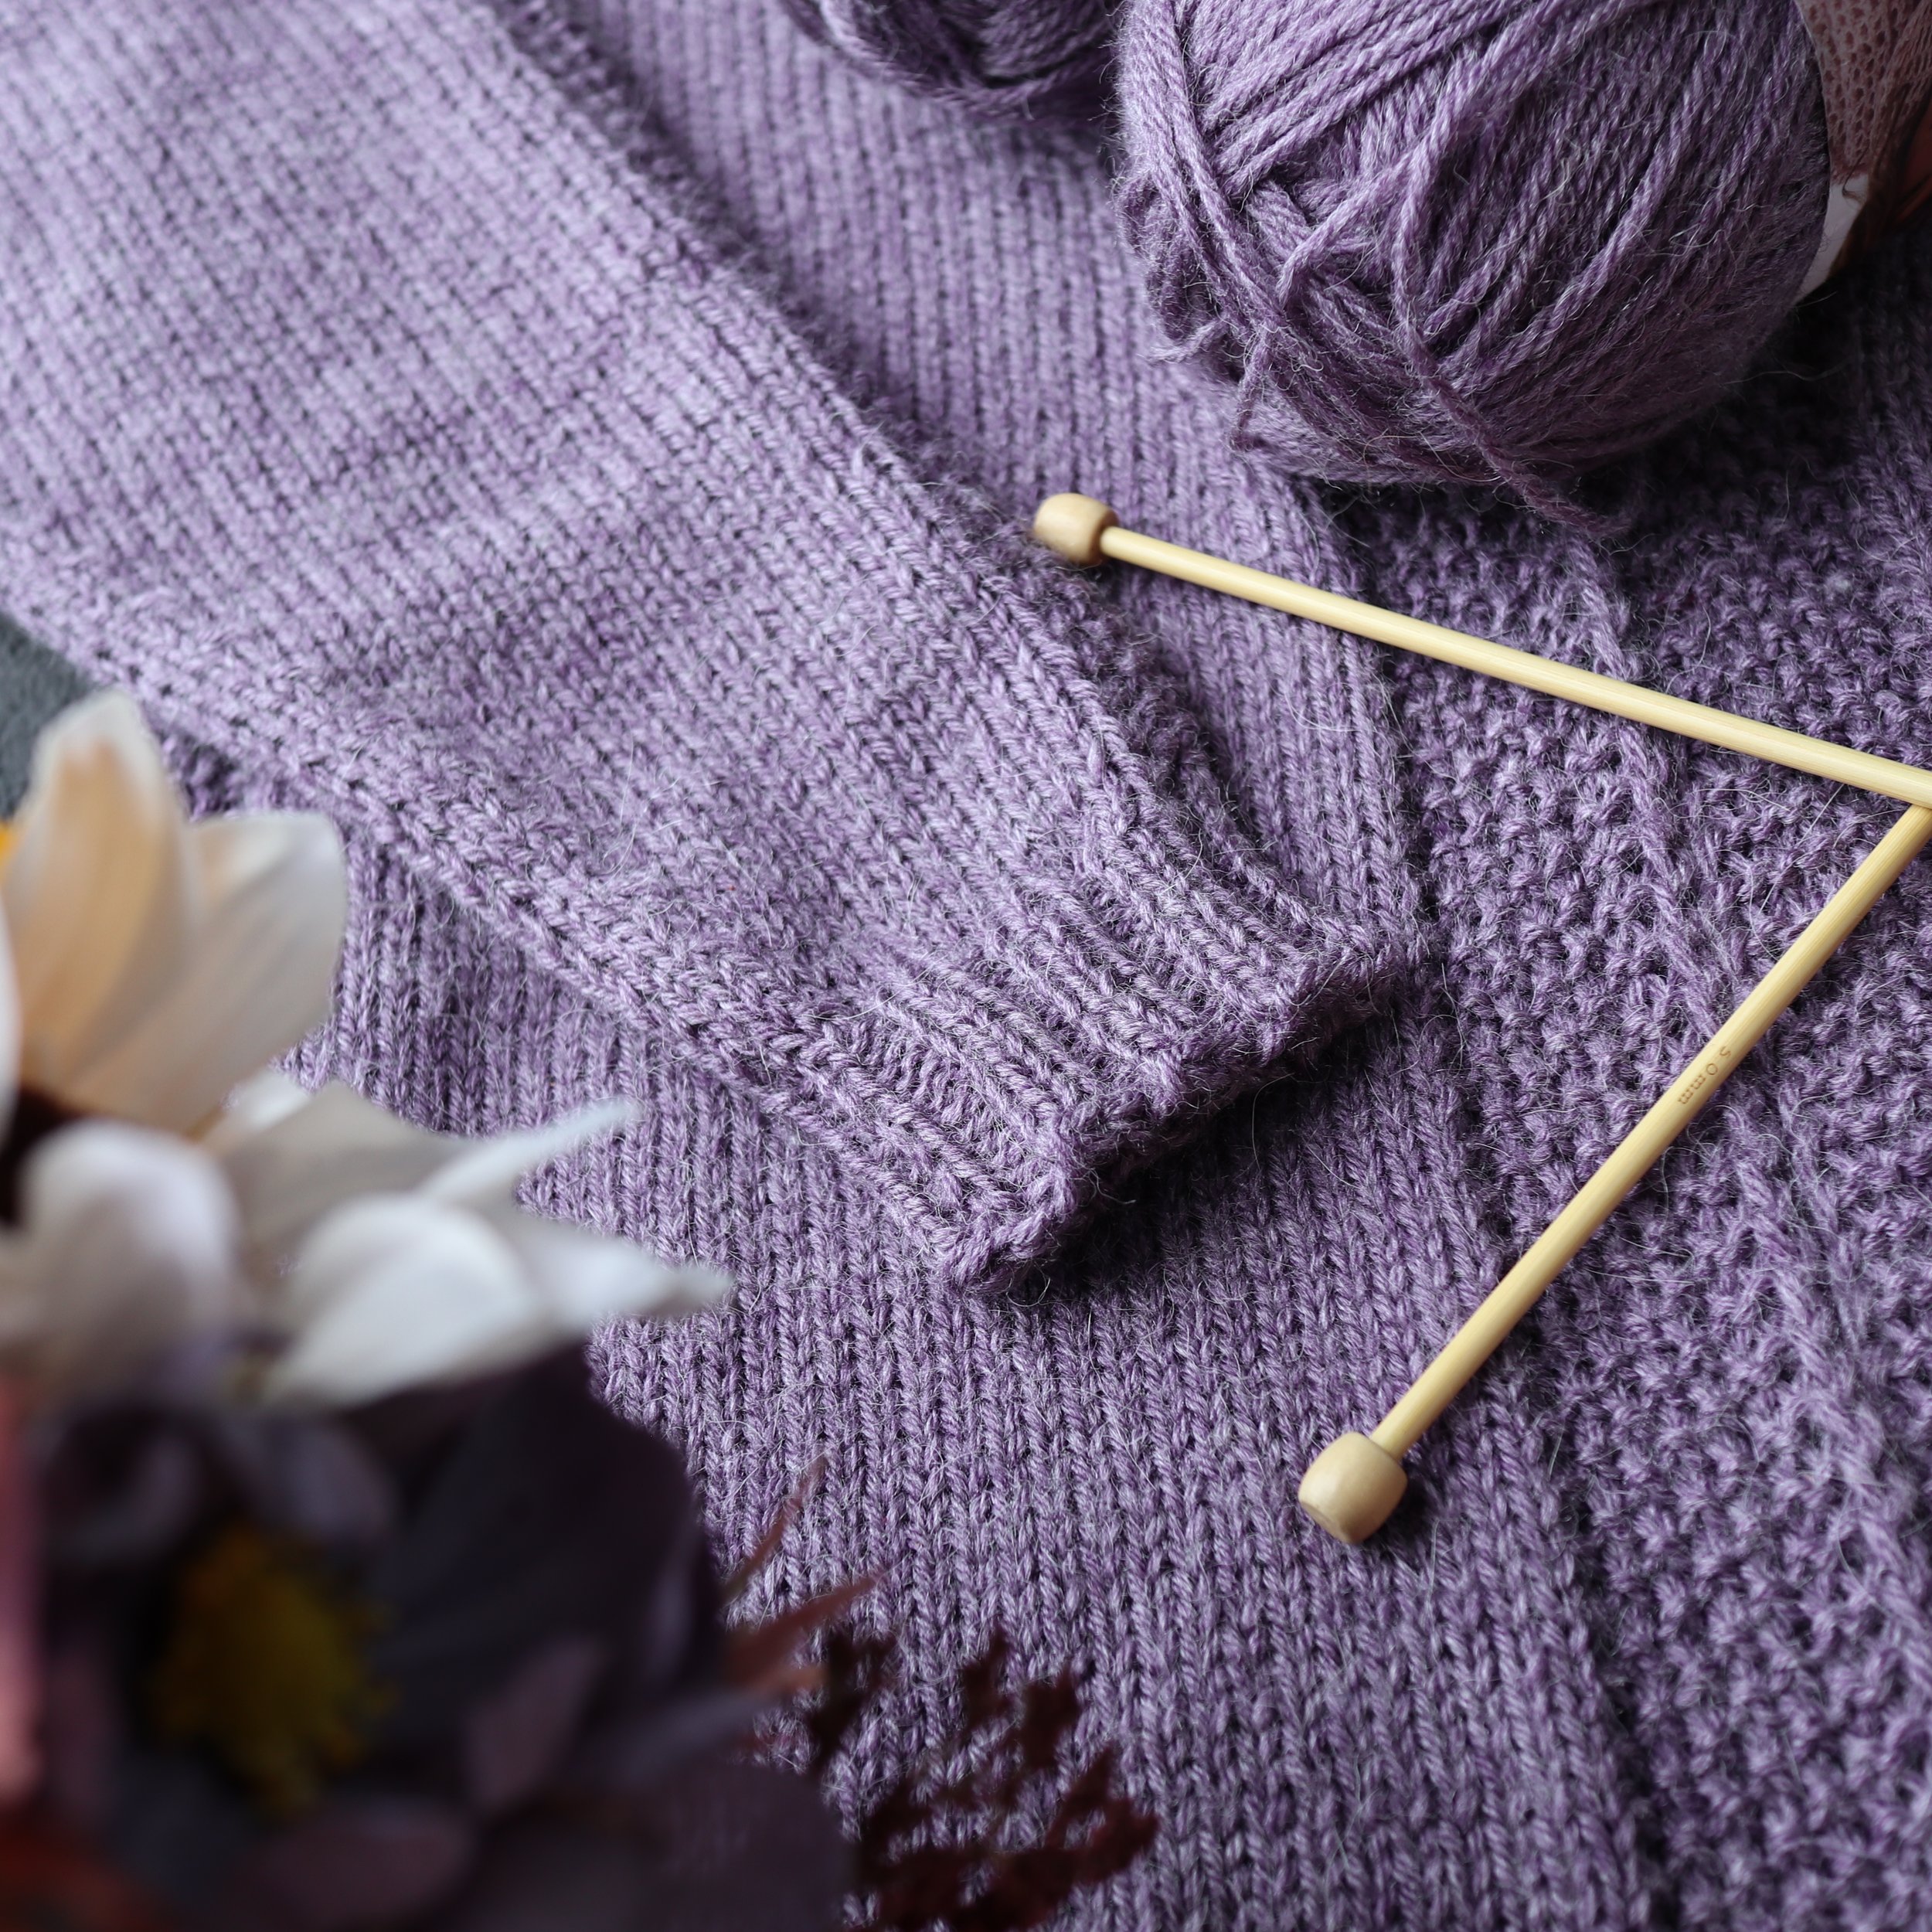
Sewing Seeds is a stockinette, drop shoulder cardigan with seed stitch details down the sides, shoulder and sleeves. The combination creates a simple but elegant garment that is perfect for those chilly fall days! The gentle V-neck of the front collar frames the body in the best way giving this cardigan a more streamlined look. This effect makes it suitable to wear with both casual and dressier outfits.
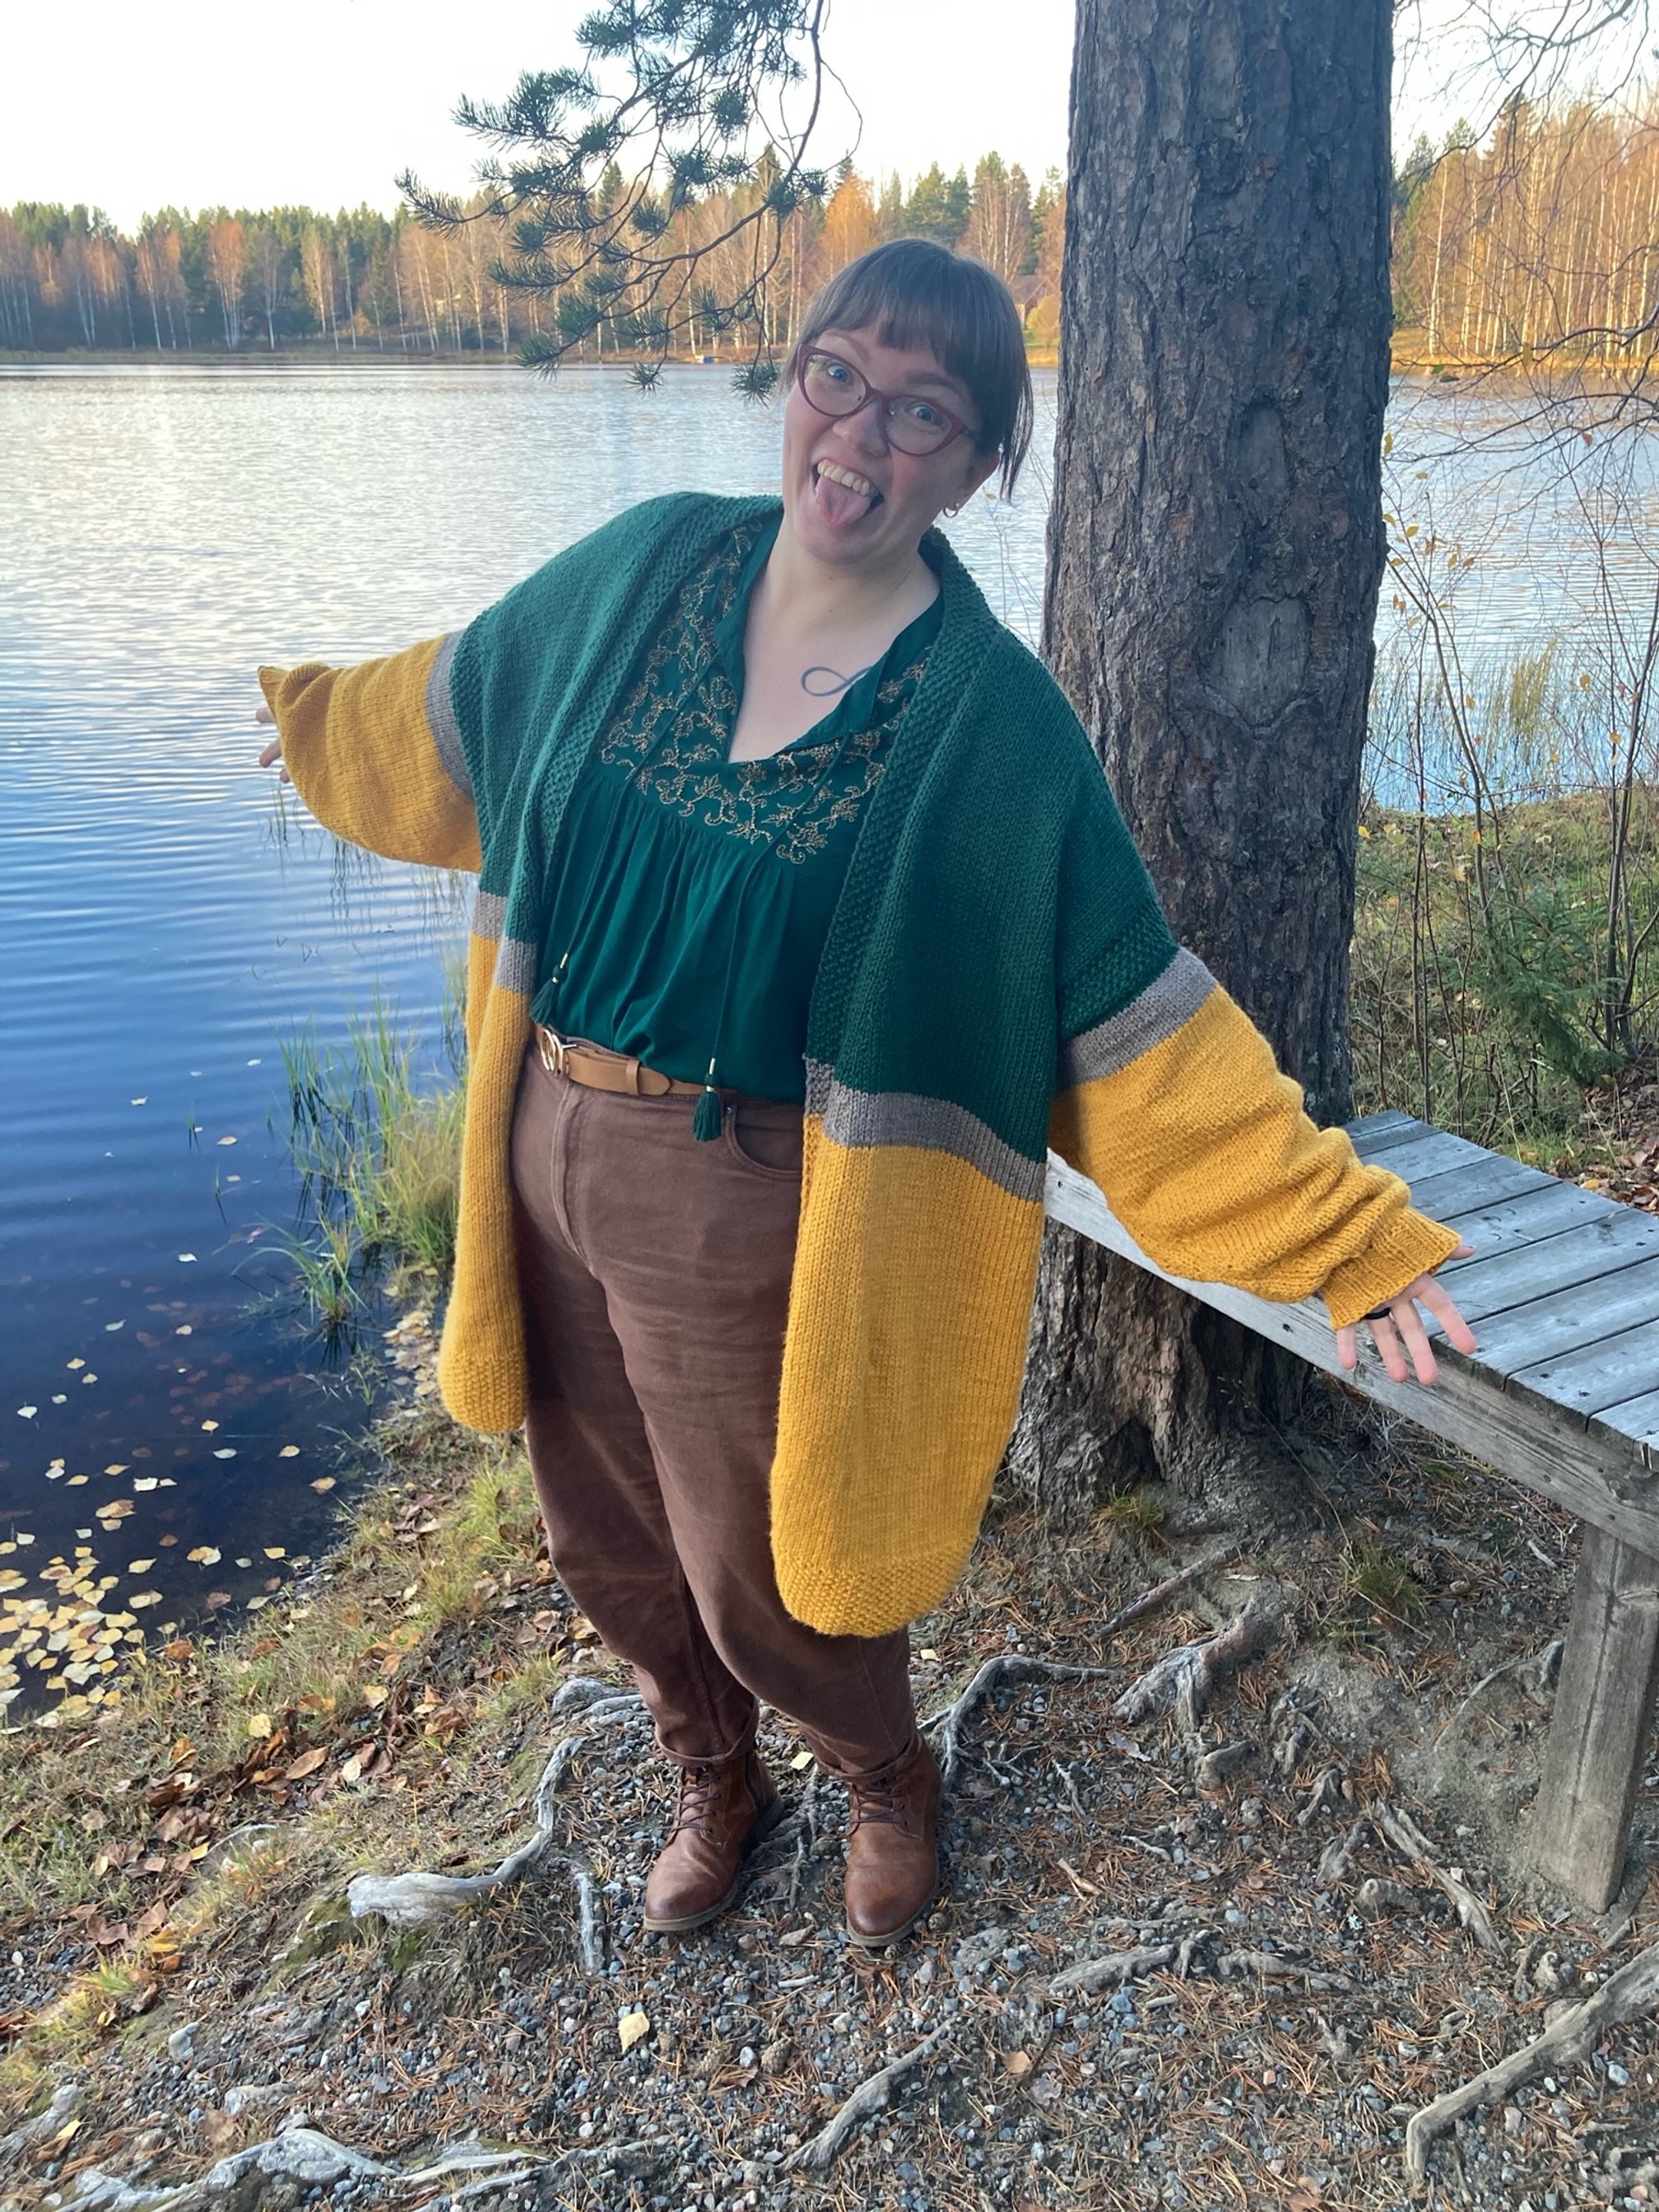
The pattern comes with directions for sizes S - 4XL, which accommodates bust sizes 26 - 59 with 10” - 13” of positive ease. This gives you a wide range of options when choosing the perfect size for you. You can size up and get an oversized cardigan that is just that much cozier, or you can choose to size down and make a lovely form fitting cardigan that goes great with slimmer outfits. You can also easily make the cardigan longer by adding rows. I chose to make the small with about 8” of positive ease. I wanted oversized, but not too much. However, some of my testers decided to go SUPER oversized with 14”-16” and they look AWESOME.
The sample cardigan is knit with Lion Brand Touch of Alpaca yarn. This yarn is a aran weight 4 yarn. You can use any weight 4 yarn with this cardigan as long as you meet gauge.
I hope you love this cardigan as much as I do!


I LOVE TO SEE WHAT YOU CREATE!
Please share your creations with the community on social media tagging @ravinsekaidesigns and hashtag #sewingseedscardigan
I can’t wait to see the beautiful things you come up with!
FOLLOW ME ON SOCIAL MEDIA
Facebook: Ravin Sekai Designs
Ravelry: RavinSekai
Etsy: Ravin Sekai Designs
Instagram: @ravinsekaidesigns
Pinterest: Ravin Sekai Designs
Patreon: Ravin Sekai Designs
WHAT YOU NEED:
Needles: Size 5.5mm and 5mm or sizes needed to obtain gauge
Yarn: Worsted Weight 4 yarn. Sample knit in Lion Brand Touch of Alpaca. 1200(1300, 1410, 1500, 1620, 1700, 1850) yards
Gauge: 17 st/24 rows = 4” w/ 5.5mm needles in stockinette. Gauge is after blocking.
Other: stitch markers, scissors, waste yarn or stitch holders
Suggested Bust Measurements: Measurements will be in inches throughout. S: 32”-35”, M: 36”-39”, L: 40”-43”, XL: 44”-47”, 2XL: 48”-51”, 3XL: 52”-55”, 4XL: 56”-59”
Finished Garment Sizing: Size is after blocking. Worn with 10” - 13” of positive ease. S: bust - 46“ x Length - 30“, M: bust - 50“ x Length - 30“, L: bust - 54“ x Length - 31“, XL: bust - 58“ x Length - 31“, 2XL: bust - 62“ x Length - 32“, 3XL: bust - 66“ x Length - 32“, 4XL: bust - 70“ x Length - 33“
Model: model is 4’11” tall, 38” bust, 30” waist, 40” hips wearing size small, with 8” positive ease in bust.

ABBREVIATIONS:
CO: cast on. I used the cable cast on.
RS: right side
WS: wrong side
St/sts: stitch/stitches
Rep: repeat
Cont: continue
Dec: decrease
Sl1kw: slip one stitch knitwise. slip your stitch knitwise from your left needle to the right without knitting it.
K: knit
P: purl
Pm: place stitch marker
Sm: slip stitch marker
Ssk: slip, slip, knit. It is a left leaning decrease on the RS. slip the first stitch as if to knit onto right-hand needles, slip the second stitch as if to knit, then slide the left-hand needle into the front part of both stitches and knit them together.
K2tog: knit two together. It is a right leaning decrease on the RS.
P2tog: purl 2 together. Left leaning dec on WS, Right leaning dec on RS.
P2togtbl: purl 2 together through the back loop. Right leaning dec on WS, Left leaning dec on RS.
BO: bind off.
Notes:
Sizes: Pattern is written as follows: S(M, L, XL, 2XL, 3XL, 4XL). This is a drop shoulder cardigan, meaning the bust measurements also affect the sleeve length. When choosing your size, use both the suggested measurements and the measurements of the actual cardigan. The cardigan is meant to be worn with 10”-13” of positive ease as a suggestion. But, knowing your body and how you like to wear your drop shoulders helps in picking the size you will want to make. The cardigan looks great with anything from 4”-16” of positive ease. Take that information with you when choosing which size to make.
Construction: Cardigan is knit bottom up. Then, while keeping the other sections on stitch holders or waste yarn, the front panels and back are knit independently. The shoulders are seamed leaving the collar unfinished and the sleeves are seamed to the shoulders. Then, the collar is finished with join-as-you-go knitting.
Length: If you would like a longer cardigan, add rows to the portion of the cardigan before you start the decreases for the neckline.
Neckline/Sleeve Decreases: I made my neckline/sleeve decreases 3 stitches in from the seed stitch collar band/end, because I don’t like them right against the band/side of the work. On the RS, I ssk at the beginning of the row and k2tog at the end of the row. On the WS, p2togtbl at the beginning of the row and p2tog at the end of the row
Seed Stitch: Make sure that you don’t tighten your tension when you go from the seed stitch to stockinette. A tighter tension on the seed stitch, especially at the collar, will result in the collar rolling under.

Save It For Later
Pin to Pinterest
THE PATTERN:
For the free pattern of this design please continue on this page. Please consider supporting me by purchasing the 100% ad-free PDF with all extras/charts for this pattern on my Ravelry or ETSY pages. Or consider joining my Patreon for member perks.
This is Part 1 of the pattern. If you are looking for pt 2, go here.
Bottom Band:
w/ 5.5mm needles CO 196( 212, 230, 246, 264, 280, 298) sts
Row 1: sl1kw, k2, *p1, k1* rep * * until the last 3 sts, k2, sl1kw
Row 2: p1, k2, *k1, p1* rep * * until last 3 sts, k2, p1
Row 3 - Row 24: rep Rows 1 - 2
Body:
S - XL ONLY
Row 25: sl1kw, k2, *p1, k1* x2, p1, pm, k33(37, 41, 45), pm, *p1, k1* x 8, pm, k82(90, 100, 108), pm, *p1, k1* x8, pm, k33(37, 41, 45), pm, k1, *p1, k1* x2, k2, sl1kw
Row 26: p1, k2, *k1, p1* x2, k1, sm, p33(37, 41, 45), sm, *k1, p1* x8, sm, p82(90, 100, 108), sm, *k1, p1* x8, sm, p33(37, 41, 45), sm, p1, *k1, p1* x2, k2, p1
Row 27 - Row 96(96, 102, 102): rep Rows 25 - 26
2XL - 4XL ONLY
Row 25: sl1kw, k2, *p1, k1* x2, p1, pm, k50(54, 58), pm, *k1, p1* x 8, pm, k116(124, 134), pm, *k1, p1* x8, pm, k50(54, 58), pm, k1, *p1, k1* x2, k2, sl1kw
Row 26: p1, k2, *k1, p1* x2, k1, sm, p50(54, 58), sm, *p1, k1* x8, sm, p116(124, 134), sm, *p1, k1* x8, sm, p50(54, 58), sm, p1, *k1, p1* x2, k2, p1
Row 27 - Row 108(108, 114): rep Rows 25 - 26
Front Neckline/Sleeve Separation:
We will now be starting the neckline, then separating the front and back panels for the sleeves. For each size this happens on different rows. Find your size below to follow the directions.
Small/Medium:
On Row 97, we will be starting the decreases for the neckline on either side of the cardigan. You will make these decreases 3 stitches after the first marker and 3 stitches before the last marker. These dec also happen on both the RS and WS. See notes about neckline decreases. You will dec 1 stitch on each front panel at the collar every 5th row 12 times, then every 6th row 4 times for a total of 16 decreases. (This method ensures the neckline decreases smoothly). When you separate the panels for the sleeve openings, you will continue in pattern for the neckline.
Row 97 - Row 114: cont. in pattern making your decreases every 5th row (4 decreases)
Separating Front Panel 1:
Now we are going to separate the first front panel from the rest of the cardigan to create the sleeve openings.
Row 115: sl1kw, k2, *p1, k1* x2, p1, sm, k29(33), sm, *p1, k1* x 4, turn leaving the remaining stitches unknit but still on the needles. (or you can slip the remaining stitches onto waste yarn/stitch holders to be knit later, your choice.)
Row 116: *k1, p1* x 4, sm, p29(33), sm, p1, *k1, p1* x 2, k2, p1
Row 117 - Row 180: cont in pattern decreasing every 5th row (8 more times), then every 6th row (4 times) at the collar.
BO

Back:
Row 115: Re-attach the yarn to the back portion on the RS. *p1, k1* x 4, sm, k82(90), sm, *p1, k1* x4, turn leaving the remaining stitches of the last panel unknit but still on the needles.
Row 116: *k1, p1* x4, sm, p82(90), sm, *k1, p1* x4
Row 117 - Row 180: cont in pattern
BO
Separating Front Panel 2:
Re-attach the yarn to the last front panel on the RS.
Row 115: *p1, k1* x4, sm, k29(33), sm, k1, *p1, k1* x2, k2, sl1kw
Row 116: p1, k2, *k1, p1* x2, k1, sm, p29(33), sm, *k1, p1* x4
Row 117 - Row 180: cont in pattern decreasing every 5th row (8 more times), then every 6th row (4 times) at the collar.
BO all sts except the last 8 of the collar. Place these sts on waste yarn or a st holder to be worked later. Go to shoulder seams
Large/XL:
On Row 103, we will be starting the decreases for the neckline on either side of the cardigan. You will make these decreases 3 stitches after the first marker and 3 stitches before the last marker. These decreases also happen on both the RS and WS. See notes about neckline decreases. You will decrease 1 stitch on each front panel at the collar every 5th row 12 times, then every 6th row 4 times for a total of 16 decreases. (This method ensures the neckline decreases smoothly). When you separate the panels for the sleeve openings, you will continue in pattern for the neckline.
Row 103 - Row 114: cont. in pattern making your decreases every 5th row (3 decreases)
Separating Front Panel 1:
Now we are going to separate the first front panel from the rest of the cardigan to create the sleeve openings.
Row 115: sl1kw, k2, *p1, k1* x2, p1, sm, k38(42), sm, *p1, k1* x 4, turn leaving the remaining stitches unknit but still on the needles (or you can slip the remaining stitches onto waste yarn/stitch holders to be knit later, your choice.)
Row 116: *k1, p1* x 4, sm, p38(42), sm, p1, *k1, p1* x 2, k2, p1
Row 117 - Row 186: cont in pattern decreasing every 5th row (9 more times), then every 6th row (4 times) at the collar.
BO
Back:
Row 115: Re-attach the yarn to the back portion on the RS. *p1, k1* x 4, sm, k100(108), sm, *p1, k1* x4, turn leaving the remaining stitches of the last panel unknit but still on the needles.
Row 116: *k1, p1* x4, sm, p100(108), sm, *k1, p1* x4
Row 117 - Row 186: cont in pattern.
BO
Separating Front Panel 2:
Re-attach the yarn to the last front panel on the RS.
Row 115: *p1, k1* x4, sm, k38(42), sm, k1, *p1, k1* x2, k2, sl1kw
Row 116: p1, k2, *k1, p1* x2, k1, sm, p38(42), sm, *k1, p1* x4
Row 117 - Row 186: cont in pattern decreasing every 5th row (9 more times), then every 6th row (4 times) at the collar.
BO all sts except the last 8 of the collar. Place these sts on waste yarn or a st holder to be worked later. Go to shoulder seams.
2XL/3XL:
On Row 109, we will be starting the decreases for the neckline on either side of the cardigan. You will make these decreases 3 stitches after the first marker and 3 stitches before the last marker. These decreases also happen on both the RS and WS. See notes about neckline decreases. You will decrease 1 stitch oon each front panel at the collar every 5th row 12 times, then every 6th row 4 times for a total of 16 decreases. (This method ensures the neckline decreases smoothly). When you separate the panels for the sleeve openings, you will continue in pattern for the neckline.
Row 109 - Row 114: cont. in pattern making your decreases every 5th row (2 decreases)
Separating Front Panel 1:
Now we are going to separate the first front panel from the rest of the cardigan to create the sleeve openings.
Row 115: sl1kw, k2, *p1, k1* x2, p1, sm, k48(52), sm, *k1, p1* x 4, turn leaving the remaining stitches unknit but still on the needles (or you can slip the remaining stitches onto waste yarn/stitch holders to be knit later, your choice.)
Row 116: *p1, k1* x 4, sm, p48(52), sm, p1, *k1, p1* x 2, k2, p1
Row 117 - Row 192: cont in pattern decreasing every 5th row (10 more times), then every 6th row (4 times) at the collar.
BO

Back:
Row 115: Re-attach the yarn to the back portion on the RS. *k1, p1* x 4, sm, k116(124), sm, *k1, p1* x4, turn leaving the remaining stitches of the last panel unknit but still on the needles.
Row 116: *p1, k1* x4, sm, p116(124), sm, *p1, k1* x4
Row 117 - Row 192: cont in pattern.
BO
Separating Front Panel 2:
Re-attach the yarn to the last front panel on the RS.
Row 115: *k1, p1* x4, sm, k48(52), sm, k1, *p1, k1* x2, k2, sl1kw
Row 116: p1, k2, *k1, p1* x2, k1, sm, p48(52), sm, *p1, k1* x4
Row 117 - Row 192: cont in pattern decreasing every 5th row (10 more times), then every 6th row (4 times) at the collar.
BO all sts except the last 8 of the collar. Place these sts on waste yarn or a st holder to be worked later. Go to shoulder seams.
4XL:
On Row 115, we will be starting the decreases for the neckline on either side of the cardigan AND separating the sleeves. You will make the decreases 3 stitches after the first marker and 3 stitches before the last marker. These decreases also happen on both the RS and WS. See notes about neckline decreases. You will decrease 1 stitch on each front panel at the collar every 5th row 12 times, then every 6th row 4 times for a total of 16 decreases. (This method ensures the neckline decreases smoothly). When you separate the panels for the sleeve openings, you will continue in pattern for the neckline.
Separating Front Panel 1:
We are going to separate the first front panel from the rest of the cardigan to create the sleeve openings.
Row 115 (dec row): sl1kw, k2, *p1, k1* x2, p1, sm, k2, ssk, k54, sm, *k1, p1* x 4, turn leaving the remaining stitches unknit but still on the needles (or you can slip the remaining stitches onto waste yarn/stitch holders to be knit later, your choice.)
Row 116: *p1, k1* x 4, sm, p57, sm, p1, *k1, p1* x 2, k2, p1
Row 117 - Row 198: cont in pattern decreasing every 5th row (11 more times), then every 6th row (4 times) at the collar.
BO
Back:
Re-attach the yarn to the back portion on the RS.
Row 115: *k1, p1* x 4, sm, k134, sm, *k1, p1* x4, turn leaving the remaining stitches of the last panel unknit but still on the needles.
Row 116: *p1, k1* x4, sm, p134, sm, *p1, k1* x4
Row 117 - Row 198: cont in pattern.
BO
Separating Front Panel 2:
Re-attach the yarn to the last front panel on the RS.
Row 115 (dec row): *k1, p1* x4, sm, k54, k2tog, k2, sm, k1, *p1, k1* x2, k2, sl1kw
Row 116: p1, k2, *k1, p1* x2, k1, sm, p48(52), sm, *p1, k1* x4
Row 117 - Row 198: cont in pattern decreasing every 5th row (11 more times), then every 6th row (4 times) at the collar.
BO all sts except the last 8 of the collar. Place these sts on waste yarn or a st holder to be worked later. Go to shoulder seams.
Find seaming, finishing the collar, and sleeves in Part 2.
Happy Creating!
IF YOU LIKED THIS PATTERN, PLEASE SUPPORT ME ON PATREON OR BUY ME A COFFEE!

BUY ME A KO-FI

SUPPORT ME ON PATREON
I LOVE TO SEE WHAT YOU CREATE!
Please share your creations with the community on social media tagging @ravinsekaidesigns and hashtag #sewingseedscardigan
I can’t wait to see the beautiful things you come up with!
FOLLOW ME ON SOCIAL MEDIA
Facebook: Ravin Sekai Designs
Ravelry: RavinSekai
Etsy: Ravin Sekai Designs
Instagram: @ravinsekaidesigns
Pinterest: Ravin Sekai Designs
Patreon: Ravin Sekai Designs

Hi! I’m Rachel.
I’m a quirky world traveller, avid knitter, crochet lover, pattern maker, and all around nerd! I spend a lot of time clowning around, and I often have the goofiest smile on my face. This website is the landing place for my new patterns, random thoughts, and general craziness. I hope you enjoy my randomness and my yarnie goodness!
Archive
- LGBTQ+
- PRIDE
- accessories
- accessory
- asymmetrical
- autumn
- backpack
- bag
- beach
- beanie
- bias shawl
- blanket
- blog hop
- blue
- bobble
- bookbag
- boyfriend
- cardigan
- case
- celtic weave stitch
- clutch
- clutch bag
- collaboration
- color block
- color work
- cover
- cover-up
- cowl
- crochet
- crochet pattern
- crochetpattern
- crop top
- croptop
- decor
- diy
- dress
- ds case
- duster
- earwarmer
- easy
- fall
- festivaltop
- free pattern
- gauge
- ghost
- granny squares
- halloween
- handbag
- hat
- headband
You Might Also Like:


