
Super Cute, Super Easy Headband With A Bow - Free Knitting Pattern

I always take knitting along on my road trip and by the end of the trip I usually end up with a small project like this headband. I used worsted weight yarn and number 8 (5mm) needle for this work. The band is knitted in garter stitch and the bow is in both garter and stockinette sts. The center of the bow is held together with a seed-stitch band which I thought would make it look a little more interesting.
This headband is a great project for leftover yarn and it takes less than a day to make. If you just start learning how to knit, this would be a fun weekend project to do.
Here Is The Headband With A Bow Pattern
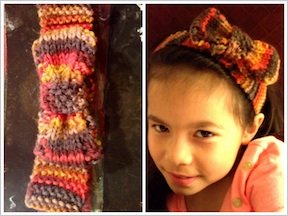
My daughter wearing her new headband - what a good sport she is.
Million Thanks, sweetie!
Gauge: 4.5 sts/inch
Materials
1. Worsted weight yarn of your choice
2. A pair of straight knitting needles US #8 (5mm)
3. Tapestry needle
Hepful links for head and hat sizes
http://www.craftyarncouncil.com/headsize.html
http://www.tottoppers.com/sizing/
Direction
For the headband;
CO 8 sts. Knit every row until the band is about 3 inches less than desired length. I use wool and it is very stretchy. If you find your yarn is not as stretchy, make the band about 2 inches less than desired length.
Then bind off all stitches and seam both ends together using tapestry needle and yarn.
For the bow;
CO 9 sts. Follow pattern below;
Row 1: Knit.
Row 2: K2, p5, k2.
Repeat these 2 rows until piece measures about 8 or 9 inches. Bind off and seam ends together. Then make a seed-stitch center ring for the bow as follow;
For the center ring of a bow;
Cast on 5 sts.
Row 1: K1,p1,k1,p1,k1.
Repeat row 1, 17 times. Then bind off and sew ends together to form ring.
Assembly the headband and the bow
Slip the center ring over the bow and slide it to the center. Push the center of the bow inward to form a little dent. Use tapestry needle and yarn to secure the center ring and the bow together at the back of work. Attach the bow to the band by sewing it in place. Then you're done.
Want to share your finish photo? Send me a picture using the form in my gallery page.
Thanks for visiting and have a happy knitting!
Go To Knitting Instructions Homepage
You might like these
Easy Bobble-Cable Headband For Kids and Adults
Simply to knit bobble-cable headband pattern for kids or adults. Add wider trim for bigger size.
Gardener Headband/Sweatband For Him And Her - Free Knitting Patterns
2 free patterns for headbands to make for gardeners. One is in lovely leaf motif and another is in handsome brioche rib. Knit them both!
Easy Baby Headband With a Bow Knitting Pattern.
This baby headband is pretty easy to knit. Great for beginner. Just need a little effort to sew them together. The result is worth it. I hope you'll try.


You might like these
Easy Lacy Headband - Beginner Lace Knitting Pattern
This easy lacy headband knitting pattern is just one examples of how simple it is to incoperate lace stitch into everyday knitted items.
Hat And Headband Knitting Patterns - Free Patterns For Beginner
Easy hat and headband knitting patterns which I picked especially for beginner. Learn how to knit lacy headband with video instruction. Free patterns!
Easy Bobble-Cable Headband For Kids and Adults
Simply to knit bobble-cable headband pattern for kids or adults. Add wider trim for bigger size.


Recent Articles
-
Feather and Fan Neck Scarf - Free Scarf Knitting Pattern
Apr 19, 24 02:57 PM
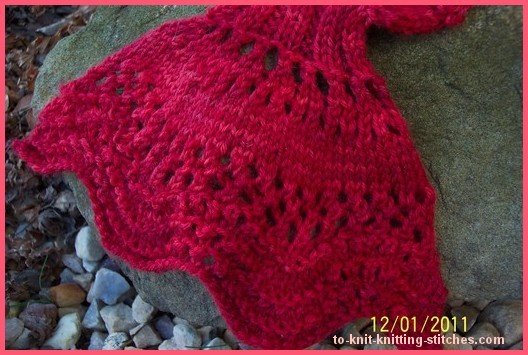 This Feather and Fan neck scarf is knitted with a 50 gram ball wool. Beautiful and make a great gift for your love one.


