Friday, July 15, 2022

Toddler-Painted Yarn!

My toddler just helped me dye some yarn for his upcoming sweater! Yep, really. My 1.5-year-old "hand-painted" the yarn in a big plastic bin with food coloring and squeeze bottles, obviously with significant guidance from me to keep the mess relatively contained. After he went to bed for the night, I heat-set the colors with vinegar and my yarn-dyeing kettle on the stovetop. This was a super fun activity for him (wait, Mama is ENCOURAGING me to make a mess?) and my first post-baby foray back into yarn dyeing, which I have been missing very much.

We used Lion Brand Wool-Ease, which fit all our various criteria. Most importantly, the dye had to be child-safe, so no strong chemicals. Food coloring or Kool-Aid were the only two dyes that I was willing to put in a toddler's hands, meaning we needed to dye animal fiber. For cost reasons, that animal fiber was wool, because I wasn't going to experiment with anything expensive. And finally, because I want him to wear the sweater that I eventually make with it, I needed a soft, non-itchy, and machine-washable yarn. I love the acrylic-wool blend Wool-Ease for its comfortable texture, durability, and much cheaper price than pure wools that are washable and soft. As a huge bonus, since only the wool content (20%) of the Wool-Ease takes dye, the resulting color is less intense than obtained from dyeing pure wool -- this is helpful when dyeing with food coloring which can give super bright, borderline garish colors on wool. Oh, and it's easier to heat-set Wool-Ease without felting, which is good for sleep-deprived parents.

For the cardigan I am planning to make, I skeined up approximately 3.5 balls of Wool-Ease for this dye batch. I knew it would be a little crowded in the kettle, but that was ok with me as I wasn't going for a uniform color. Here is the yarn pre-soaking in a plastic bin in the bathtub.

To avoid a brown mess, I limited the color selection to two main colors, blue and green. I had two squeeze bottles, so we started with one bottle of each and refilled those as we went along. I also had two different brands of food coloring, one regular and one gel, so we used both greens and both blues for slightly different shades to keep things interesting. Even so, my toddler quickly realized I was holding out on some of the colors so he tried to climb up and help himself to "purple," so I mixed up a purple batch with one drop of red in the next blue bottle. I made the bottles pretty concentrated, with 5 drops of gel food coloring or 7 drops of regular food coloring in each one and the yarn looked pretty well covered when we were done. Unfortunately, with all the chaos and demands for "more more" dye, I didn't get any pictures of the yarn-painting process, and I totally forgot to take pictures of the yarn in the plastic bin before moving it to the kettle (blame that sleep deprivation I mentioned earlier).

To heat-set the dye with vinegar, I ended up doing five heatings. For each, I heated the kettle until it just began to boil, covered the lid, turned off the heat, and let the bath sit until the water became clear. The first heating exhausted the hand-painted dye quickly, within 30 minutes. Even though I thought we had used a lot of food coloring in the squeeze bottles, the yarn was a very light pastel after this first heat. So I added another 5-ish drops of food coloring per 3oz of yarn, basically kettle-dyeing at this point but following the general color scheme already painted into the yarn. Then I heated again and let the dye exhaust, up to the fifth time. I was surprised at how much food coloring the yarn keep taking up, but by the fifth exhaustion (the next morning) I thought the yarn looked bright enough, so I let it sit and cool for the rest of the day before washing. Altogether we used about 40 drops of Dollar Tree food coloring and 10 drops of Wilton gel food coloring per 3oz of yarn. The colors held fast during rinsing and gentle wash with baby shampoo.

While I am very happy with how the yarn turned out and my toddler loved the activity, there was substantial artistic input from me in the kettle-dye to get the yarn more vibrantly colored, so I plan to experiment in future rounds to keep more of the toddler-painted look. We will be doing this again soon with more yarn for a matching Mama-sized cardigan, and I will try including vinegar in the pre-soak, letting him paint the yarn directly in the (unheated) pot, using more dye in the squeeze bottles, and adding less water in the heat-setting process to reduce letting the colors run in the dyebath or needing to add more dye to the kettle.


Materials:

- Animal fiber yarn of desired quantity (highly recommend Wool-Ease)

- Scrap yarn for ties

- Large plastic bin or bucket, ideally clear

- Bathtub or outdoor space

- Plastic squeeze bottles

- Food coloring

- White vinegar

- Dedicated pot used for dyeing (not used for food)

- Disposable chopsticks or tongs (not used for food) for manipulating yarn in dyebath


Prep before toddler/child gets involved:

- Wind yarn into loose skeins. Tye loosely in 4-5 spots around the skein (I use scraps of bright-colored acrylic yarn for ties).

- Place yarn in plastic bin and submerge completely in room temperature water. You may place toys or other objects on top of the yarn to weight it down so it doesn't float. Let soak for at least 30 minutes.

- Place plastic bin in bathtub or outdoors, wherever you are ok with a bit of food coloring spillage.

- Fill plastic squeeze bottles with water and food coloring. I had small bottles and used about 5-7 drops of food coloring per bottle (and we refilled several times, for a total of about 12-15 bottles worth of dye). I brought the food coloring with us into the bathroom so it was easier to refill the bottles as we used them up.


Toddler/child activity portion:

- Give toddler/child squeeze bottles to squeeze the dye onto the yarn. Younger toddlers may need more guidance to help squeeze onto the yarn instead of all over the room.

- Encourage or help toddler/child to cover all the yarn with dye. If necessary and desired, you can also dip the undyed sections in dye later.


Steps after toddler/child art is completed:

- Obviously, please keep children safely away from hot stoves and kettles.

- Transfer yarn to yarn-dyeing kettle. Add enough water and vinegar (about 1 part vinegar to 10 parts water) to just cover the yarn and place on stovetop. Turn on the heat until water just begins to simmer, then cover pot and turn off heat. Let sit for at least 30 minutes before opening lid to check.

- Wait until dye is exhausted, when the water in the dyebath is clear and uncolored.

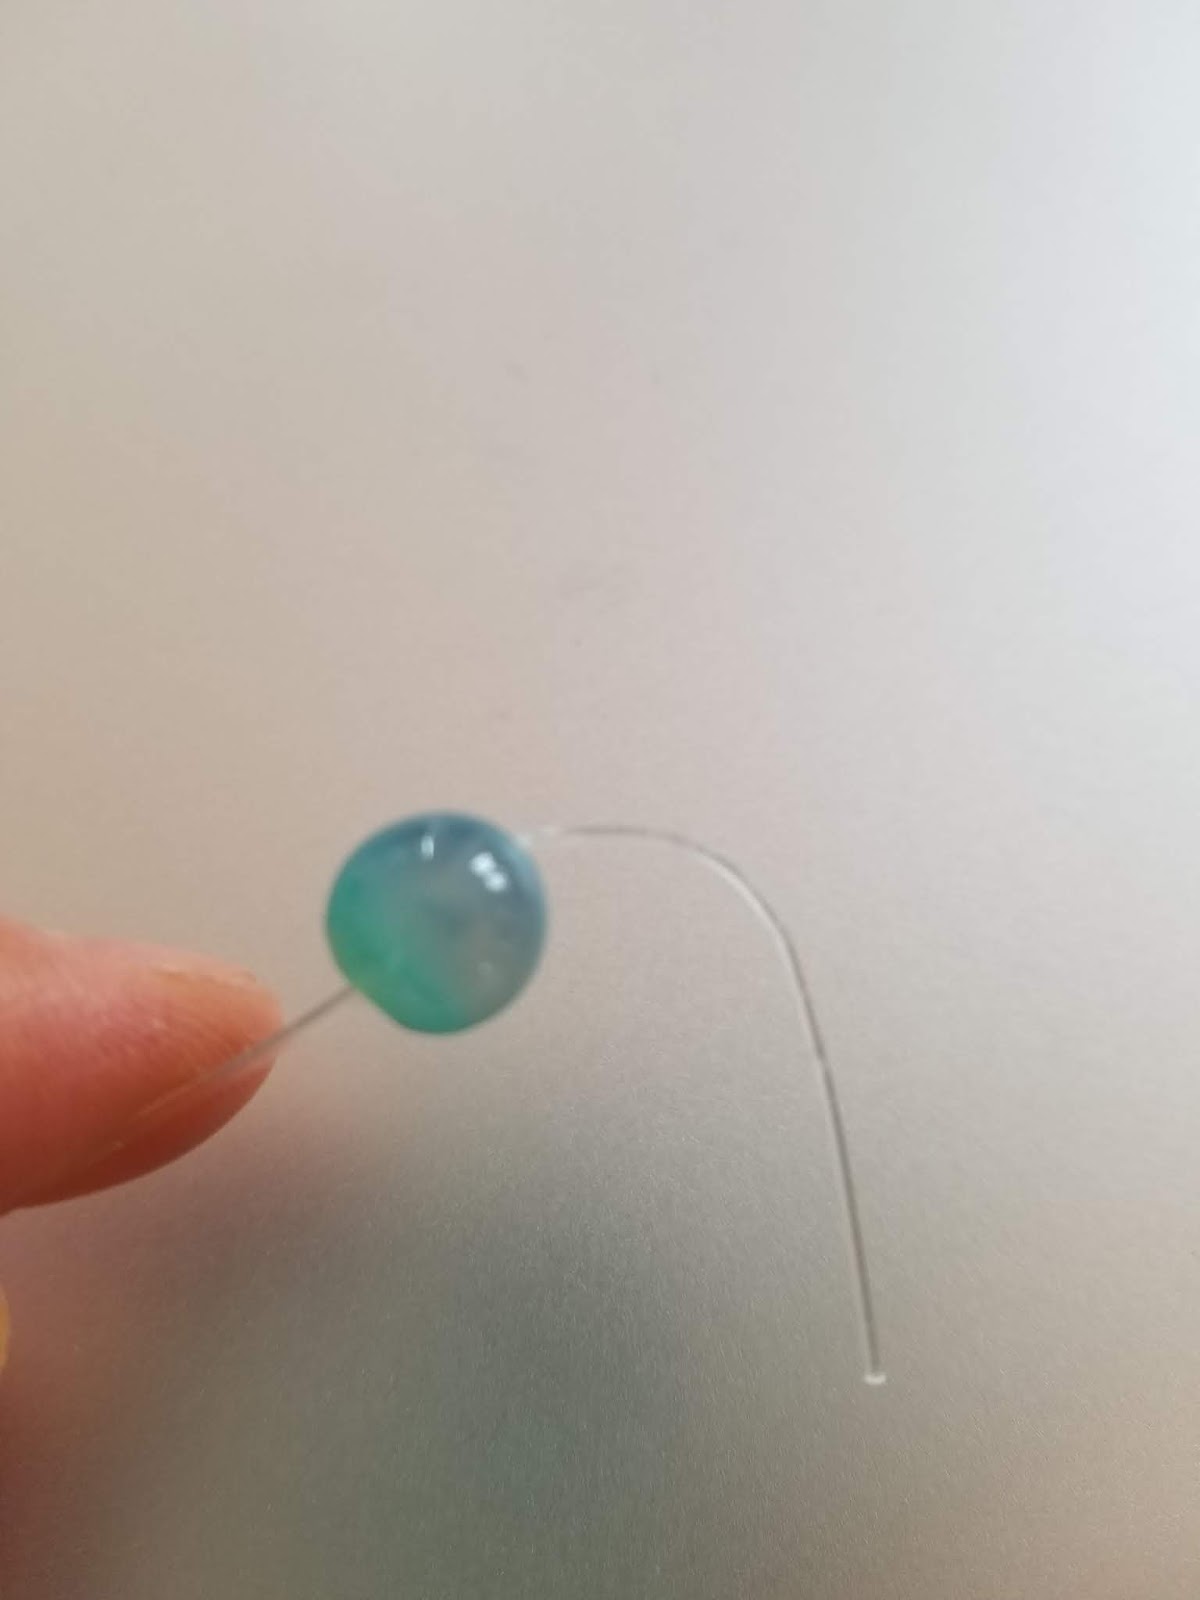
- Lift a small section of yarn out of the water to inspect -- if it looks dark/vibrant enough for you, then move to next step. Note that the color will lighten when the yarn dries (see example photo below). If not colorful enough, then add food coloring to dyebath, use tongs or chopsticks to gently distribute the dye around all the yarn, and repeat previous 2 steps.

- When happy with the yarn's color saturation, let the kettle and yarn cool completely to room temperature.

- Remove yarn from kettle and rinse well until water runs completely clear. Washing with gentle yarn soap at this point is optional but recommended.

- Hang until completely dry.

- Twist into neat skeins or wind into loose balls for storage.


A final note: in the photo below, I wet a small section of the dried yarn to demonstrate the color saturation and shade difference. The change from wet to dry is definitely noticeable and is something to keep in mind when you're deciding when to stop adding more dye in the pot!


Friday, June 5, 2020

Avocado Dye Experiment - Part 2


I loved the way my wool turned out last week and couldn't wait to try more avocado dye. Plus, I had saved the used avocado skins and pits from the previous dye extraction, so the materials were ready to go. Also (as if I needed another reason), I am designing a light summery tank top that would look great with any of the pink colors that I got on my last avocado dye experiment.

This time, I dyed a giant cone of crochet thread (100% mercerized cotton). I had tested this same cotton last week by making a couple ties for my hank out of this thread. I think the results this time are just as beautiful!

Note: these instructions/experiment notes are less detailed than usual, because mostly I followed the same procedure as in avocado dye experiment - part 1. Any differences are specifically noted.

Dye extraction: 25 hours
This dyebath was made as the 2nd extraction from the avocado pits and skins I used last week. They were still a nice deep red color and started showing pink in the dyebath immediately after I added them to water. I simmered/cooled for about 25 hours before I was ready to dye.

Scouring: as usual using my dish soap method

Dye: 3 hours
I got impatient so didn't let the cotton thread sit very long in the dyebath. It looked like such a deep pink... in hindsight, I should have let it sit longer before rinsing.

The difference between this and the wool dye in experiment 1 was that this time, I rinsed the cotton immediately after dyeing (I didn't let it fully dry first). I'm not sure what impact this had on the result, but will experiment again in the future!

The result was a beautiful, very light blush. I like the subtlety of the color, and the mercerized cotton has a nice sheen, almost like silk. If you have the patience to deal with crochet thread, I highly recommend it!


Friday, May 29, 2020

Vanilla Apple Popsicle Recipe


These healthy popsicles are addictive! And they're so easy to make at home - just 2 ingredients (plus the popsicle mold that you just made, right?). Of course, if you already have a store-bought popsicle mold, that would work too.

These popsicles have creaminess from the yogurt, tartness from the applesauce, and a touch of sweetness throughout. Delicious, refreshing, and so cold!

If you make these the fast way, the layers blend a bit and you get wavy lines between them. If you wanted straighter lines between the layers, let each layer freeze a little bit before adding the next (but obviously this takes more time and planning). My philosophy - even a messy popsicle is a tasty popsicle, and faster making means sooner eating!


Ingredients:
  • Vanilla greek yogurt
  • Applesauce
Instructions:
  1. Fill bottom layer (1-1.5 inches) of the popsicle mold with vanilla yogurt.
  2. Fill next layer (1-1.5 inches) with applesauce.
  3. Gently place top layer of yogurt on top.
  4. Cover top of popsicle mold with cap and insert the popsicle sticks. If you're using my homemade mold, then the cap is the aluminum foil covering.
  5. Freeze 4-5 hours until firm.
  6. Remove and eat!

Popsicle Mold - Make Your Own!


As the weather heats up, those popsicle recipes on Pinterest are looking more and more irresistable.... I'm a huge fan of fruit and/or yogurt popsicles, with no need for added sugar! Sometimes you can even blend in some hidden veggies for extra texture.

I don't have a popsicle mold at home though. Instead of rushing out to buy one, which costs money and means you have to wait for shipping, I made my own out of a used spice container. It took just 5 minutes to make, used materials I had lying around the house, and works great!

I used a Costco big spice jar (e.g. for red pepper flakes, black pepper) for my mold that makes 4 popsicles at a time. You don't have to use the same one - almost any plastic one will work, but obviously the shape of the popsicles will be different. Just pick a plastic jar that is the same width all the way around (otherwise, if there's a wider section at the bottom of the mold, your popsicles will get stuck in that wide section and you would be able to pull them out after freezing).


Materials needed:
  • Empty spice container
  • Popsicle sticks or disposable chopsticks
  • Aluminum foil
  • Knife
Steps:
  1. Cut the top off the spice container along the dotted line shown. We want it to be the same width all the way around.
  2. Cover the top of the cut-off container with aluminum foil.
  3. Poke 4 holes in the aluminum foil as shown, roughly equally spaced so that each hole is in the middle of a quadrant. If you have a knife, this can help you poke through the foil before you stick your popsicle sticks or chopsticks through.
  4. Fill mold with your popsicle filling of choice. Insert one popsicle stick or chopstick through each of your four holes. Freeze until firm.
  5. Once frozen, run the sides of the mold under warm water to melt the side slightly and loosen the popsicle from the mold. Pull out the popsicles from the mold, and cut the large block into quarters. Eat!
You can adjust the size of your popsicles by putting more or less filling in the mold (so that it goes higher or less high up the sides). I wouldn't recommend trying to fit more than 4 in the mold at a time, because the thickness is what helps keep the frozen popsicle together without cracking.

Leave a comment or pin this on Pinterest if you try it!

Popsicle recipes to try with your new popsicle mold:
- Vanilla apple popsicles (pictured in the mold-making instructions)
- More coming soon (I'll update this page as I add more)


Thursday, May 28, 2020

Avocado Dye Experiment - Part 1

 
Avocados yield a beautiful pink dye. Surprising? Specifically, the dye comes from the pits and skins (so you get to eat all the yummy bits, yay!)

The internet has several "recipes" or posts about avocado dye, but the instructions and results are highly variable. Success and color seems to depend on pH, type of avocado, extraction method/time, fiber, and ?? magic ?? (for the links that I found useful, see bottom of article). This experimental series is designed to see if I can reliably extract pink dye from avocados on different natural fibers.

For this experiment, I made dye from the pits and skins of 11 avocados. I scrubbed off the residual bits of avocado flesh, chopped the pits into eighths, and froze everything in a big ziplock bag until I had enough (maybe 2-3 weeks). [Note: you don't need 11 avocados. As I found out, 11 is wayyyyy overkill. Probably just 4-5 avocados would have been more than enough for my half pound of wool.]

As always, I used whatever base yarns that I had at home.
- Full skein (227g/8oz) of Lion Brand Fisherman's Wool (100% wool) - base color: natural
- 4 ties (minimal weight) around the skein of Lion Brand Wool-Ease (20% wool, 80% acrylic) - note: the acrylic content should not dye, so the final color should be lighter than pure wool - base color: fisherman
- 2 ties (minimal weight) around the skein of Red Heart Classic 10 Crochet Thread (100% mercerized cotton) - base color: natural

Materials Needed
- Avocado pits and skins
- Wool and/or cotton yarn
- Dye pot large enough for yarn to move around freely
- Scouring agent or dish soap
- Baking soda or washing soda (latter preferred)
- Dye pot or two (not used for food)

Methods
I scoured everything per my standard procedure detailed here, leaving the yarn in a bucket of water because I was planning to dye soon. I didn't use any mordants for this experiment because avocado dye isn't supposed to require mordant - avocados have naturally high tannin content, which acts as the mordant. (I do plan to try alum and possibly black walnut tannin in future experiments.)

Extract Dye
I wanted to see if the skins and pits gave different colors. So, I put chopped up avocado skins in one pot and chopped up pits in the other. I read that you're not supposed to boil the dye because that can brown it, so I alternated heating for 5-10 minutes (watching to make sure the pots didn't get past simmering) and letting the pots sit, covered, for 30-60 minutes on the stove with the heat off. I did this for 3 cycles of heating/waiting, then left it alone to sit overnight. Throughout the next day I did 6 more heat/wait cycles. (Total dye extraction time = 25 hours).

During this process, I kept an eye on the color of the dyebaths. I don't have litmus paper to test pH, so I just relied on my eyes. If things didn't look pink or at least red/orange, I added some baking soda to raise the pH of the dyebath (make it more alkaline). In hindsight, I should have measured the baking soda amount... sorry, will do that next time. My rough guess: about 1/8 cup of baking soda per pot. As you can kind of see from the before-and-after pics below, the dyebaths were kind of murky yellow before baking soda but got much more red/pink as the pH increased. The dyebaths got more concentrated as time passed, but the color change was really from the baking soda.


Dye

I scooped out as many of the avocado pit and skin chunks as I could (and saved them in a plastic bag and froze them, in case I wanted to use them again). Then I draped my yarn across the two pots, with one end of the skein in the avocado skins dyebath and the other end in the avocado pits dyebath. I did about 8 heat/wait cycles throughout the day.


The pot edges were kind of high so the middle didn't get much dye, and the dye didn't really wick up the yarn to cover the dry spot. I tried to rotate the yarn slightly throughout the dye process and pour some of the dye over the middle section so that it got at least a little dye.


As always, I was hoping for as vibrant of a color as possible, so I left the yarn in the dyebath for the rest of the day and overnight (about 24 hours total).

The next morning, I took the yarn out and let it dry fully BEFORE rinsing.

Results

After letting the yarn dry for 2 days, I rinsed in cold water until the water ran clear. Here are pictures of the yarn before and after rising. The rinsewater from the first few rinses was super dark, almost the color of the dyebath (which makes sense, I guess).

On the 100% wool, the avocado skin dye came out a bit pinker, and the avocado pits created a somewhat browner pink. Here is the stretched-out wool skein after fully drying - skin-dyed side on the left, pit-dyed side on the right.


The wool blend (20% wool, 80% acrylic) came out a nice blush color, lighter than the pure wool (as expected). I didn't notice much of a difference between skins and pits, probably because such a small fraction of the yarn dyed.


The cotton thread was fairly different between skins and pits, with the pits giving a softer light pink color (middle of picture below) and the skins dying a much darker, almost orange-tinged pink (right). Undyed cotton thread is at the left for reference.


Conclusions and Future Directions
I'm really happy with how this experiment turned out! The colors are beautiful on all fibers and especially vivid on the wool.

11 avocados gave WAY more dye than I needed for 8oz of wool. The dyebath was roughly the same color when I poured it out as when I started steeping the yarn. I probably could have dyed at least twice as much fiber to the same color (but unfortunately I needed my stove back for cooking actual food and didn't have time for more).

My next step with avocado dye is to do a second extraction from the saved pits and skins (together) from this experiment. I scooped out most of the solid content but there were definitely some left when I poured out the dyebath, so I'm guessing I have around 9 avocados worth for the second extraction. I'll use this to dye a full 1000yd cone of crochet thread (100% mercerized cotton) because I'm designing a tank top that would look lovely with some of this gorgeous pink.


Useful Links About Avocado Dye - Sites with info that I found helpful. I haven't experimented enough to personally verify all their information, but I've tried some of their tips or think they make sense/are worth a try.

https://rebeccadesnos.com/blogs/journal/avocado-dye-faqs-top-tips-for-pink
http://www.allnaturaldyeing.com/dyeing-with-avocados/


Monday, May 25, 2020

Sand and Sea Wrap Bracelet - Photo Tutorial


Since I'm still stuck inside and not buying new craft supplies until I work down my huge stash, I made this wrap bracelet out of beads that I've had for years.

I'm in love with this color combo - it reminds me of a blissful seaside retreat.

Materials needed:
- Beads of choice
- Leather cord (2mm diameter, enough length to wrap around your wrist 2x as long as you want the bracelet. My bracelet wraps my wrist 5 times, so I cut my leather cord long enough to wrap around my wrist 10 times + 1 more time to give me room for tying knots, etc.)
- Crochet thread or beading thread (3x as long as leather cord). I used crochet thread so that's what I'll call it throughout the instructions.
- (optional but very helpful) Cardboard bobbin to wind the crochet/beading thread on while working
- Thin plastic wire to help with threading beads
- Clasp, toggle, or just add extra length to your leather cord to make a big knot

Instructions:
1. Find the center of your leather cord and tie an overhand loop knot so that you have two working cords coming out of the knot.

2. Tie a slip knot at the beginning of your crochet thread and tighten it just below your knot in the leather cord. Wrap the crochet/beading thread several times around both of your working leather cords, hiding the short tail of your slip knot inside this wrap (which I messed up in the picture below). At this point, it might be helpful to put a book or something similar over the overhand loop to hold it down while you work (I used my planner as a weight). At this point, it should look something like the below (but ignore the bead in the photo - adding beads is coming next).


3. Wrap the crochet thread around the front of the right working cord.

4. Thread the thin plastic wire through the bead. (Note: I'm using a pretty thick plastic wire here so you can see it in the pictures. I would recommend using a thinner one, as it will be MUCH easier to pull through.)


5. Lay the crochet thread over the plastic wire and loop the plastic wire back through the bead in the other direction.


6. Pull the plastic wire loop through the hole in the bead, drawing the crochet thread through with it (you should now have a loop of crochet thread going through the bead).


7. Thread the left working leather cord through this crochet thread loop and pull gently until snug (but not tight) to anchor the bead to the left side of the bracelet.


8. Wrap the crochet thread around the right working leather cord from front to back.

For the next bead, repeat steps 3-8 but wrapping on the right leather cord from back to front. That is, in step 3 wrap the crochet thread along the back of the leather cord, and in step 8, wrap from back to front.

Continue adding beads to desired length, alternating whether you are wrapping from the front or wrapping from the back. This creates a wave pattern along the right side of the bracelet that fits perfectly with the beach/sea theme.


9. Finishing the bracelet - depending on your desired toggle/clasp/knot ending, this part will be a bit different. For a clasp or toggle, tie the two working leather cords together in another overhand loop knot. Wrap the crochet thread through or around this knot and tie your clasp or toggle on securely.


I used a toggle made out of an old earring whose mate got lost years ago. The rhinestoned bar was perfect for a toggle with just a bit of sparkle.


Tuesday, May 19, 2020

Scouring Yarn (Before Dyeing) - The Simple Way

I basically scour all my yarns the same way for every type of dye that I have tried so far. This method uses no fancy/specialty ingredients or equipment! Maybe in the future I'll branch out and buy speciality scouring detergents, but for now, this seems to be working:

1. Fill large pot with room temperature water and a generous squeeze of dish soap.

2. Add yarn and gently push it around to fully submerge. Make sure the pot is large enough and there's enough water that your yarn isn't too tightly packed in there or squished on the bottom of the pot.

3. Heat to a simmer for 20-30 minutes. If using wool, do not boil (or you risk felting)! If using cotton, then boiling is less of a potential disaster, but still not recommended.

4. Cover pot and let it gradually cool for 2+ hours (or whenever you remember to come back to it).

5. Rinse yarn thoroughly but gently.

You can either let the yarn dry completely for dyeing later, or keep soaking it in a bucket/tub/pot of clean water if you're going to dye it soon.